As you’ll see from my last post, I’ve been trying to put some time aside to finish some of my outstanding projects. Today’s focus was driven by a very exciting delivery:
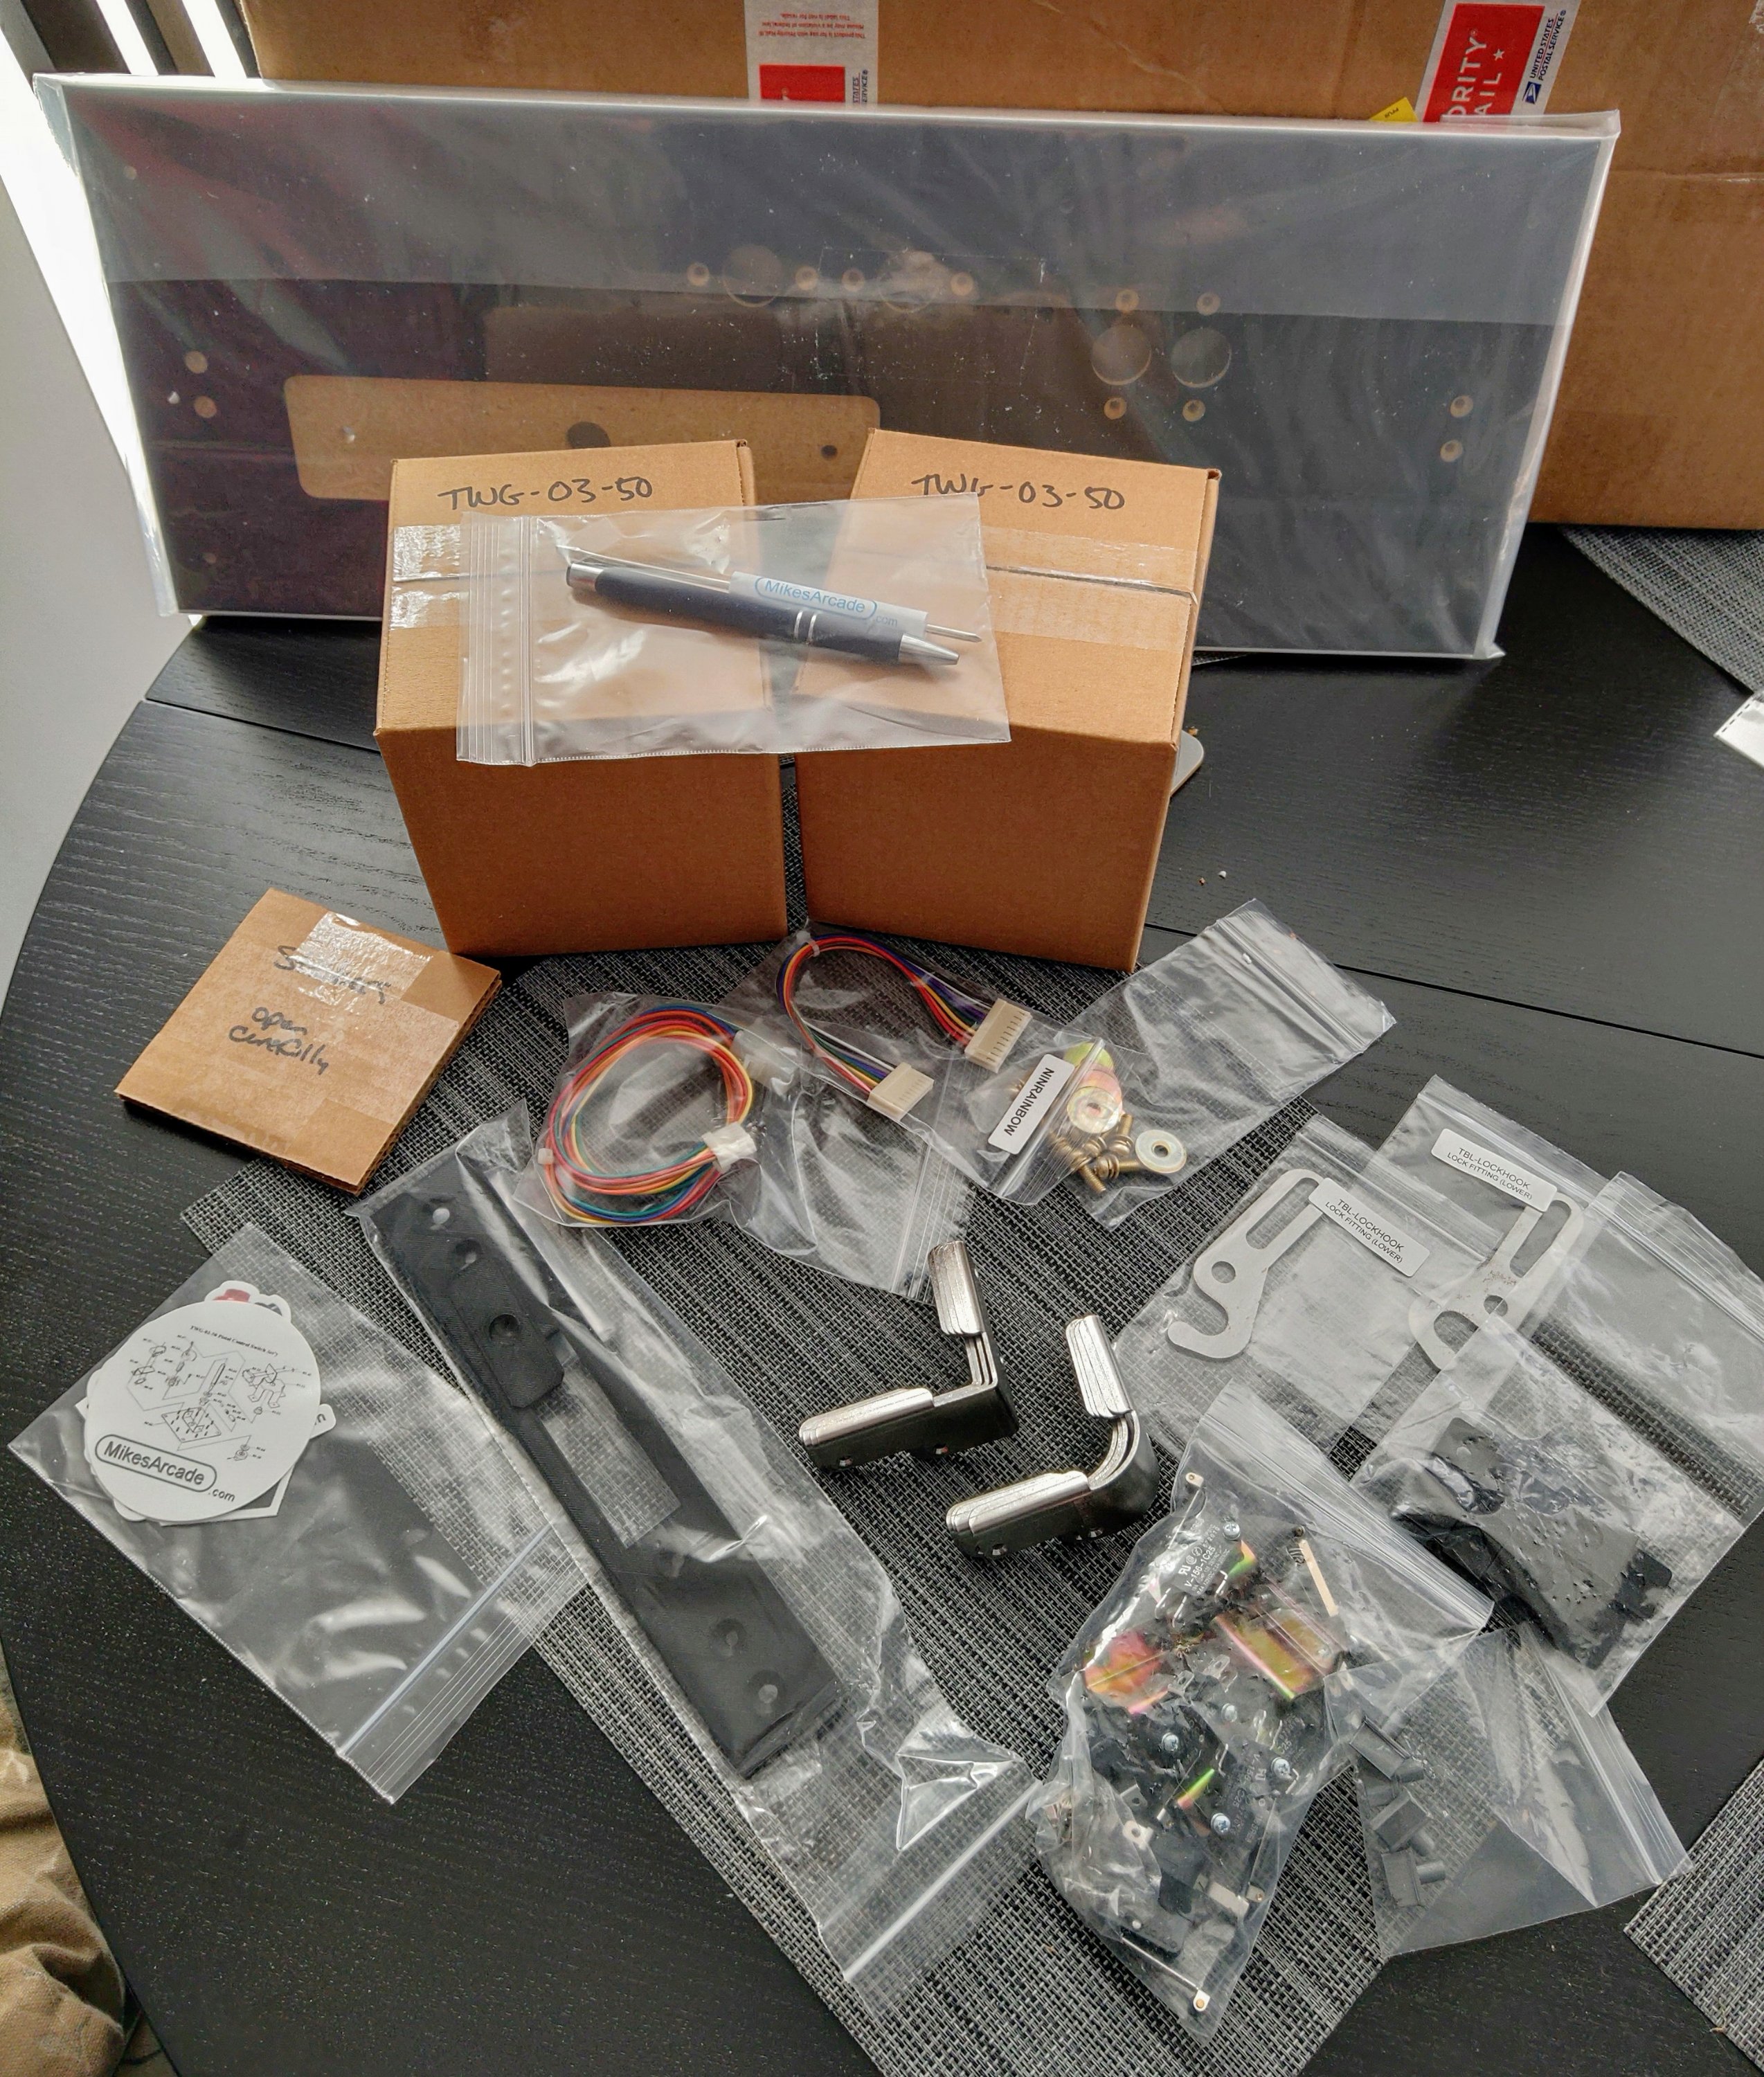
A highly anticipated order from none other than the amazing MikesArcade! There were numerous parts for my numerous projects, including my Radarscope upright. The most important part being the reproduction control panel blank for Radarscope.
This was the final piece I needed to start the control panel assembly, so I started work. First I needed to replace the shaft in the joystick assembly. The joystick came from a Space Fever, which is the same joystick as Radarscope, but with a shorter shaft. A few years ago a came across a replacement shaft assembly and picked it up for this project (to be fair, long before I sourced the game itself!).
First thing to do was to disassemble the Space Fever joystick so that I could replace the shaft: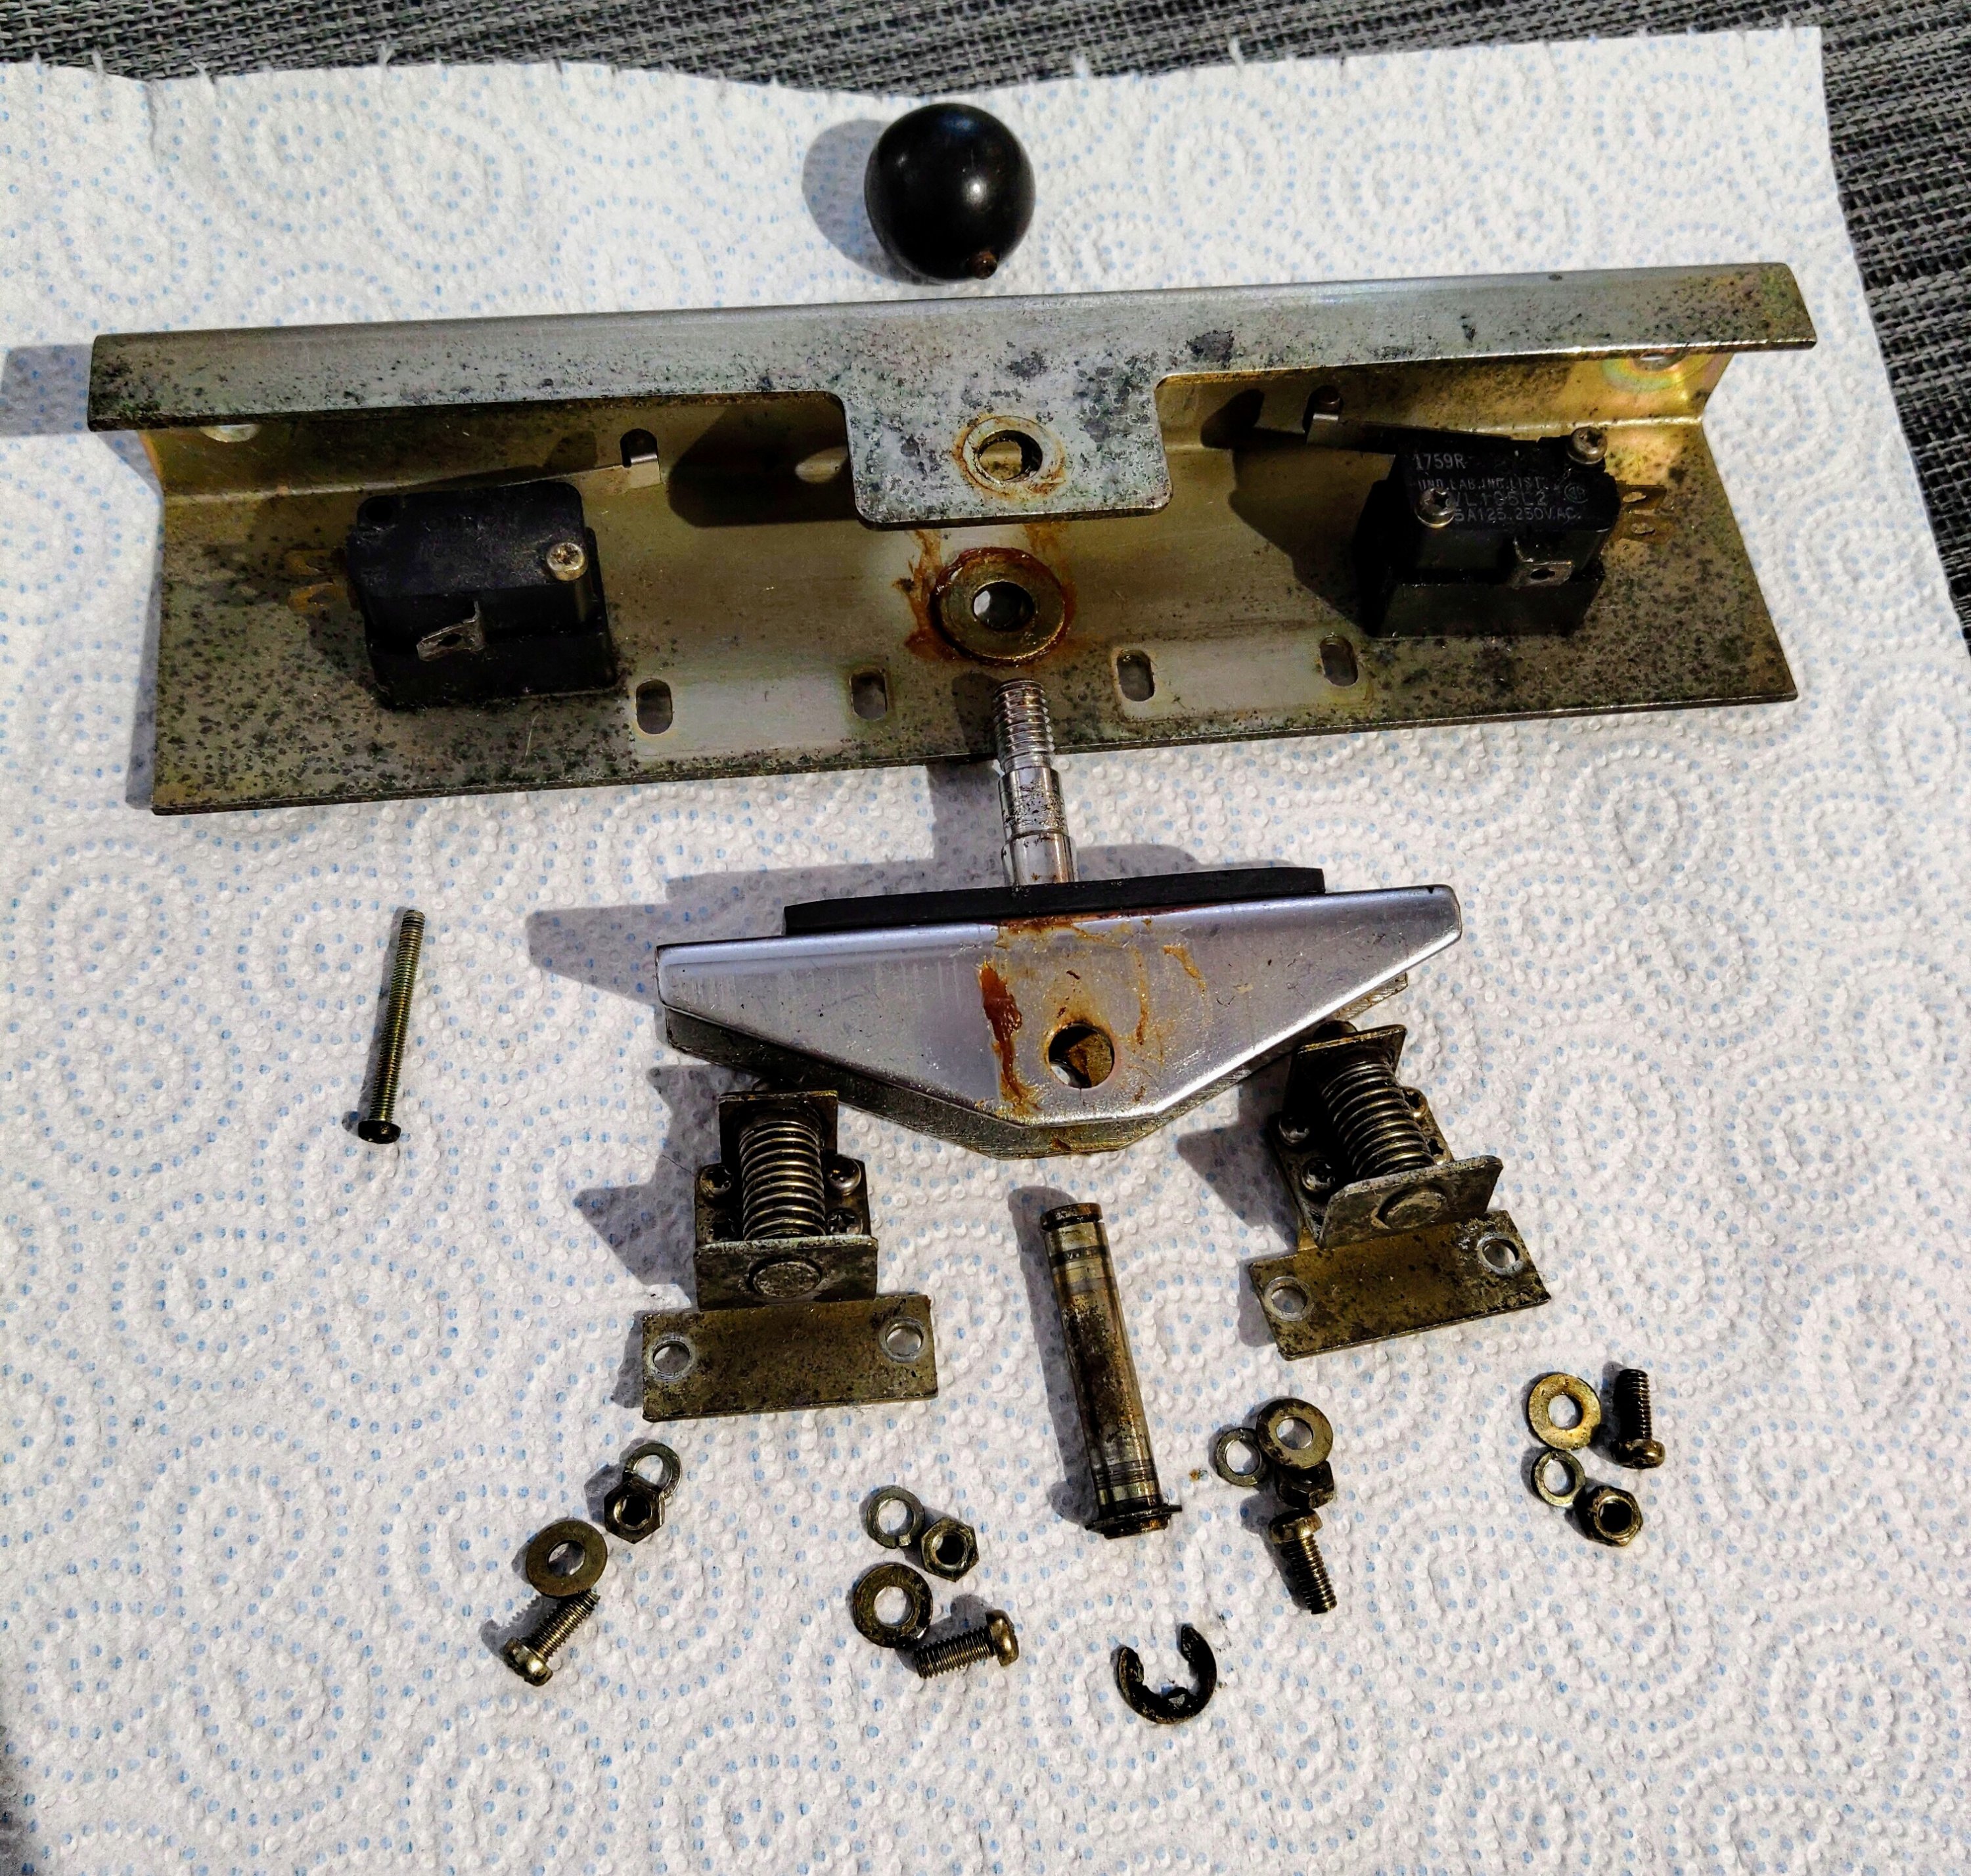
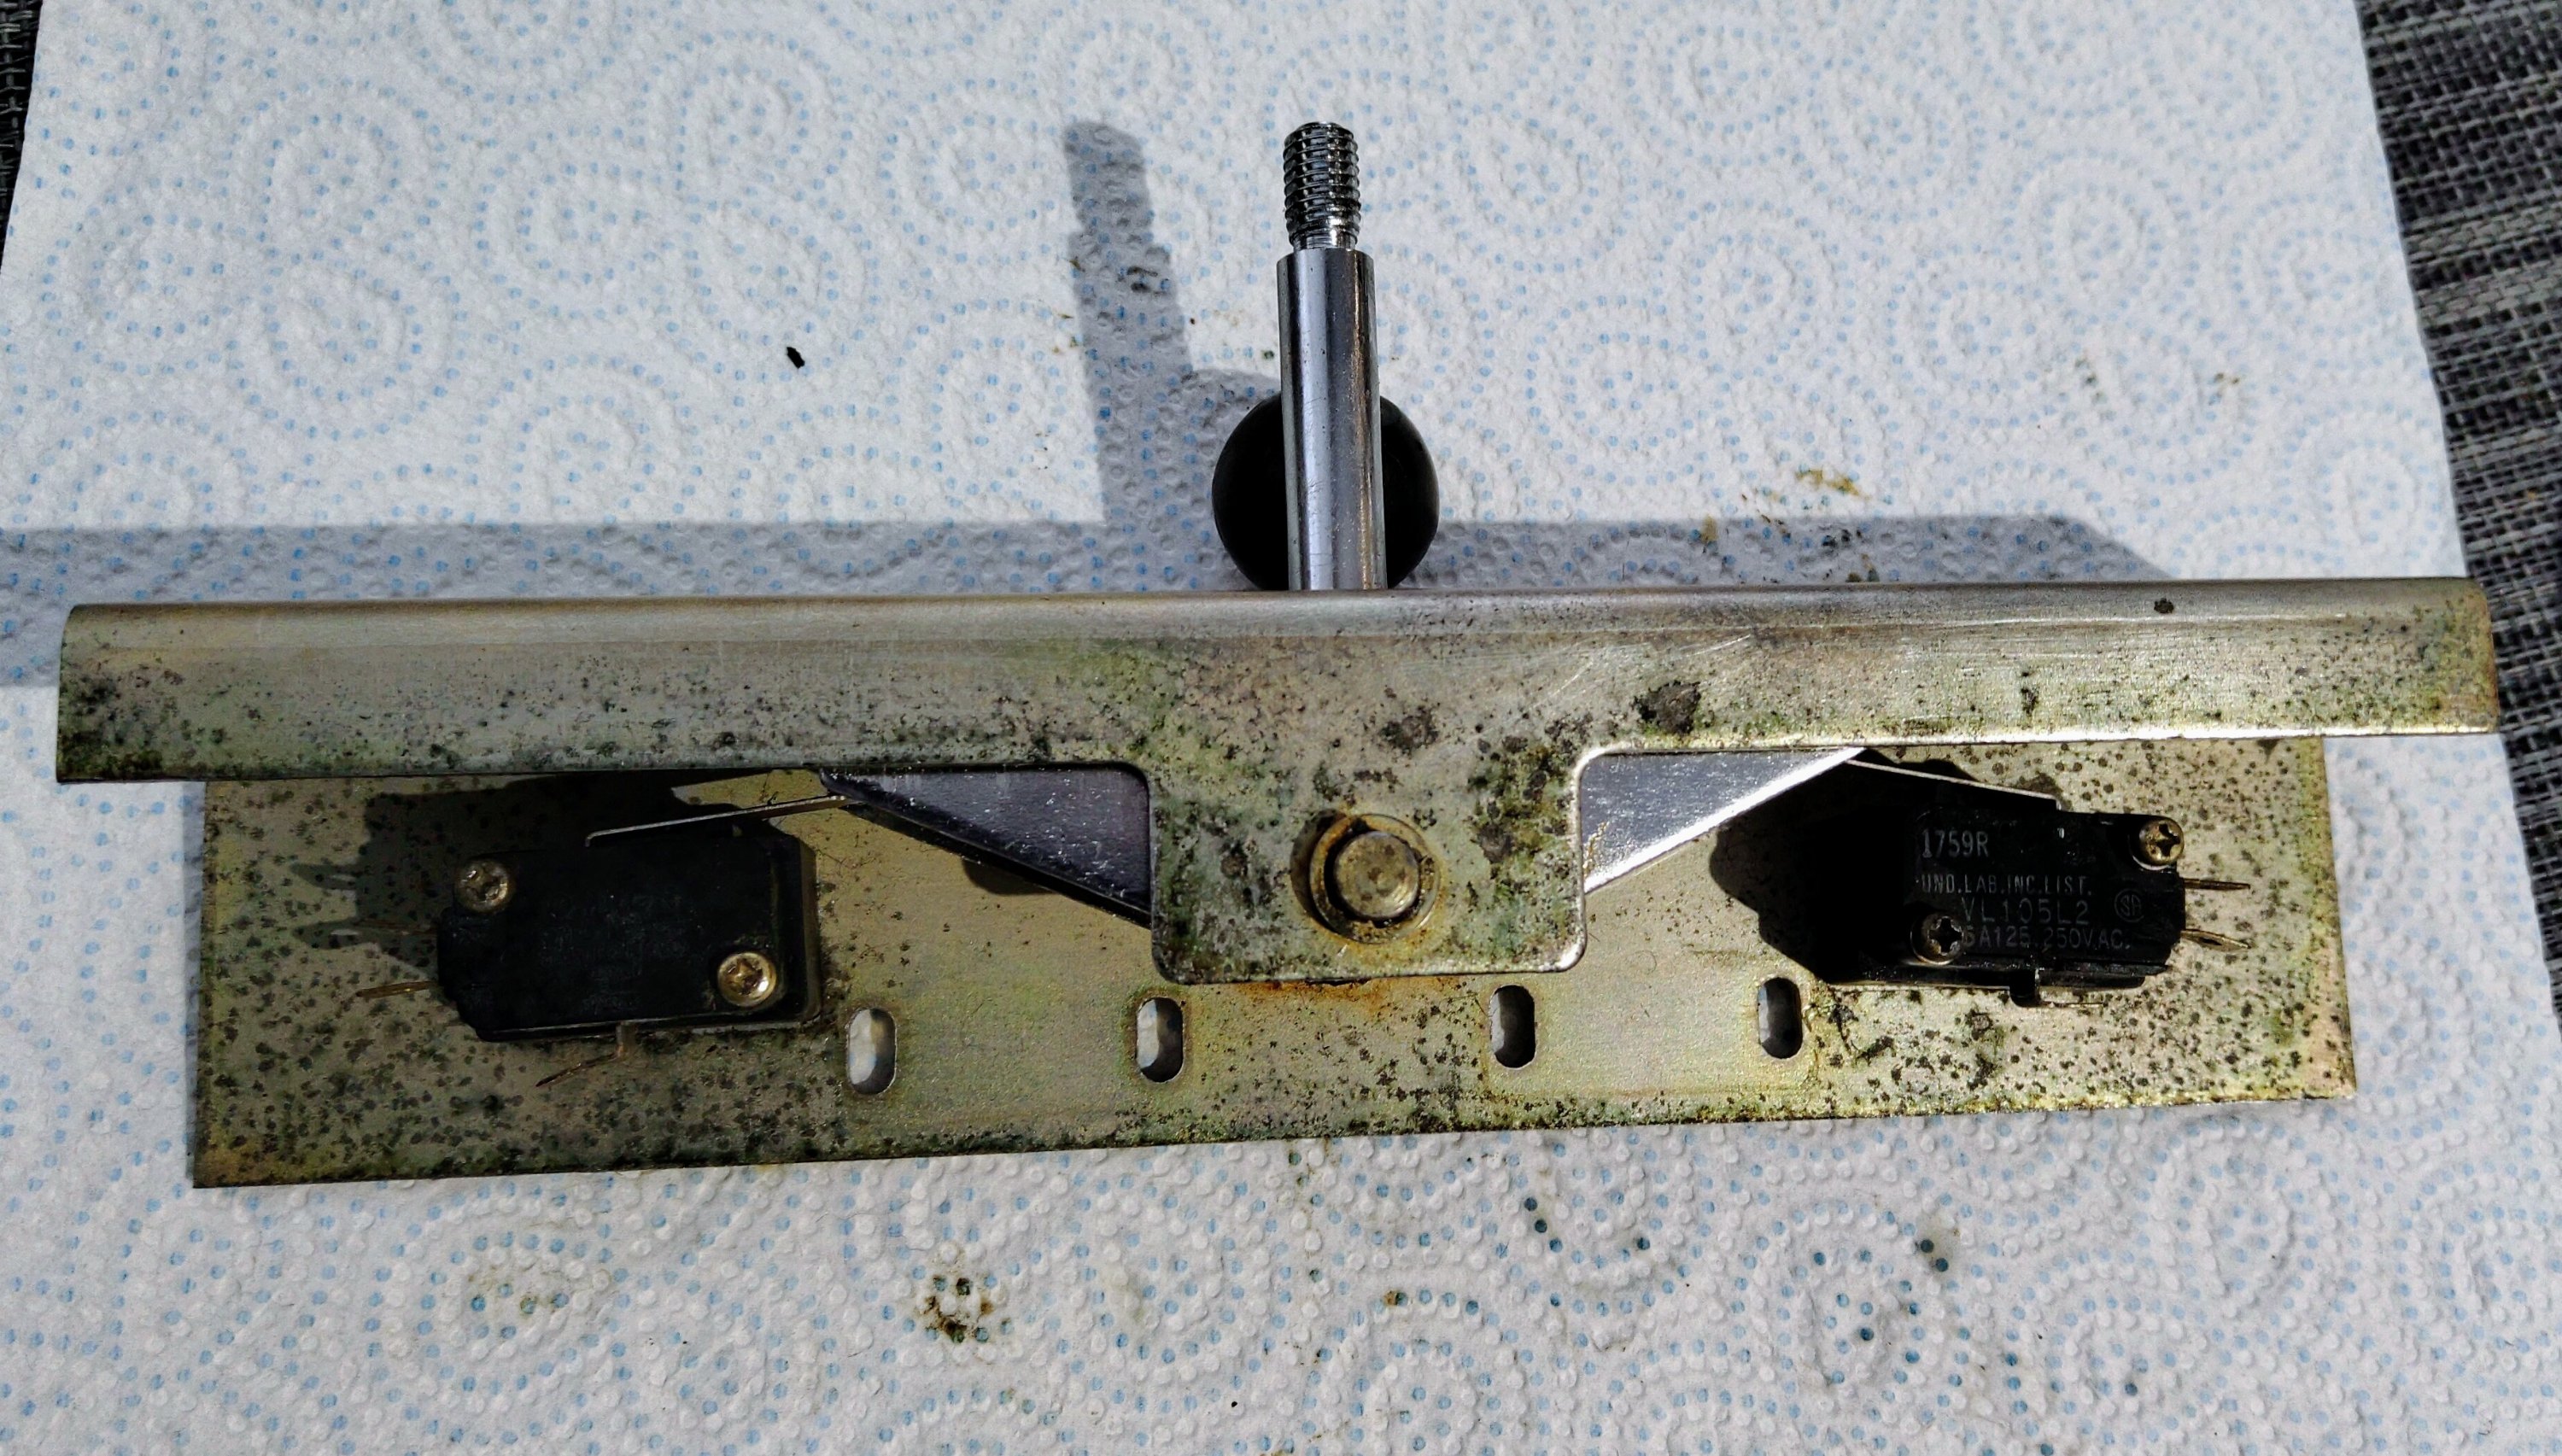
Next was to fit the replacement shaft. I removed the rubber top from the old shaft (and cleaned it!) ready to fit to the new one:
The new part is a really tight fit and is currently stopping the joystick returning to centre, so I may remove this again and remove one of the washers: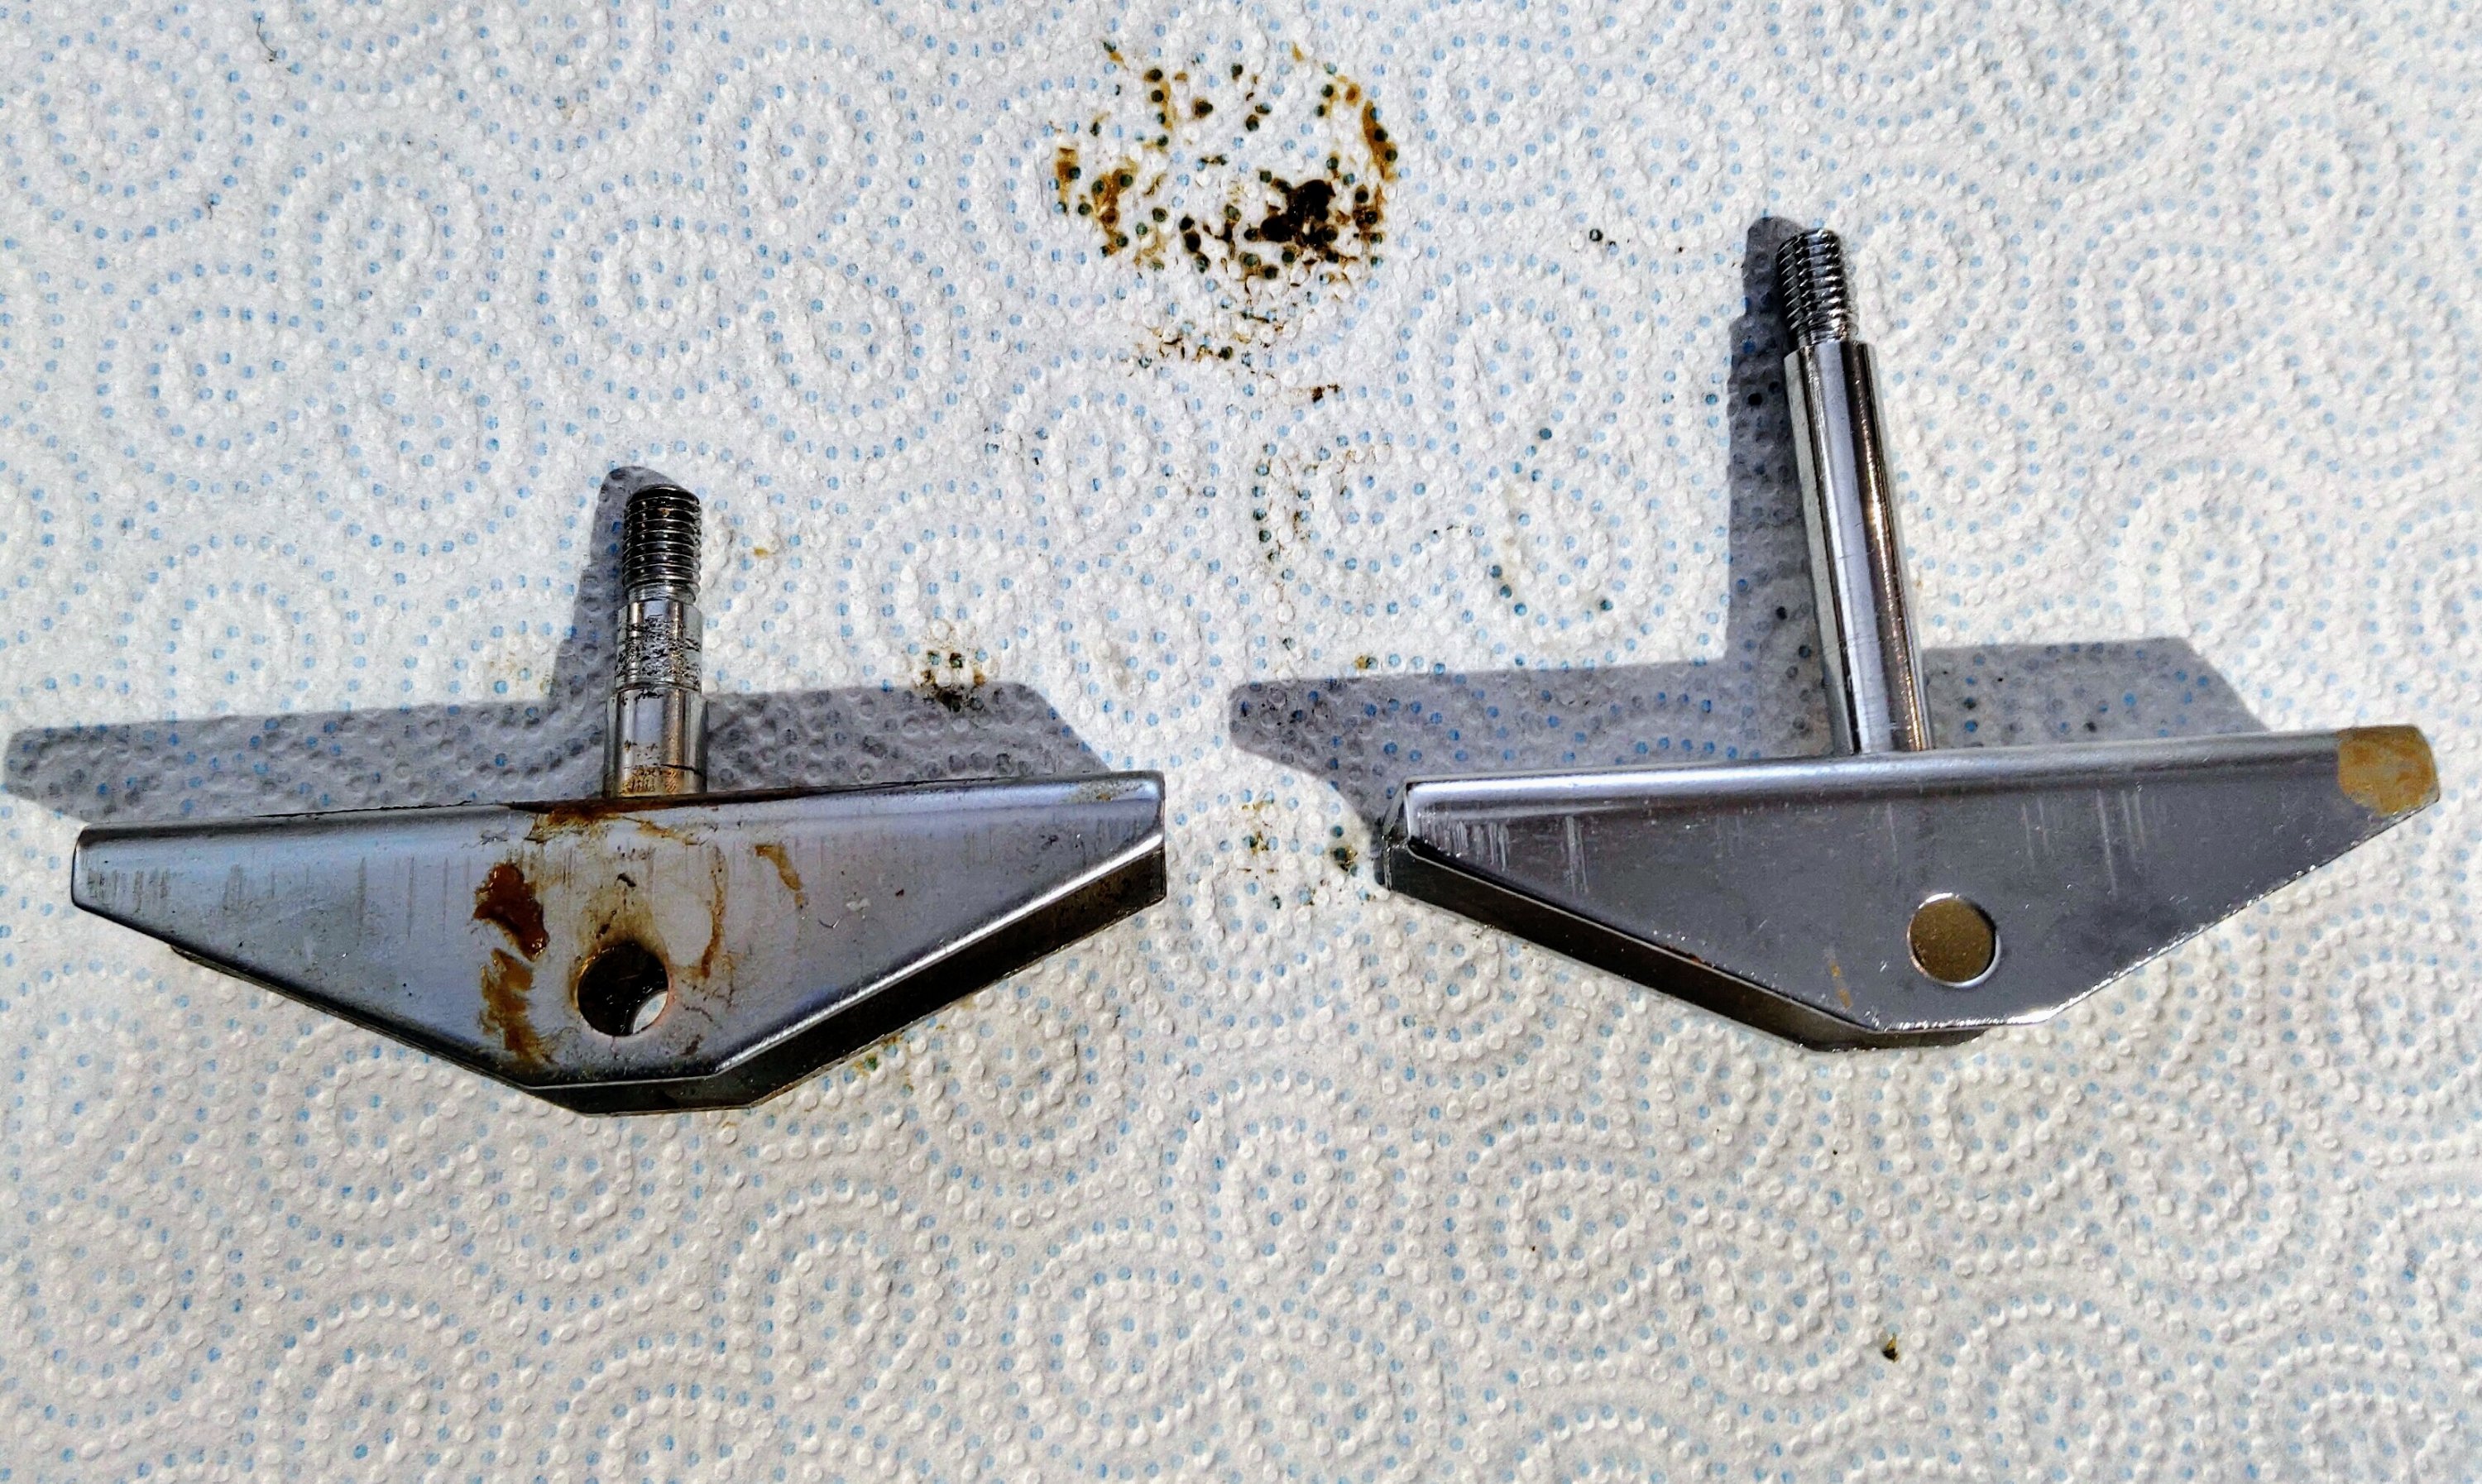
After replacing the springs, I attached the joystick to the control panel using some of MikesArcade’s amazing new 3D printed parts: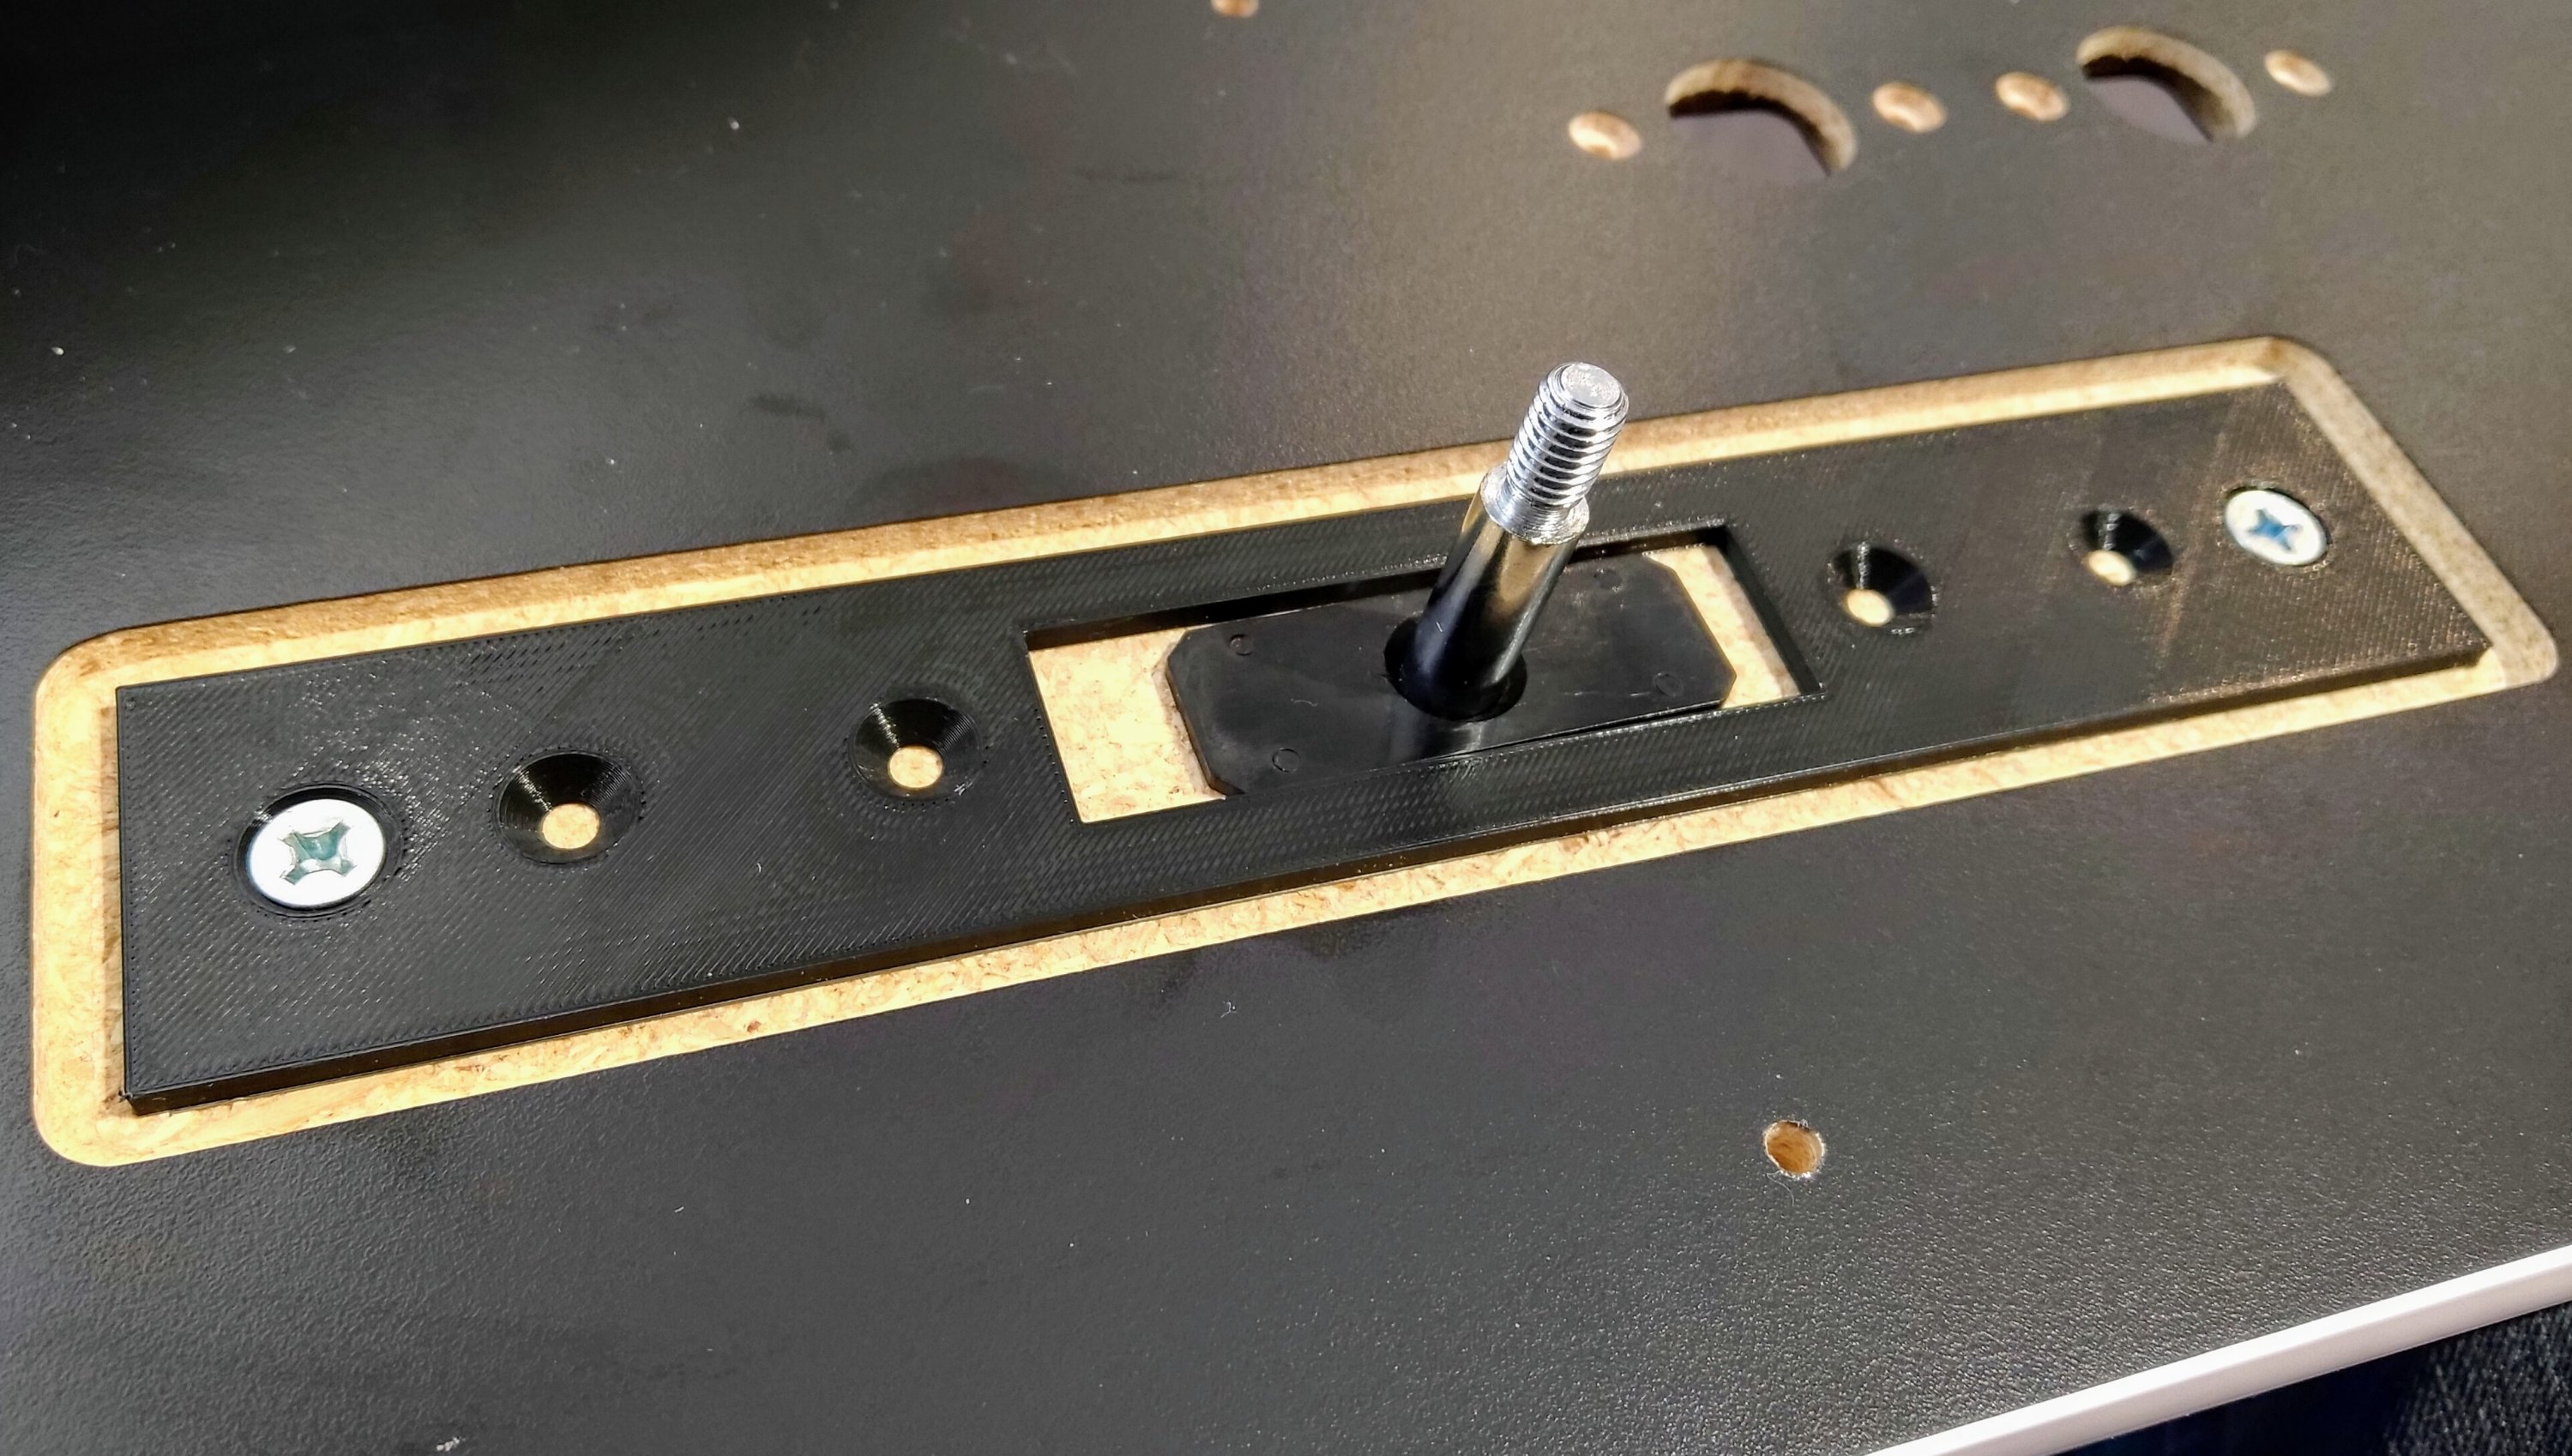
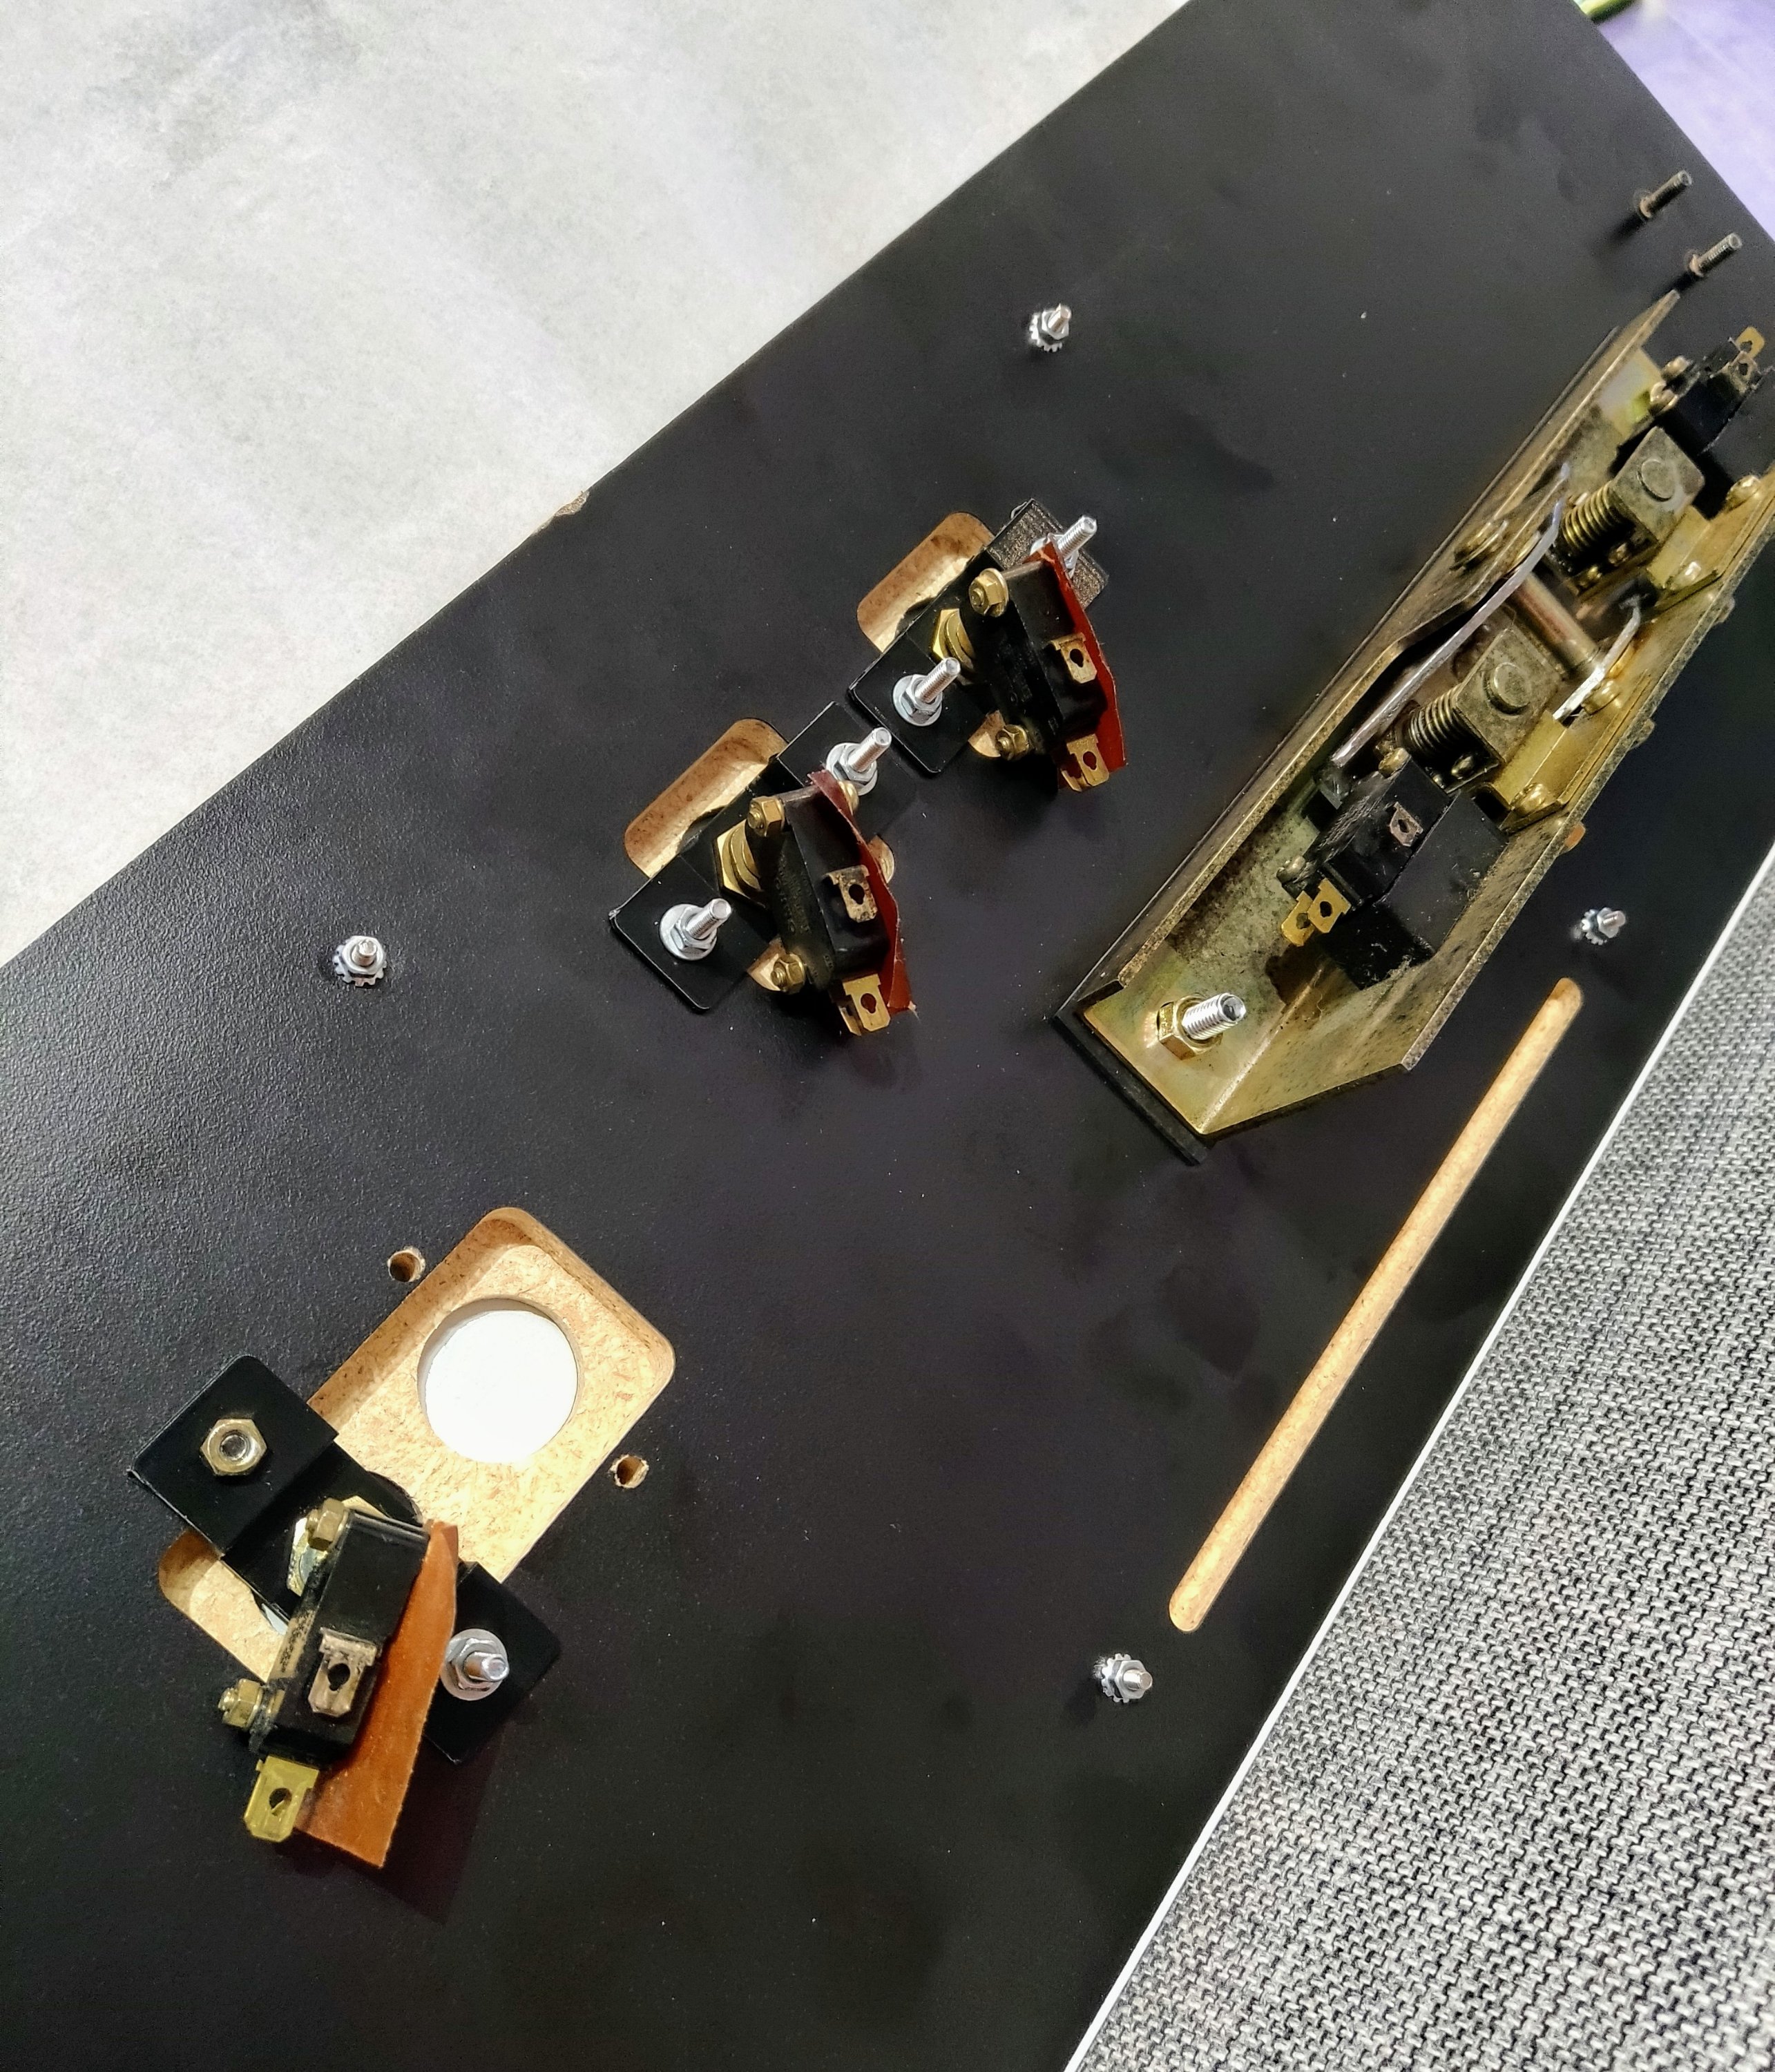
Next up was buttons. Now Radarscope doesn’t use the traditional Nintendo buttons that we all know. This upright (like a few of the earlier games) uses the buttons found on the early cocktail games. Again, more parts that I’ve been acquiring over the last few years: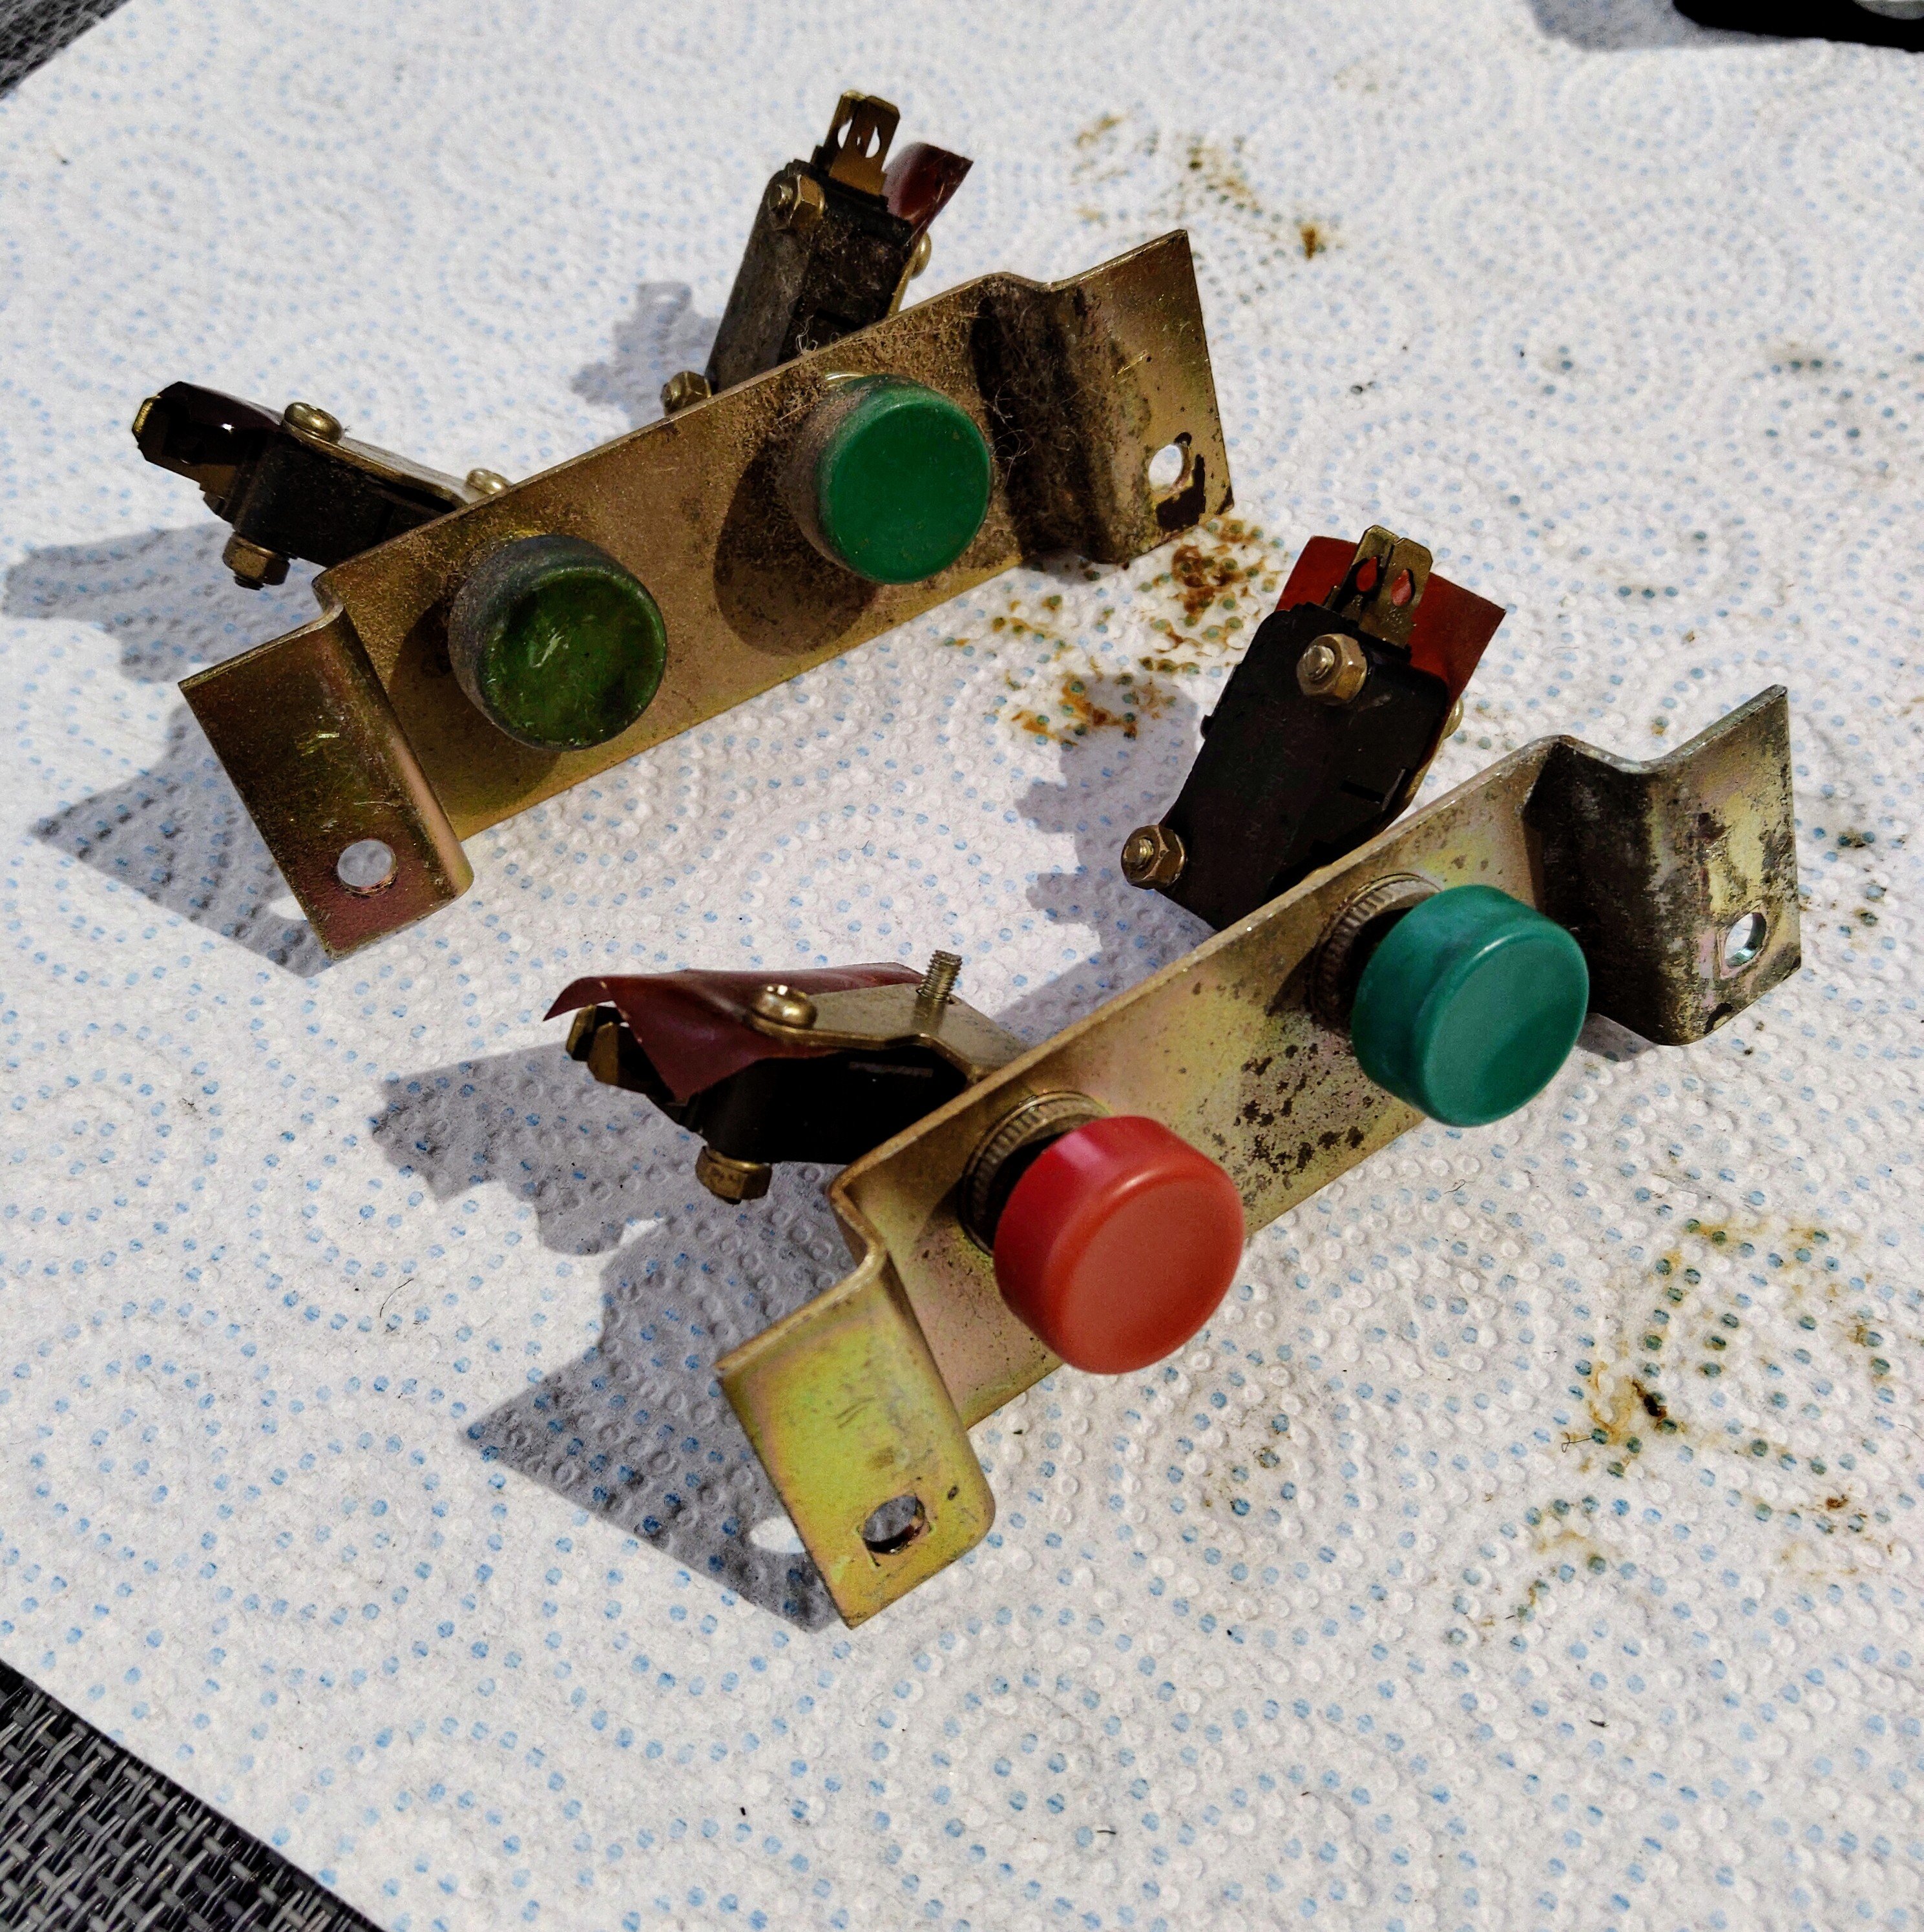
I stripped the buttons off the brackets and broke the assemblies down to allow me to clean and attach to the new panel:
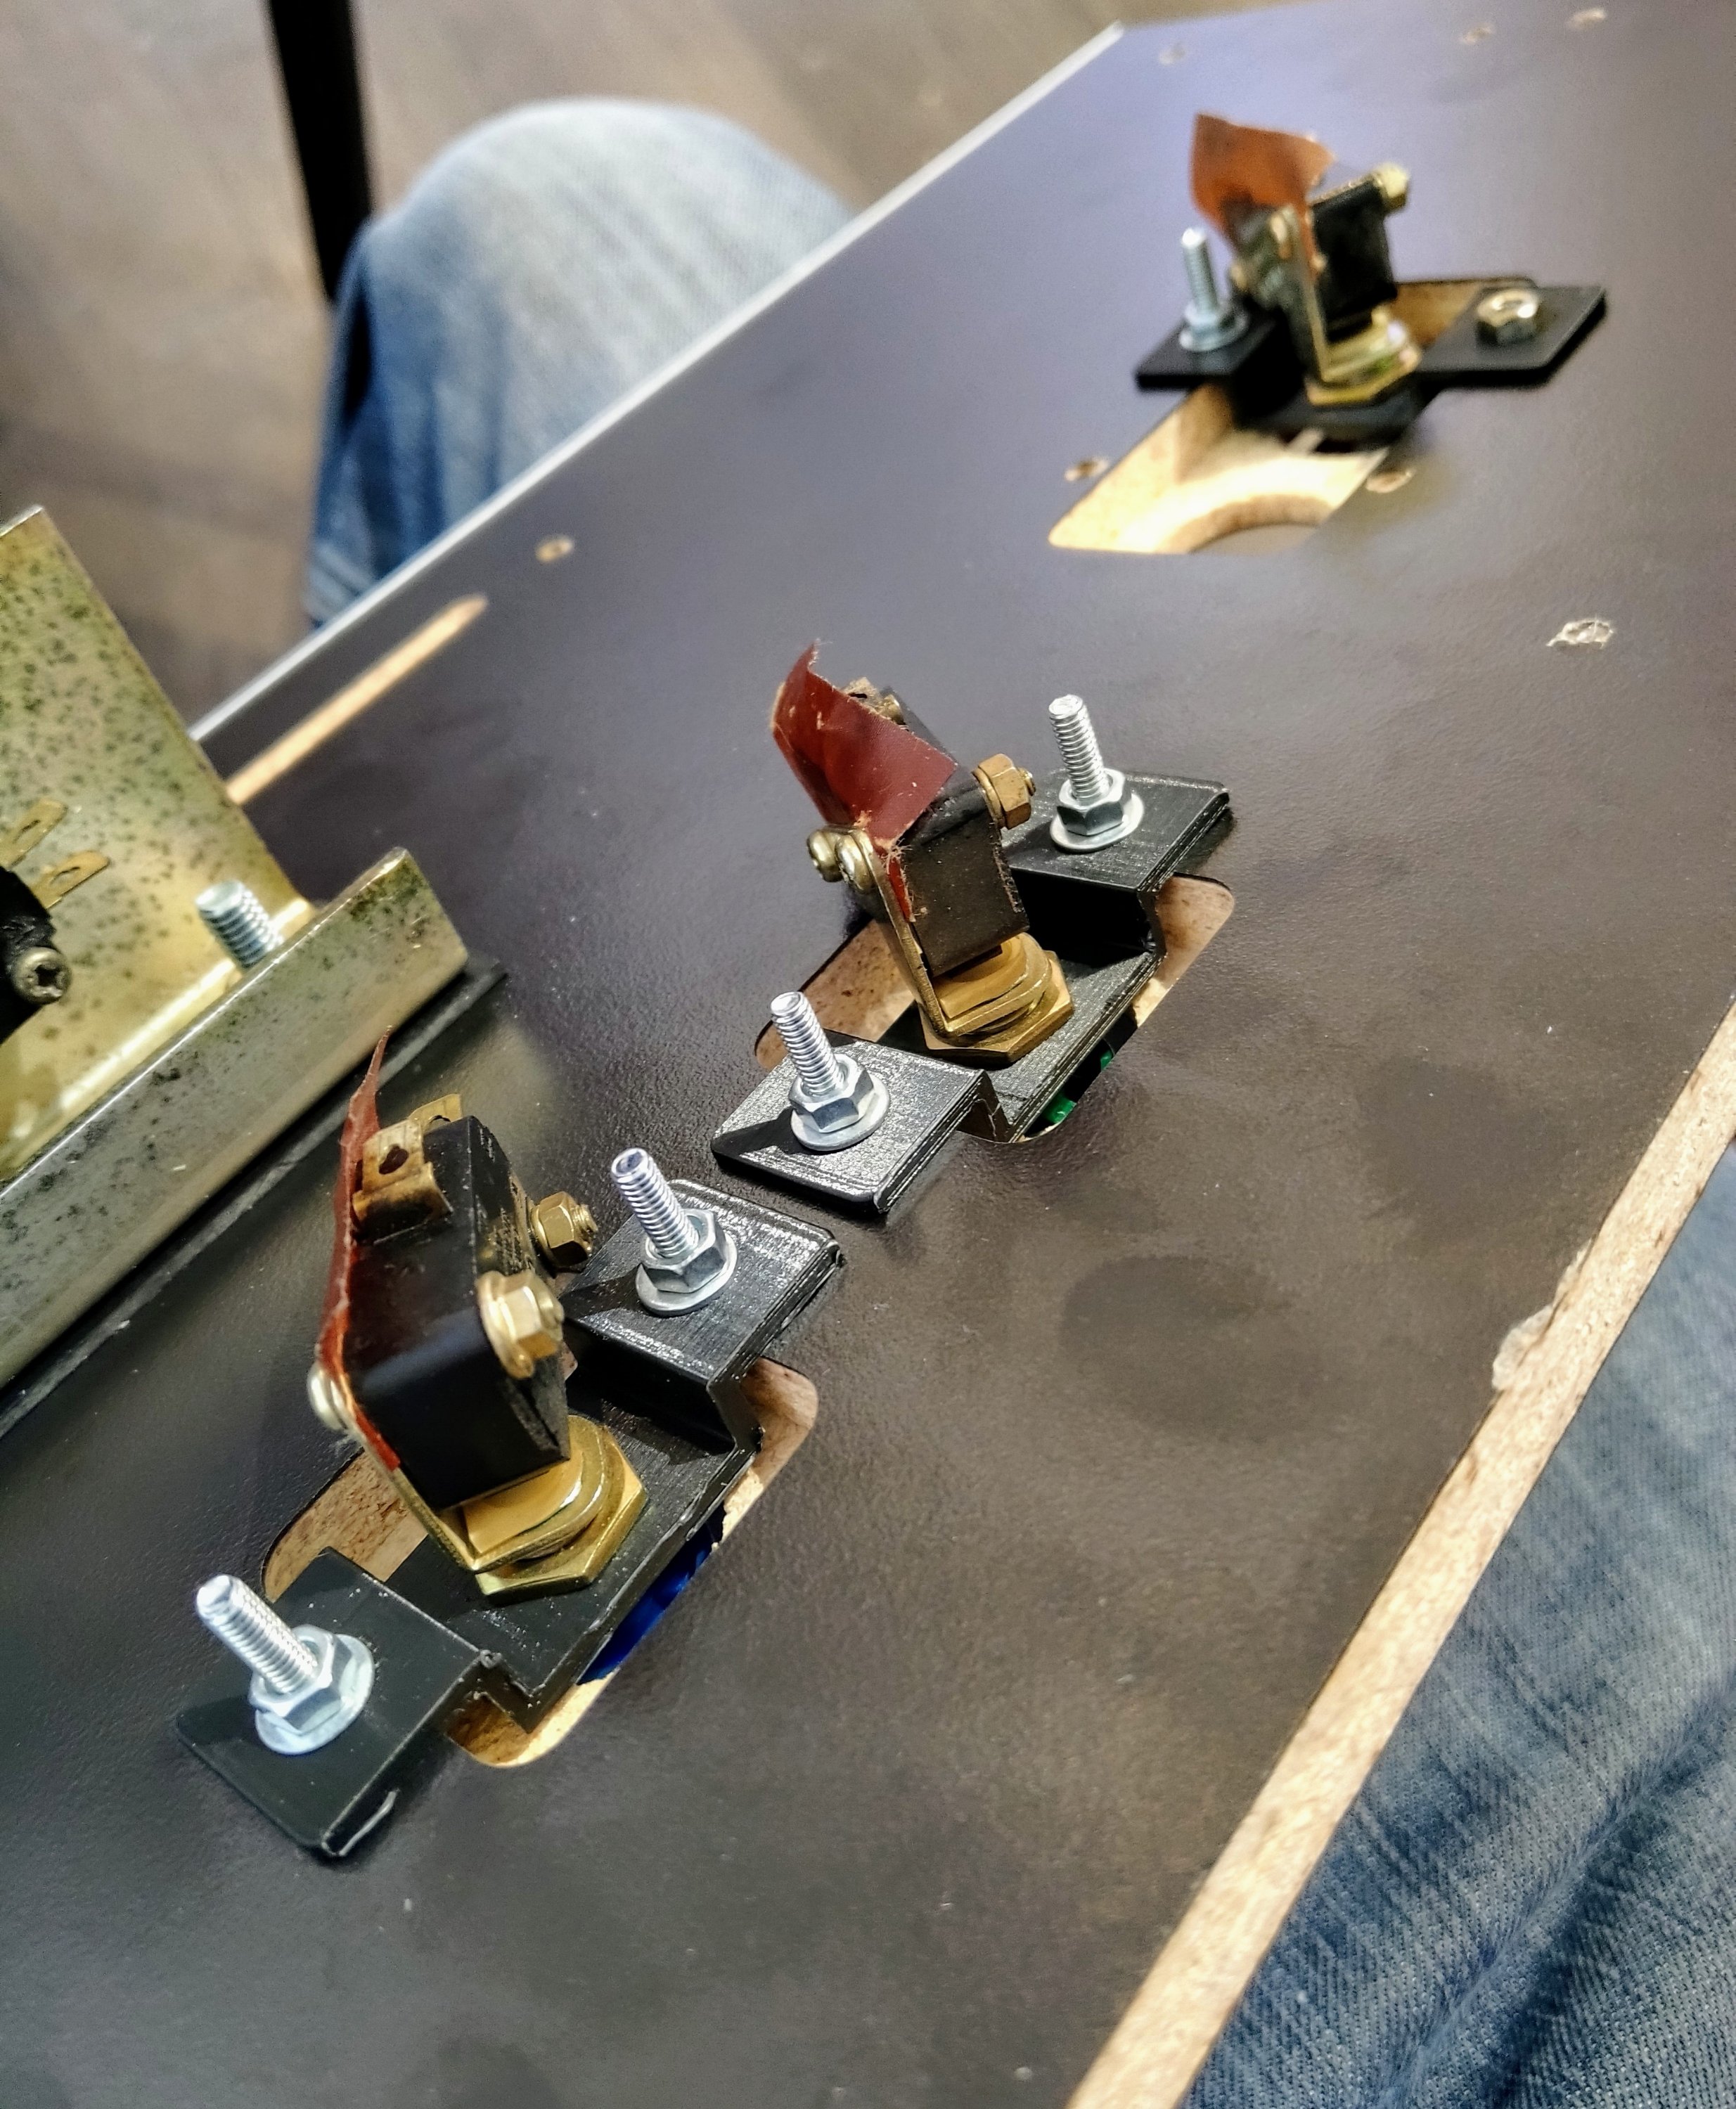
Another missing piece were the brackets to attach these buttons to the control panel. Once again, Mike Haaland to the rescue: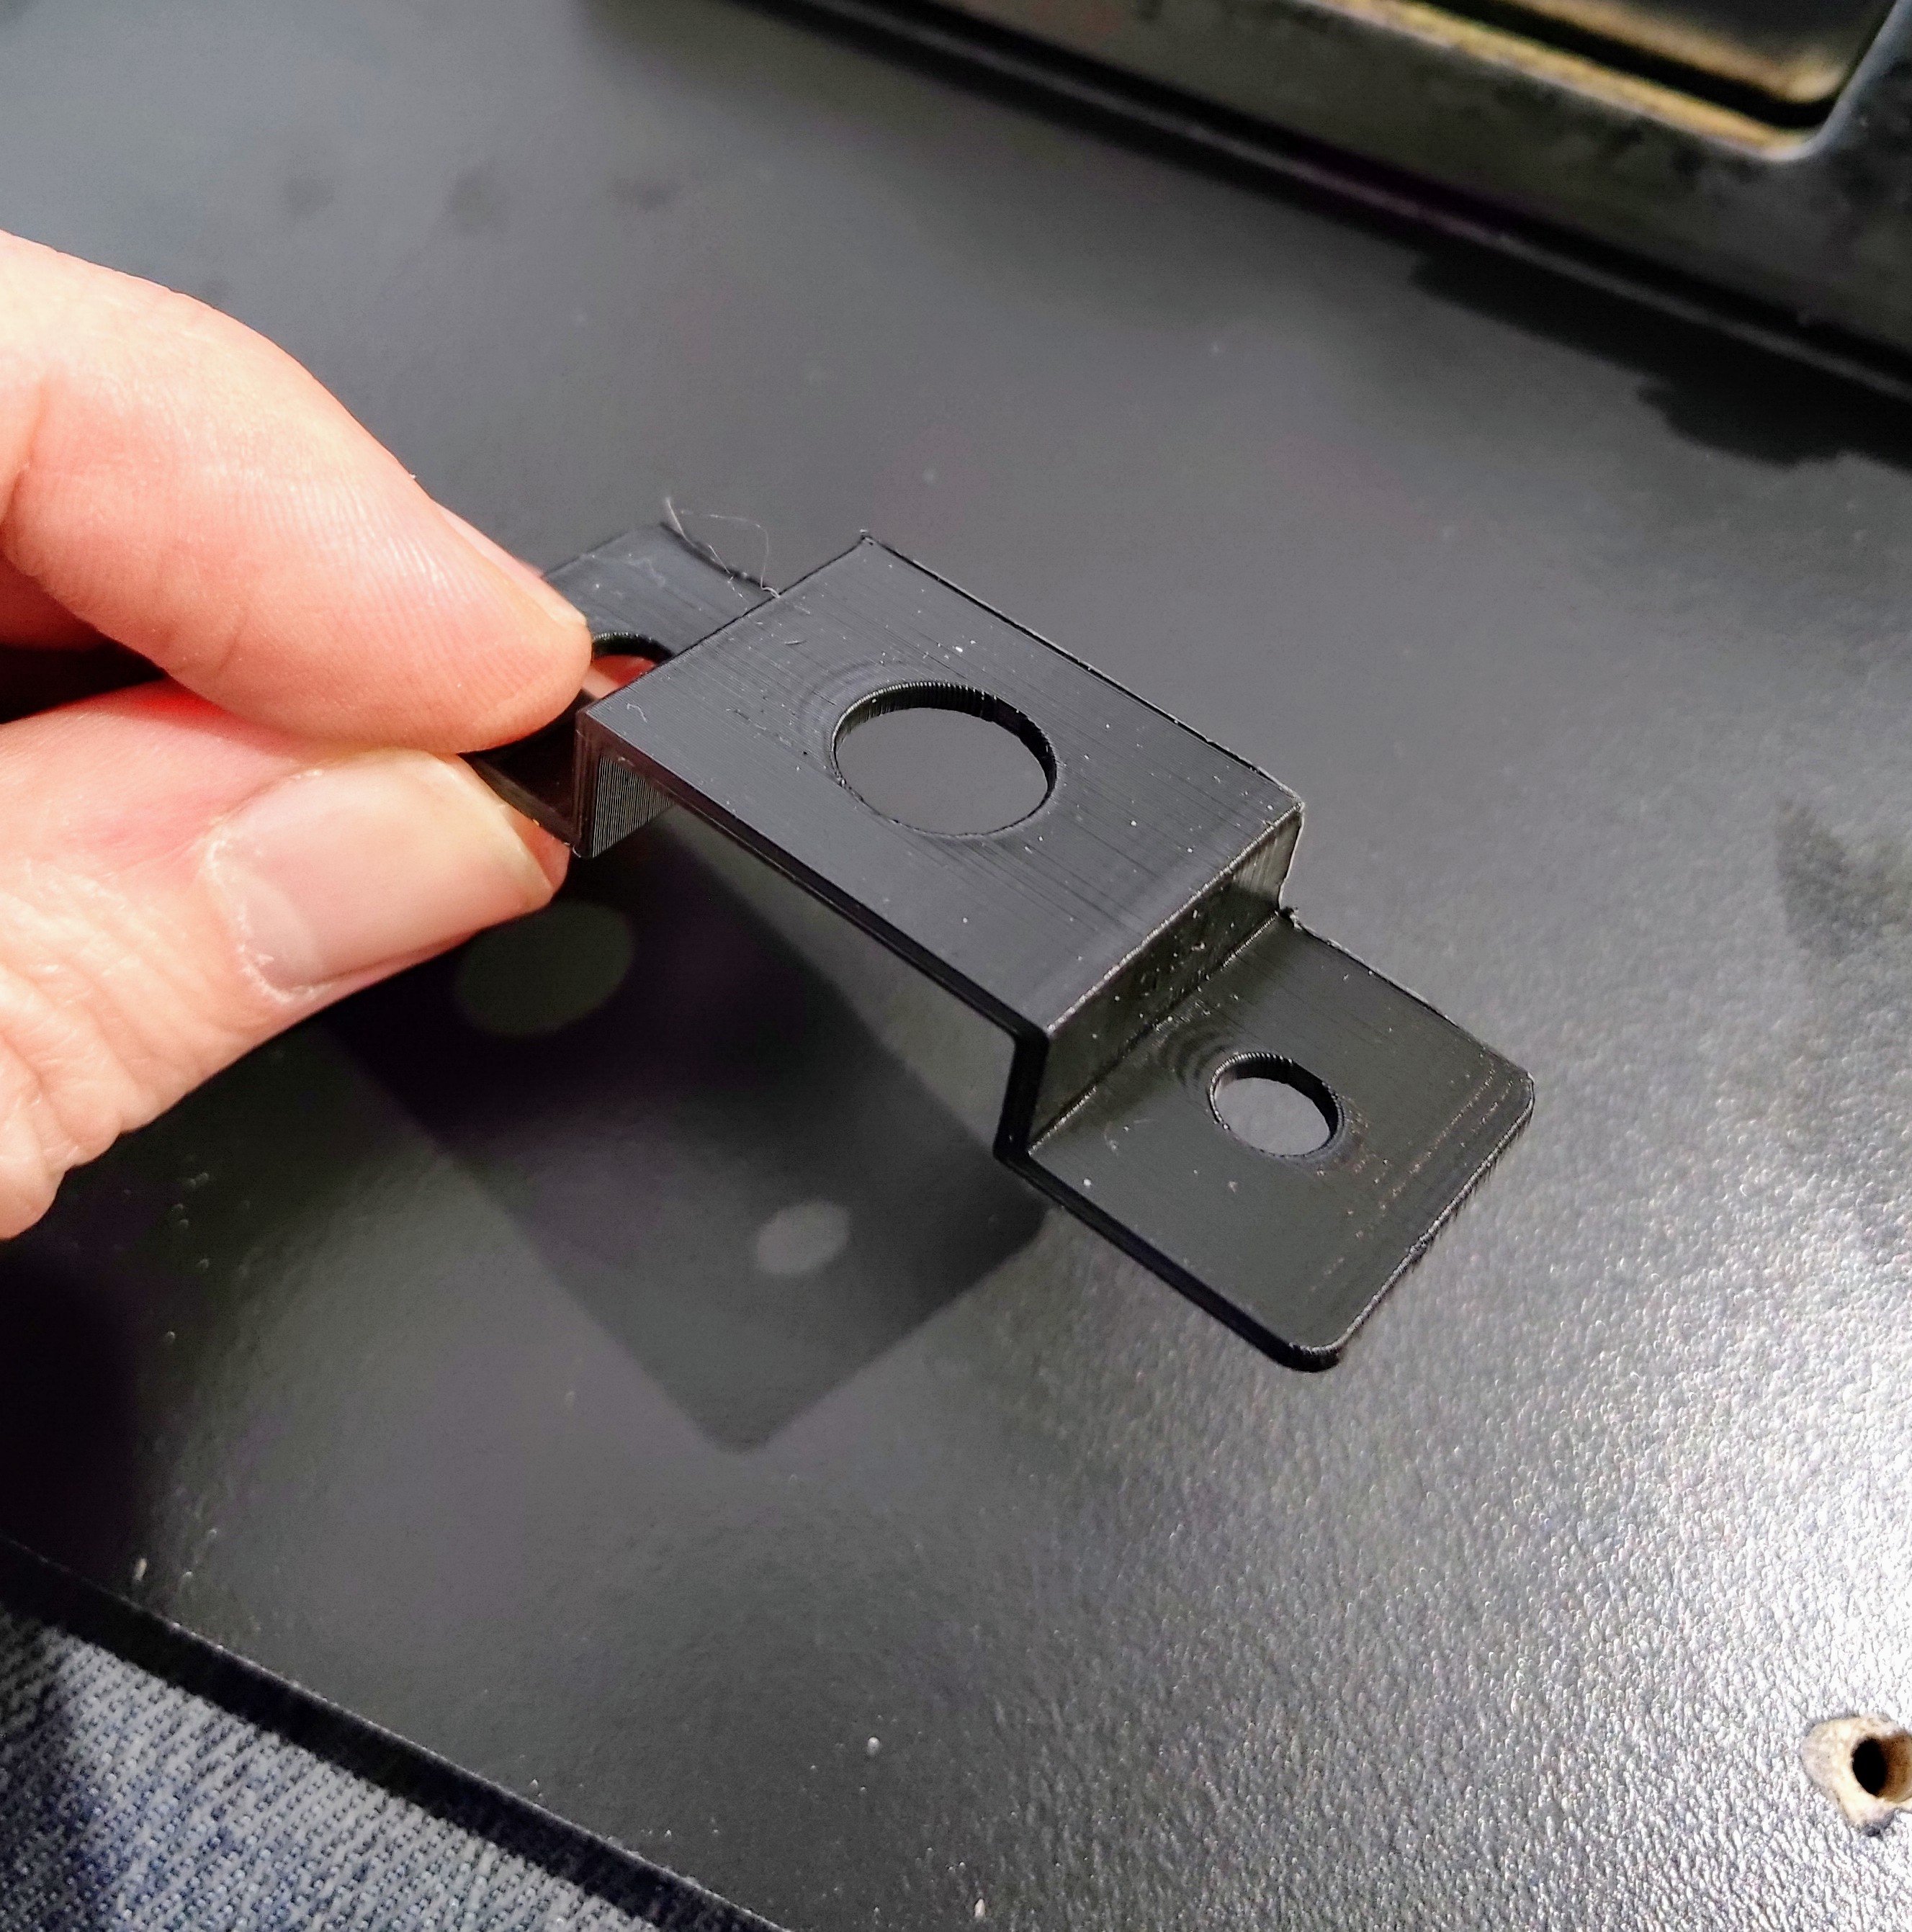
I fitted all of the brackets and then started fitting the buttons: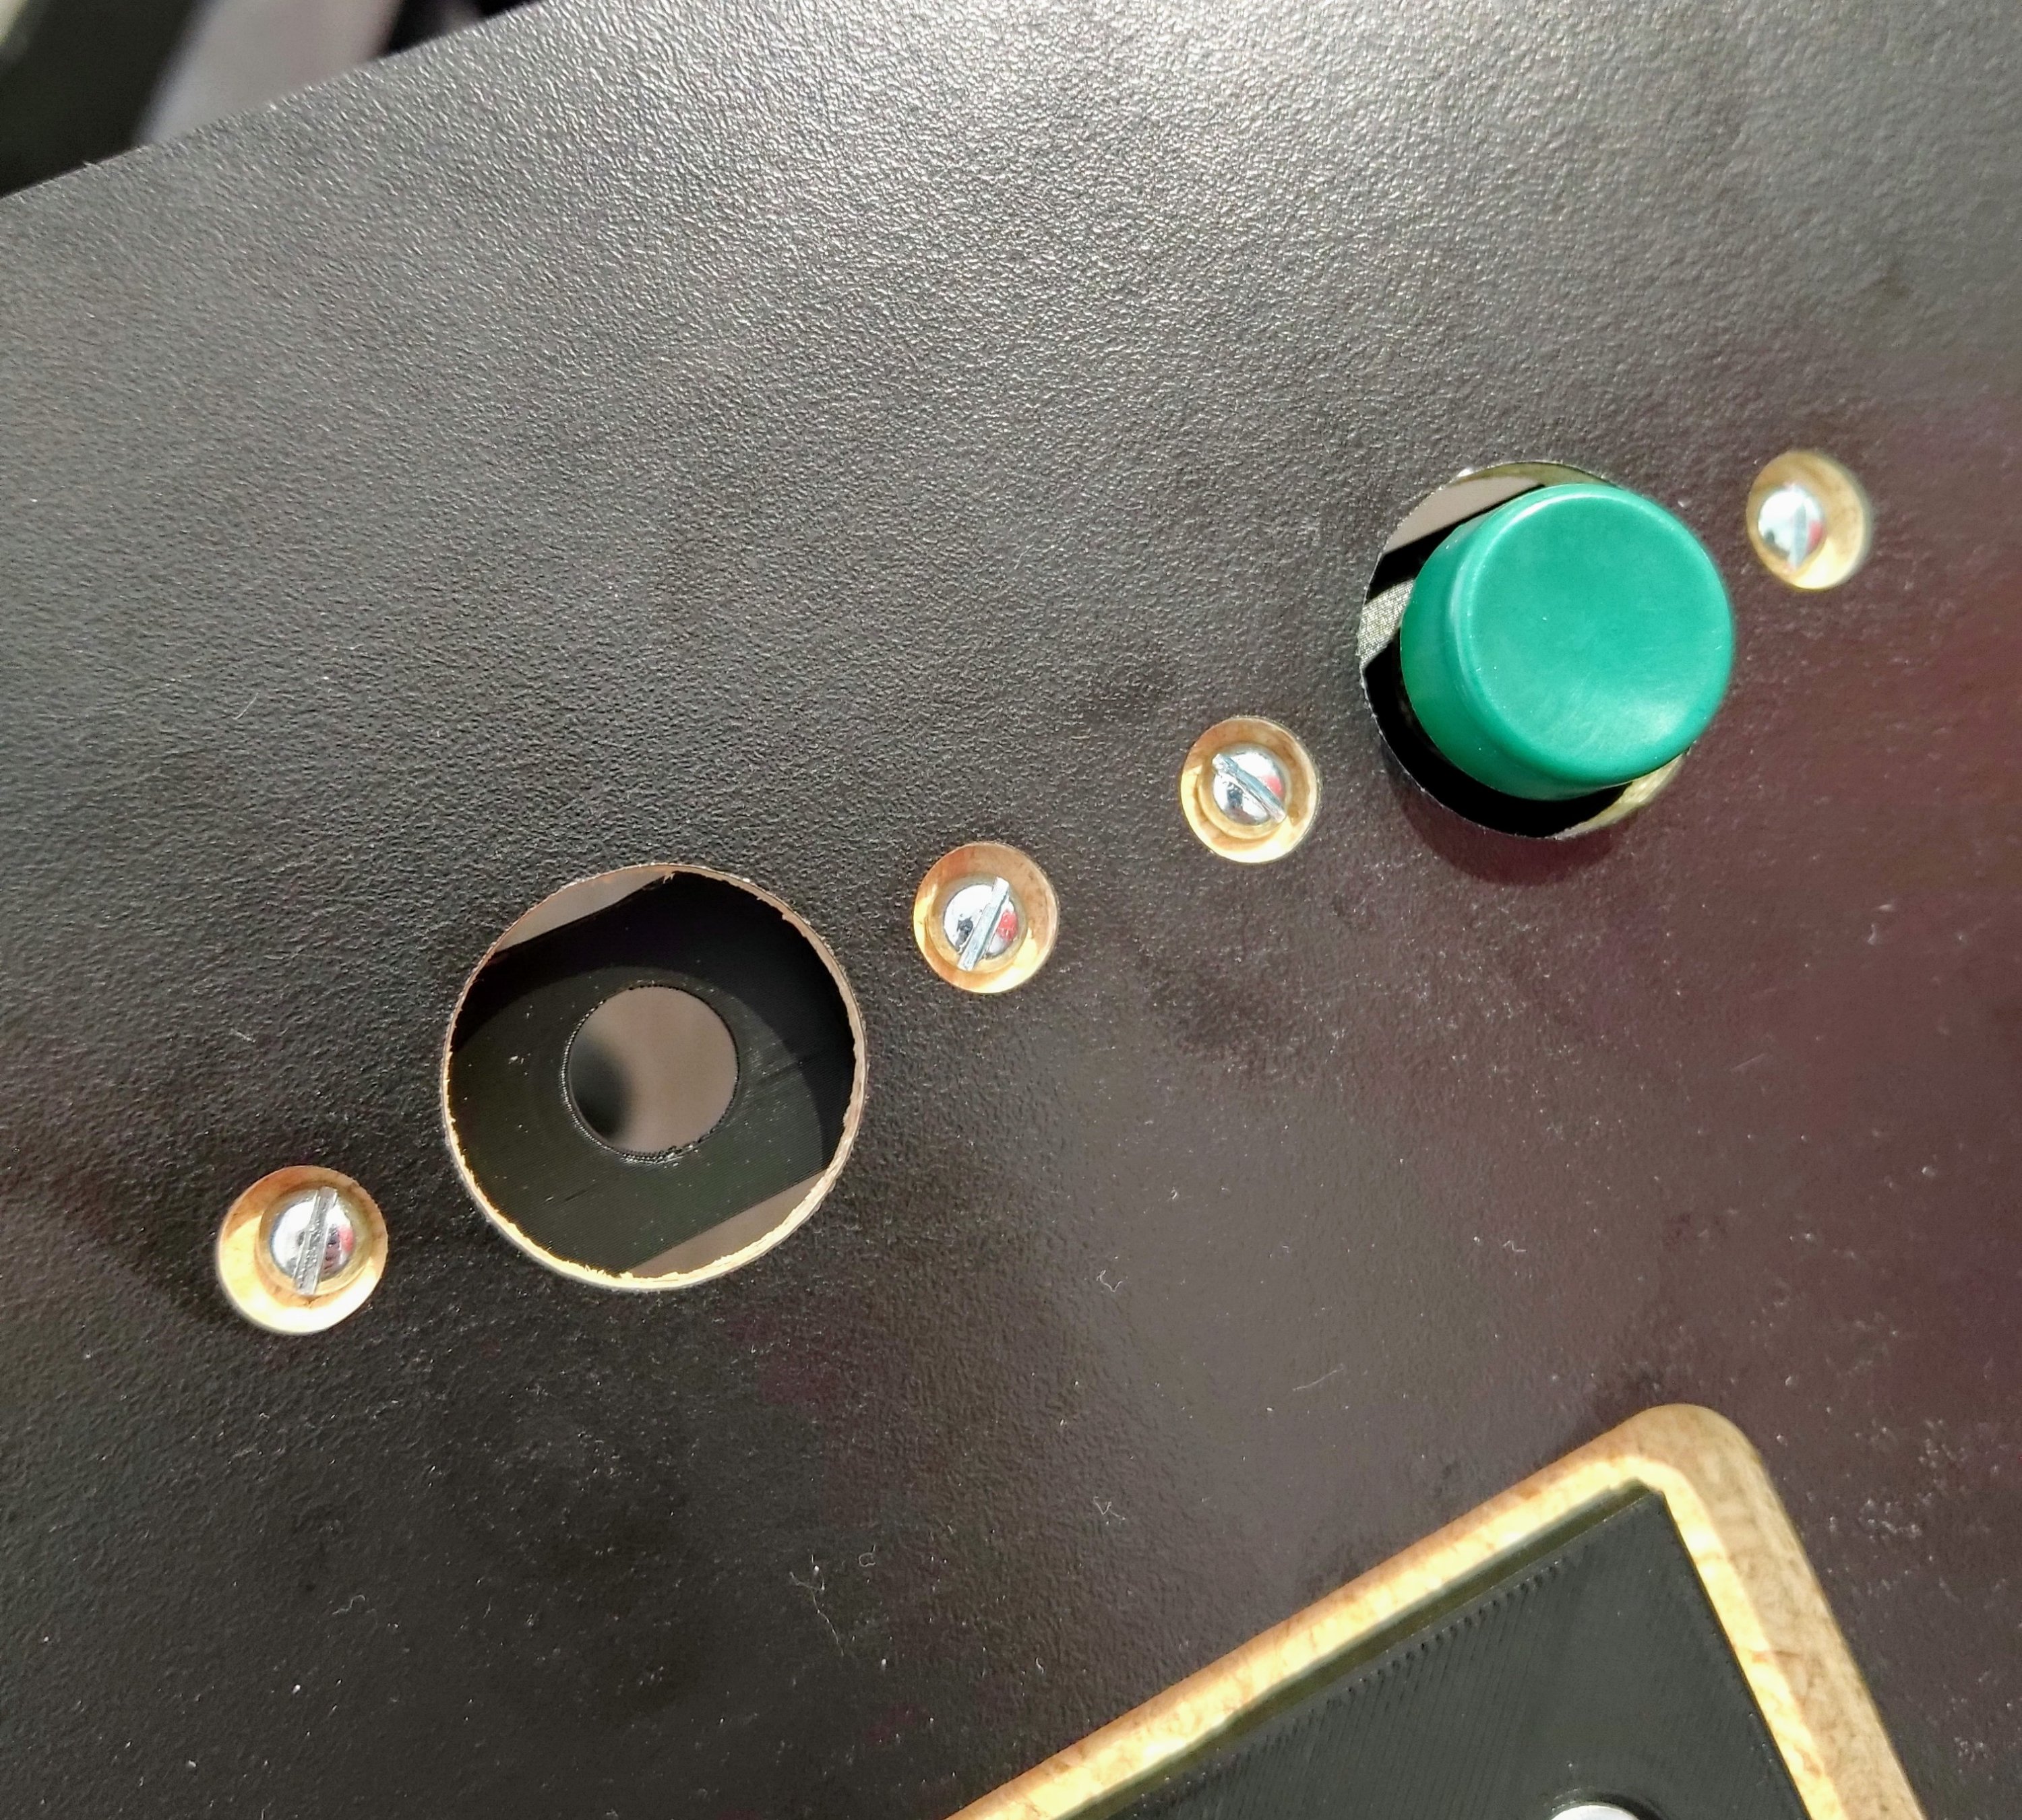

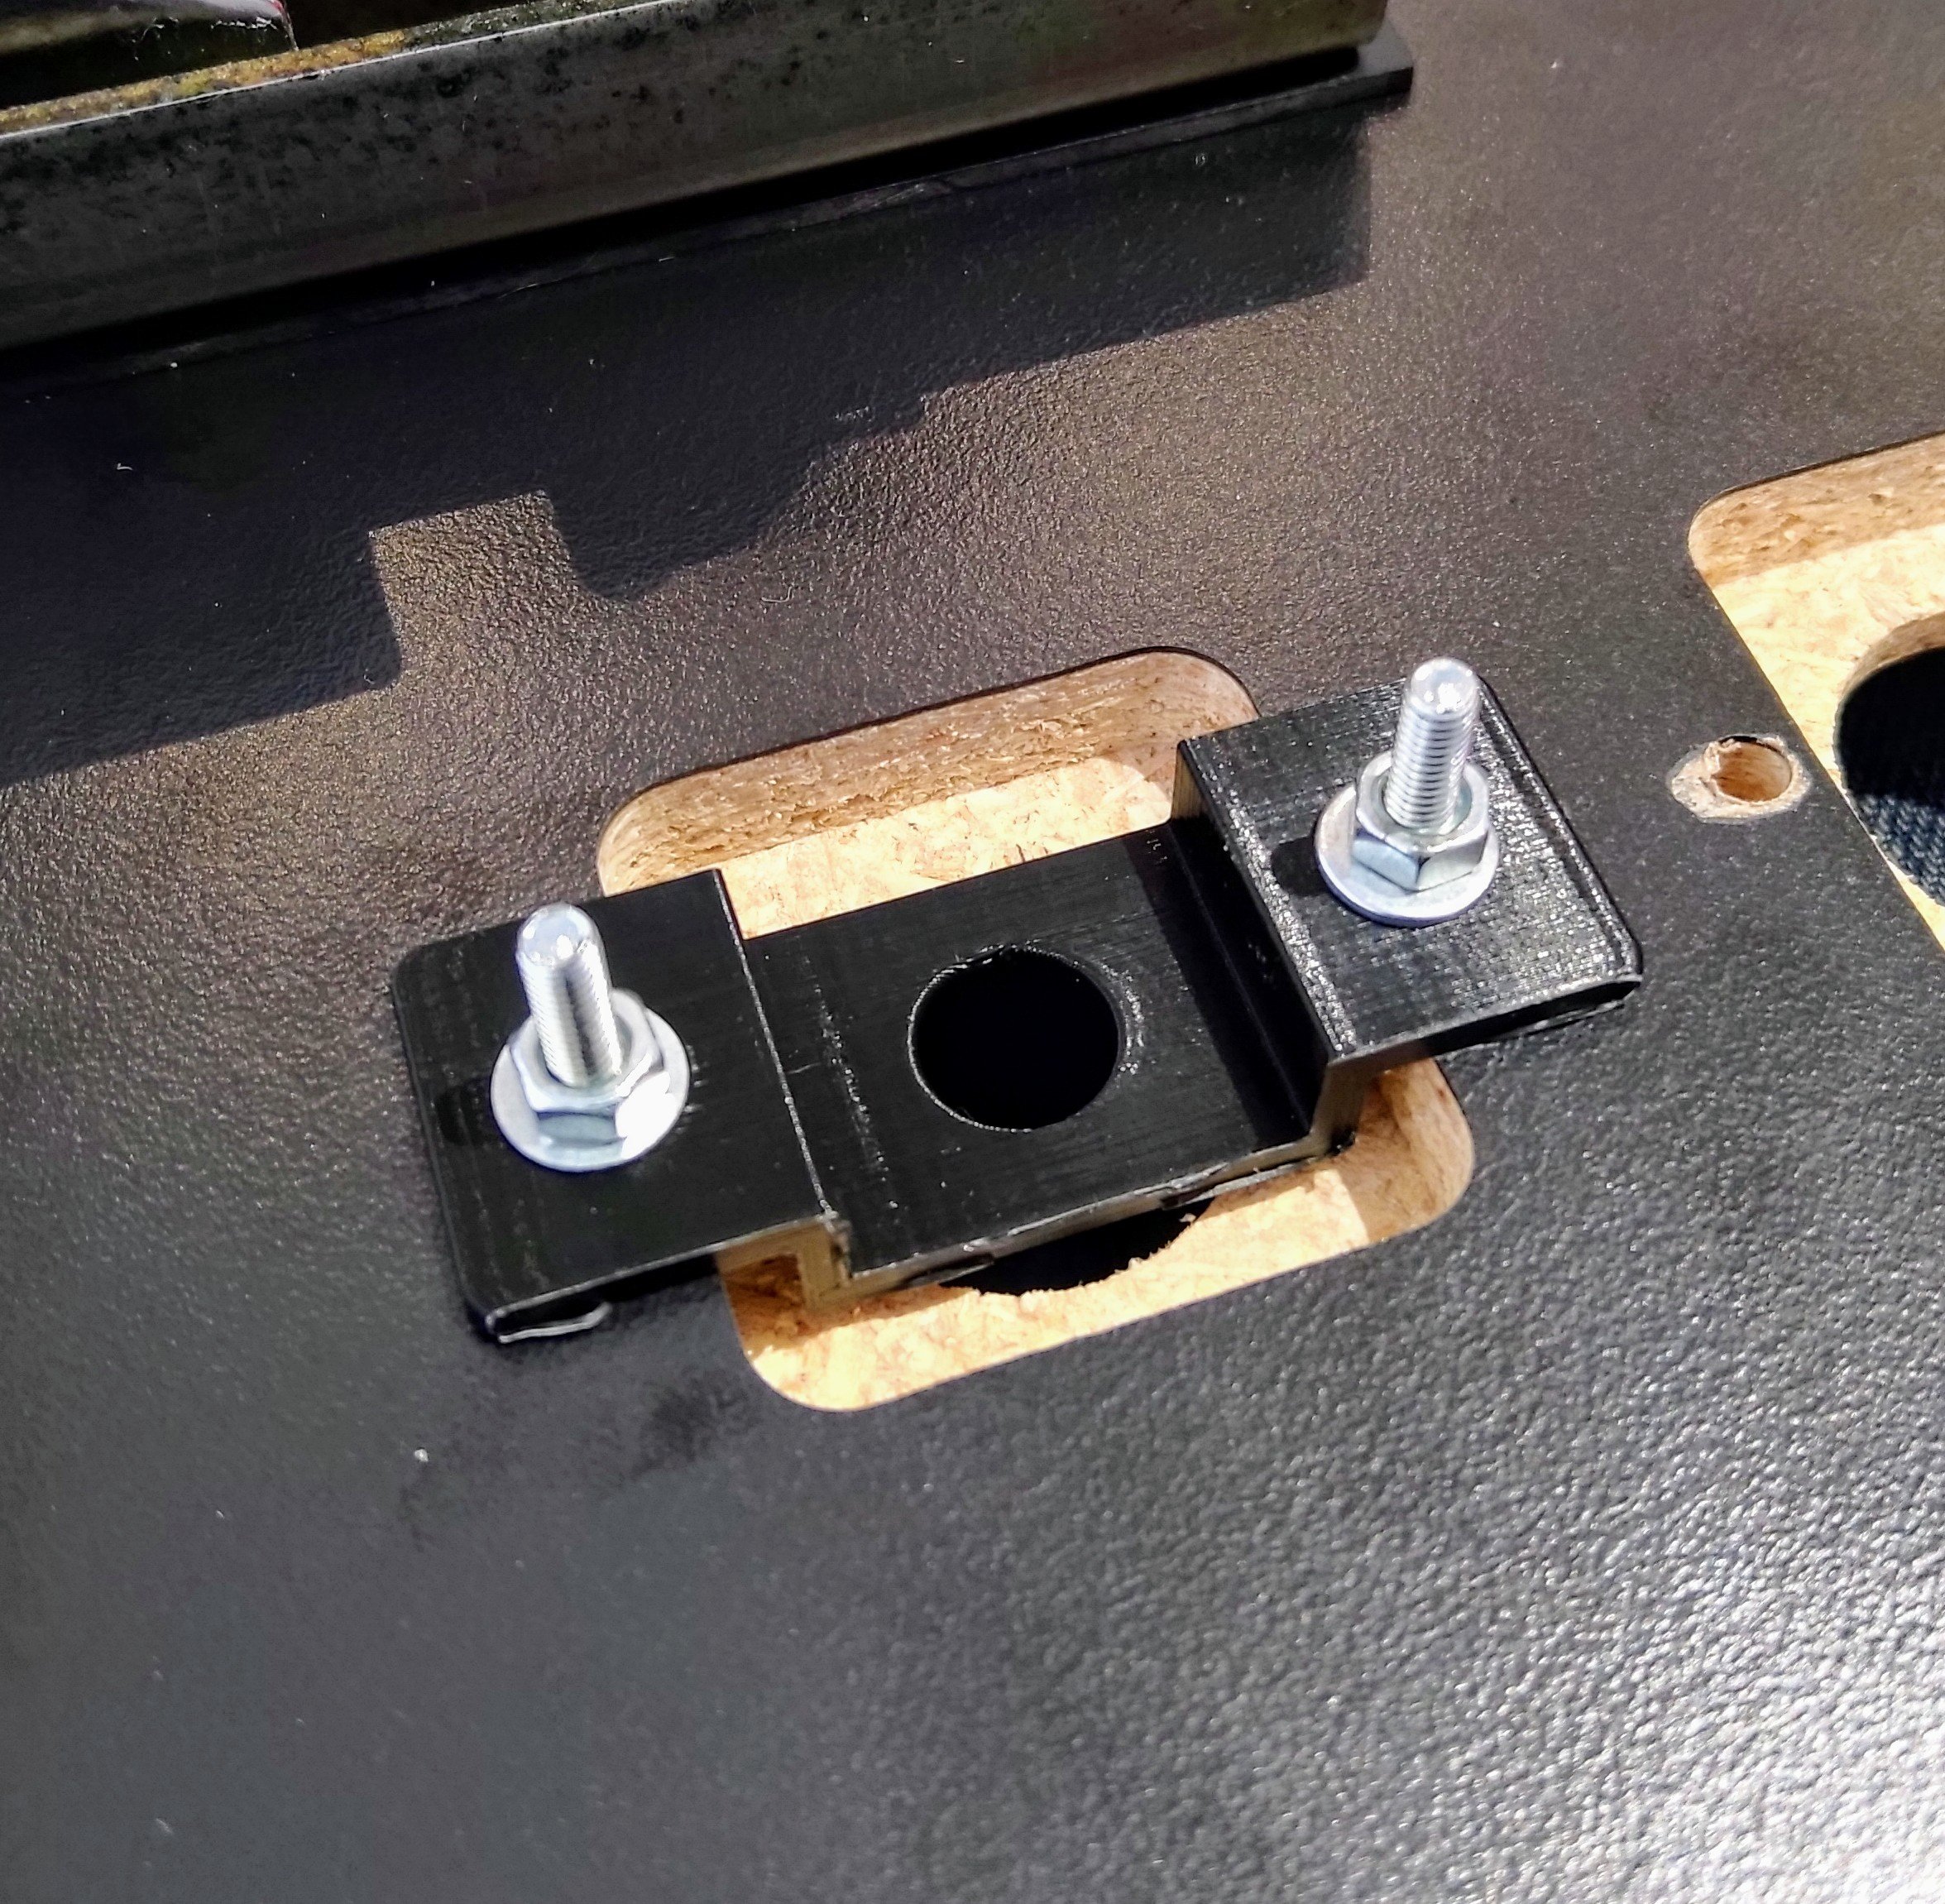
It was at this point I wasn’t going to be able to tighten the buttons down properly with the brackets already fitted to the panel. So I removed all he brackets, fitted the buttons to them and then re-attached the whole assembly to the control panel:

All that was left now was to check all the alignments and add the final piece. Another purchase from arcadeartshop.com supplied me with all of the artwork I needed for this game. This artwork did arrive in July 2019…: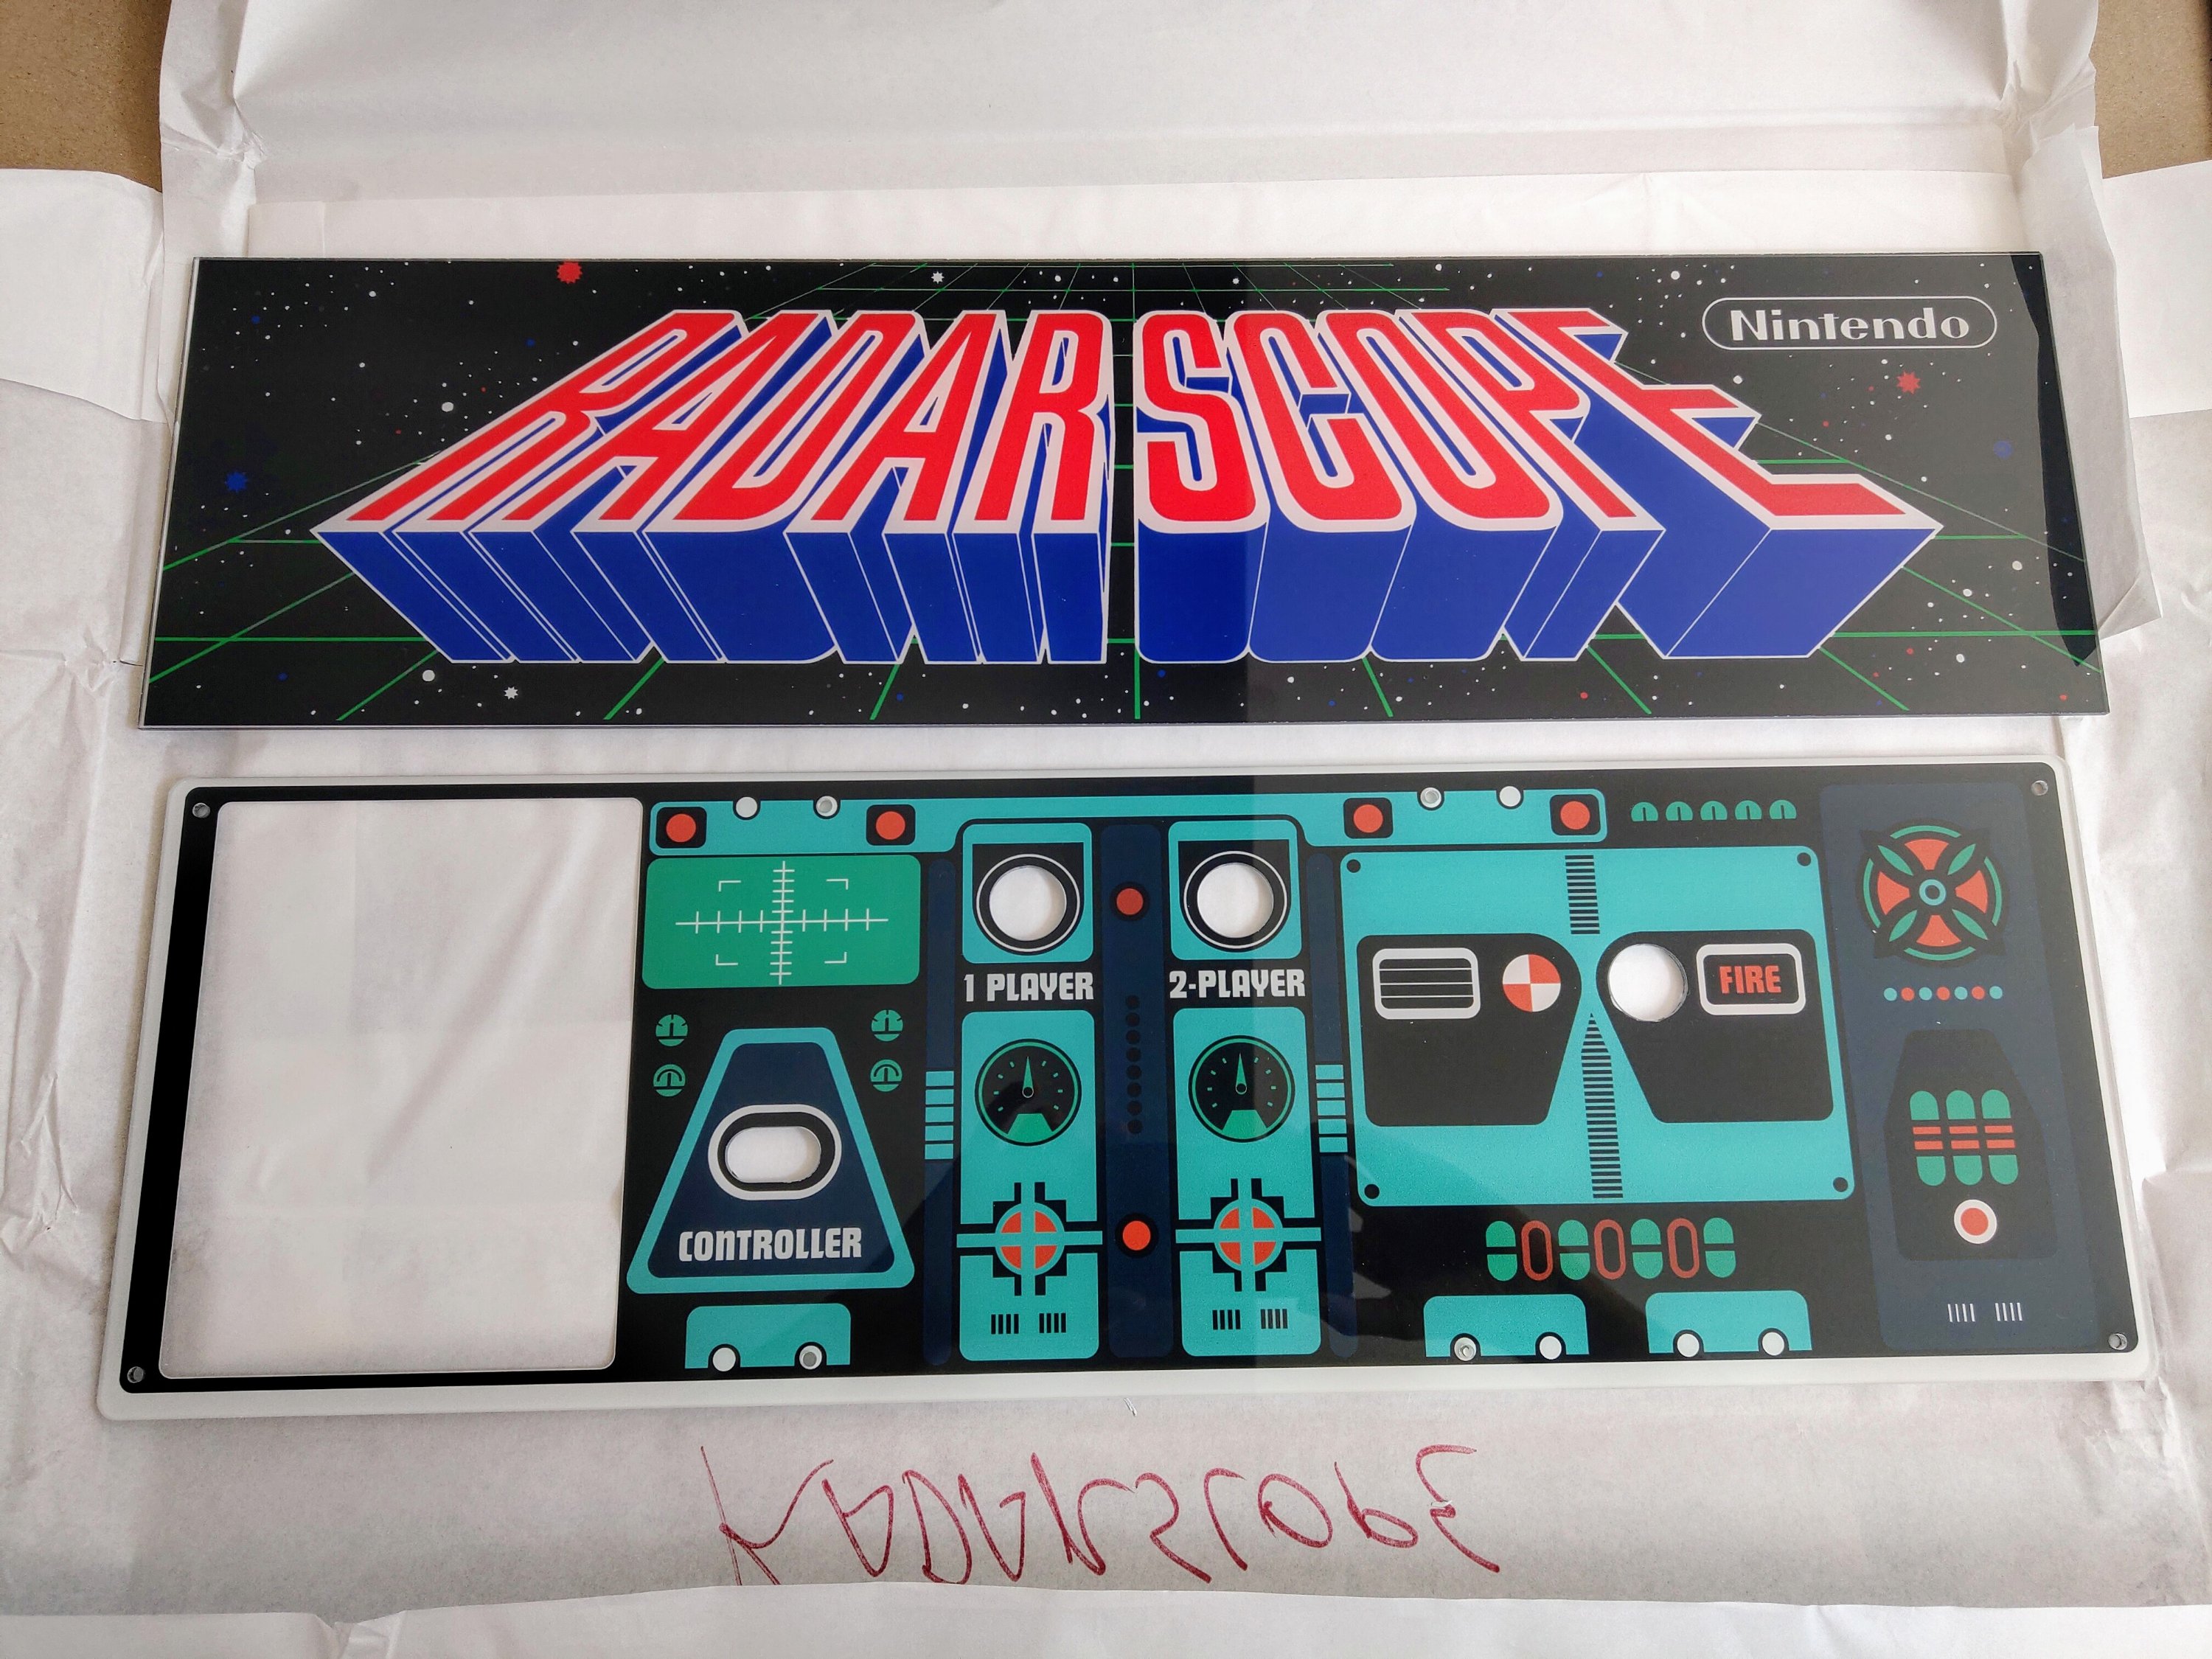
So without any further delays, I bolted the control panel overlay down:
It looks amazing! This has been well worth the wait whilst I got all of the parts together: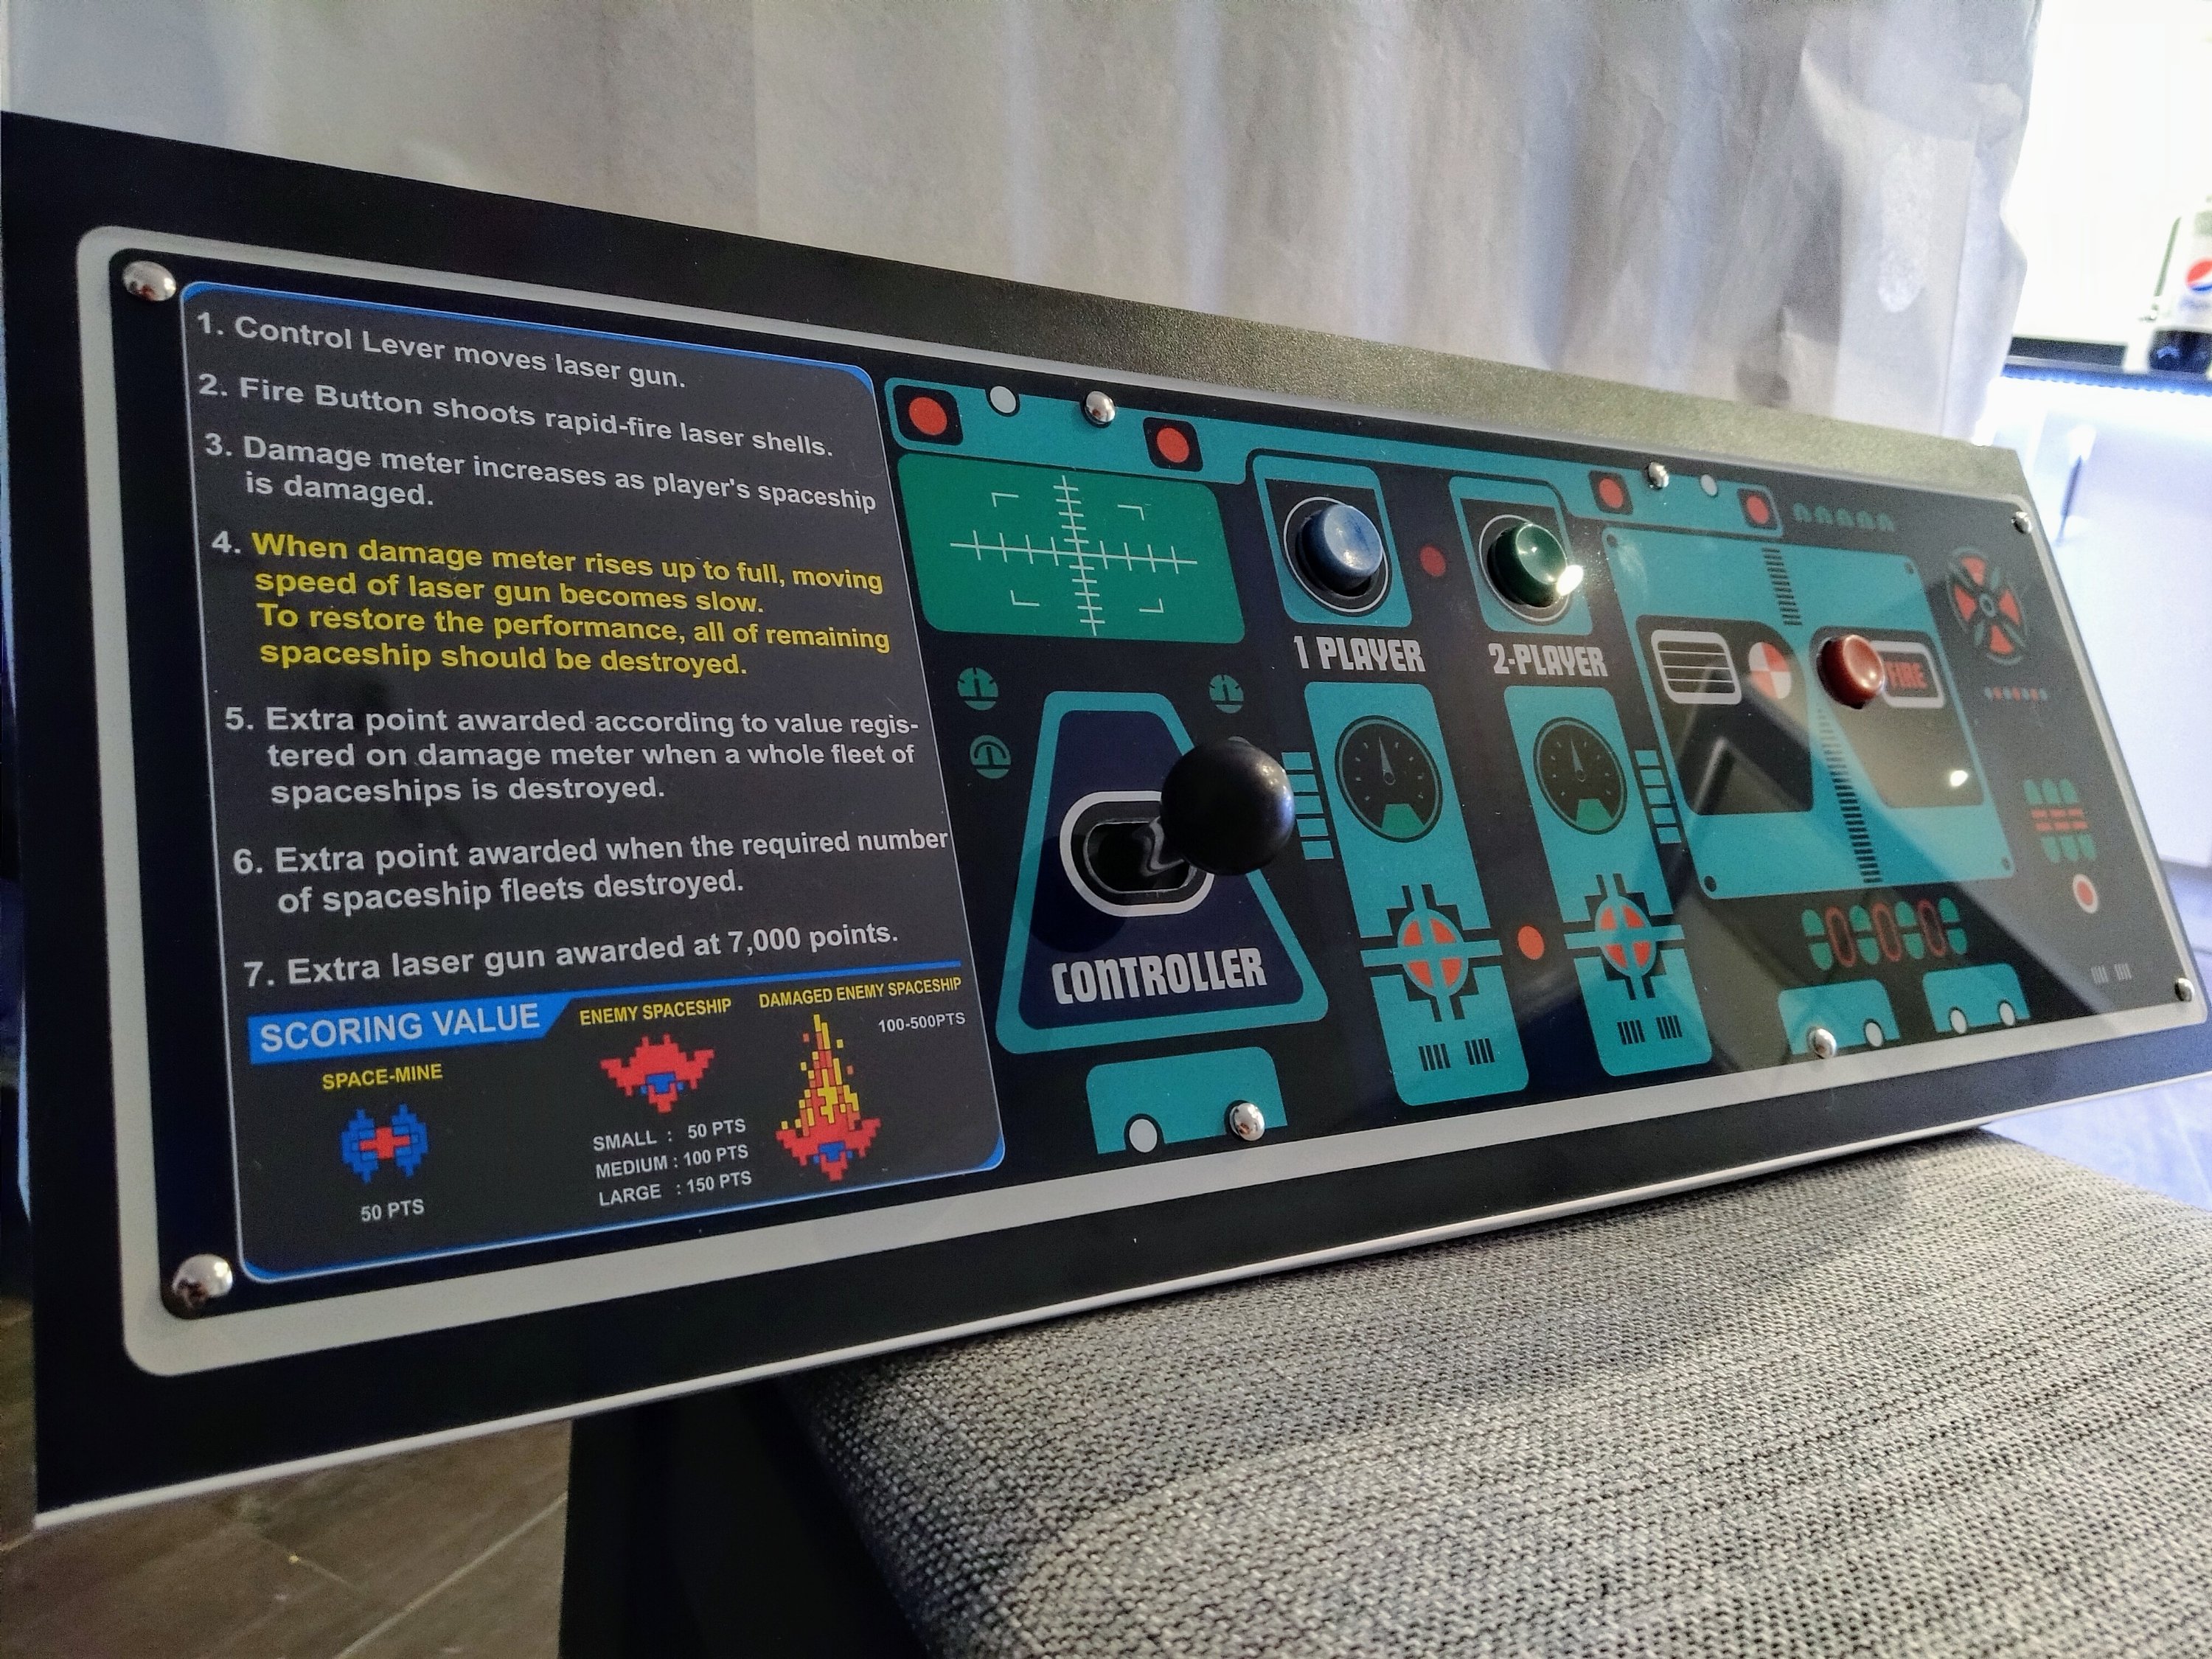
All it needs now is the wiring loom. As the cabinet is currently in a queue in my garage behind two other uprights that need painting, I’m going to put this away now safe: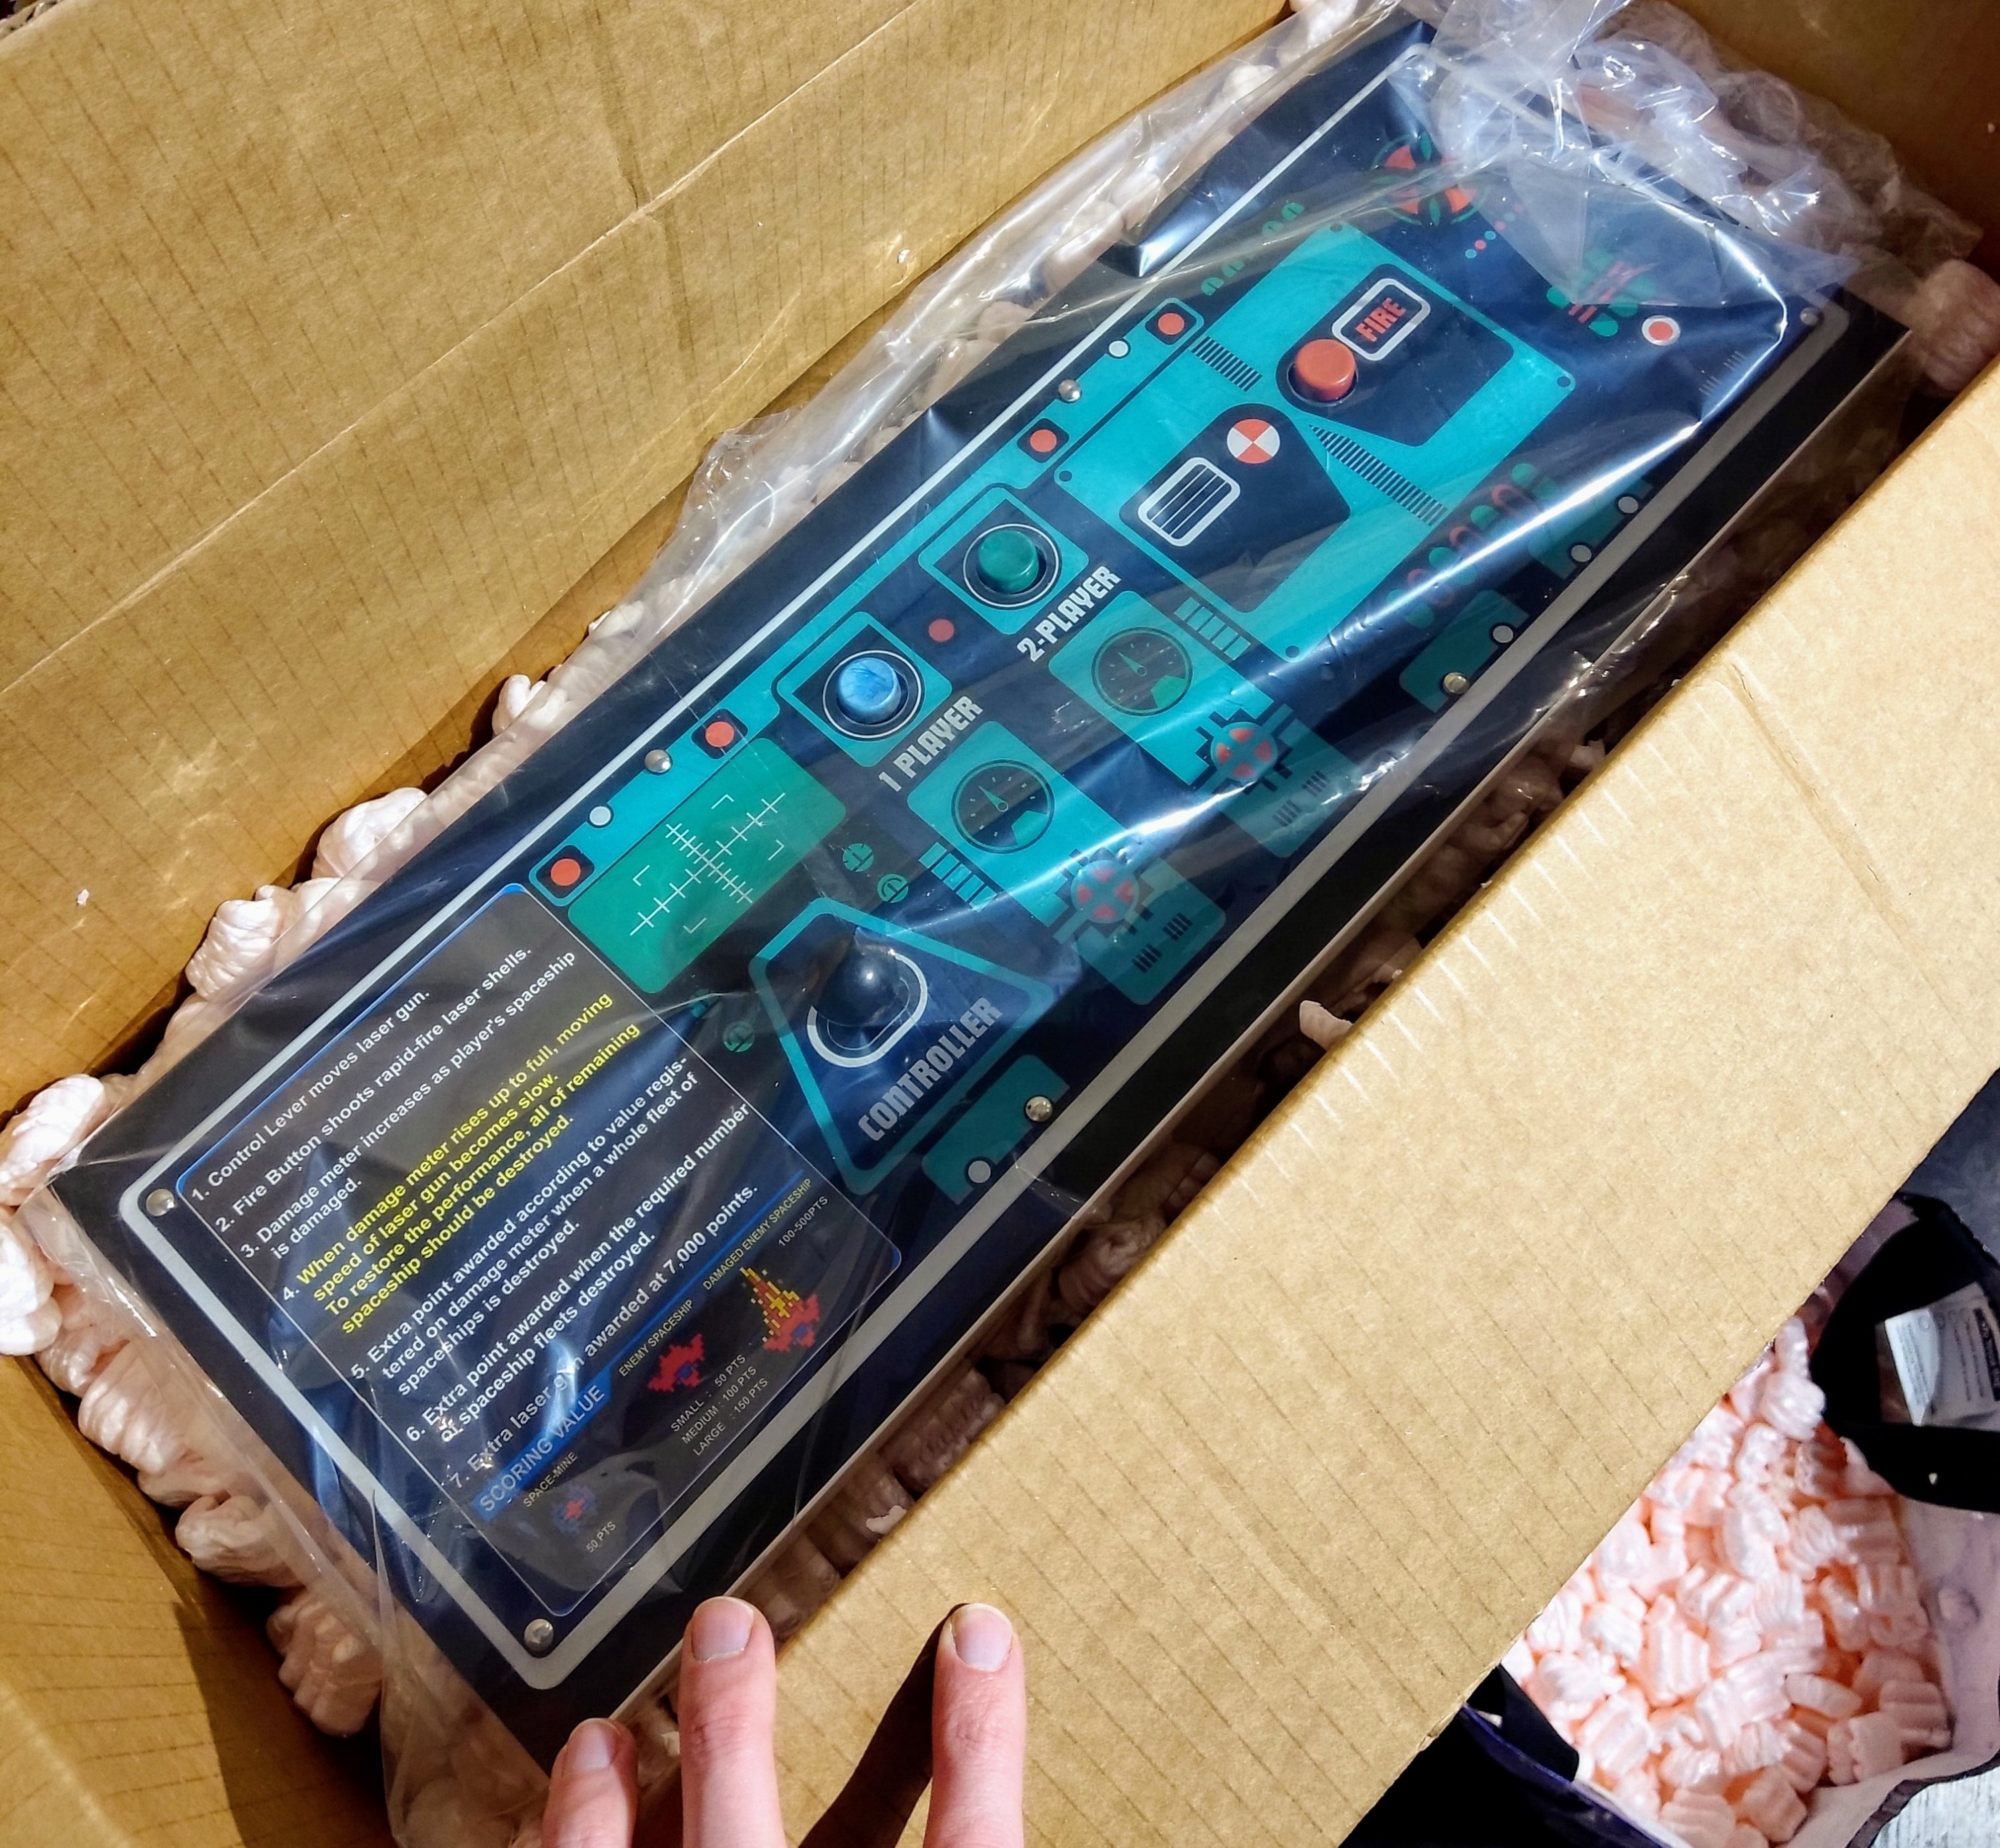
I’m technically at the point now that my Radarscope just requires re-assembly (although I haven’t decided what I’m doing about the cabinet itself… To paint, or not to paint…).
