So everything was technically in the cab now and I was greeted by the timeless start up sounds of Donkey Kong. The game coined up and I hit the 1P button with glee and anticipation… playing Donkey Kong on my very own Nintendo Donkey Kong arcade.
All was not well! As I was connecting up the control panel loom, I noticed one of the pins was missing from a connector. A quick game of trace the brown wire led me to believe I may have an issue moving Jumpman (or Mario). Sure enough, as my first game started up, I moved the joystick to the right and… nothing! The pin that was missing was for the right microswitch on the joystick. I could move left and jump, but unfortunately, right movement is pretty key in Donkey Kong!
So off came the control panel and out came the spares. Now the loom I bought previously, also came with a spare control panel loom. Luckily for me, the complete control panel I bought also had its loom, so I had two to make one good one out of. Unfortunately, the brown cable on the spare loom has also suffered the same fate. Fair to assume because it’s the final pin on the connector and also doesn’t have a pin next to it, so it’s out on its own. So I took the next wire along and piggybacked it onto my control panel:


Once the wire was attached, I returned the control panel to the arcade and plugged it in. I could move right! Success!
After a few games, it became clear the joystick would need some work. The movement wasn’t smooth and the joystick wasn’t re-centring itself. So next step was to strip the control panel and clean everything.
Off came the control panel and out came the tools. The joystick gave me the most grief as the small grub screw holding the ball top on did not want to shift. It was only after 20mins of fighting (and winning) that I realised it would have been quicker to just take the whole joystick out of the base as that was only a small circlip:
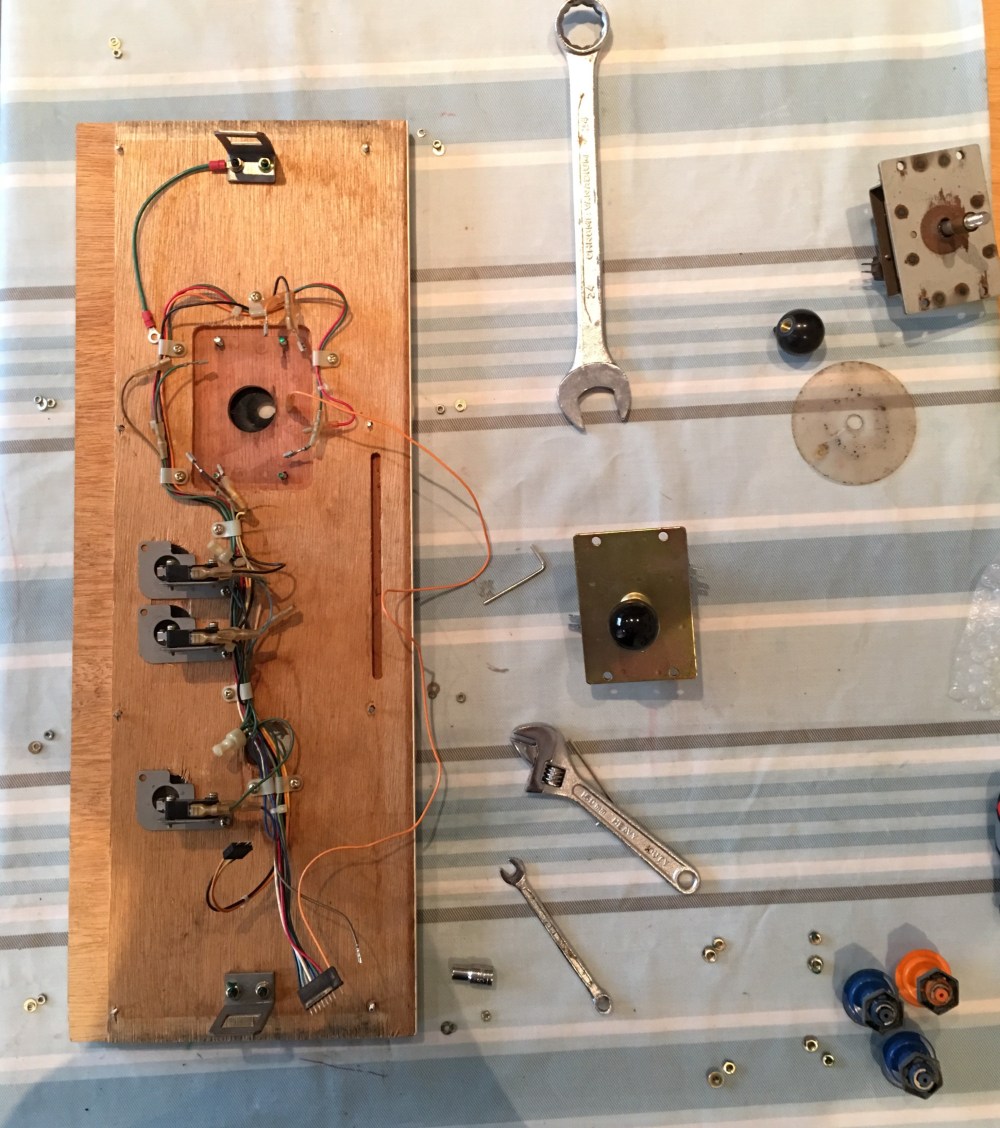
As you can see from the picture above, I had a new joystick to go in anyway (included in one of my many MikesArcade orders). The original joystick had a collapsed spring inside, but also quite a lot of rust that was affecting the bearing movement. To get this up and running I decided to go with the new joystick and save refurubing the original stick for another day.
The buttons were also very sticky (in both operation and feel) and the reason why was very clear when I took off the plexi control panel overlay:
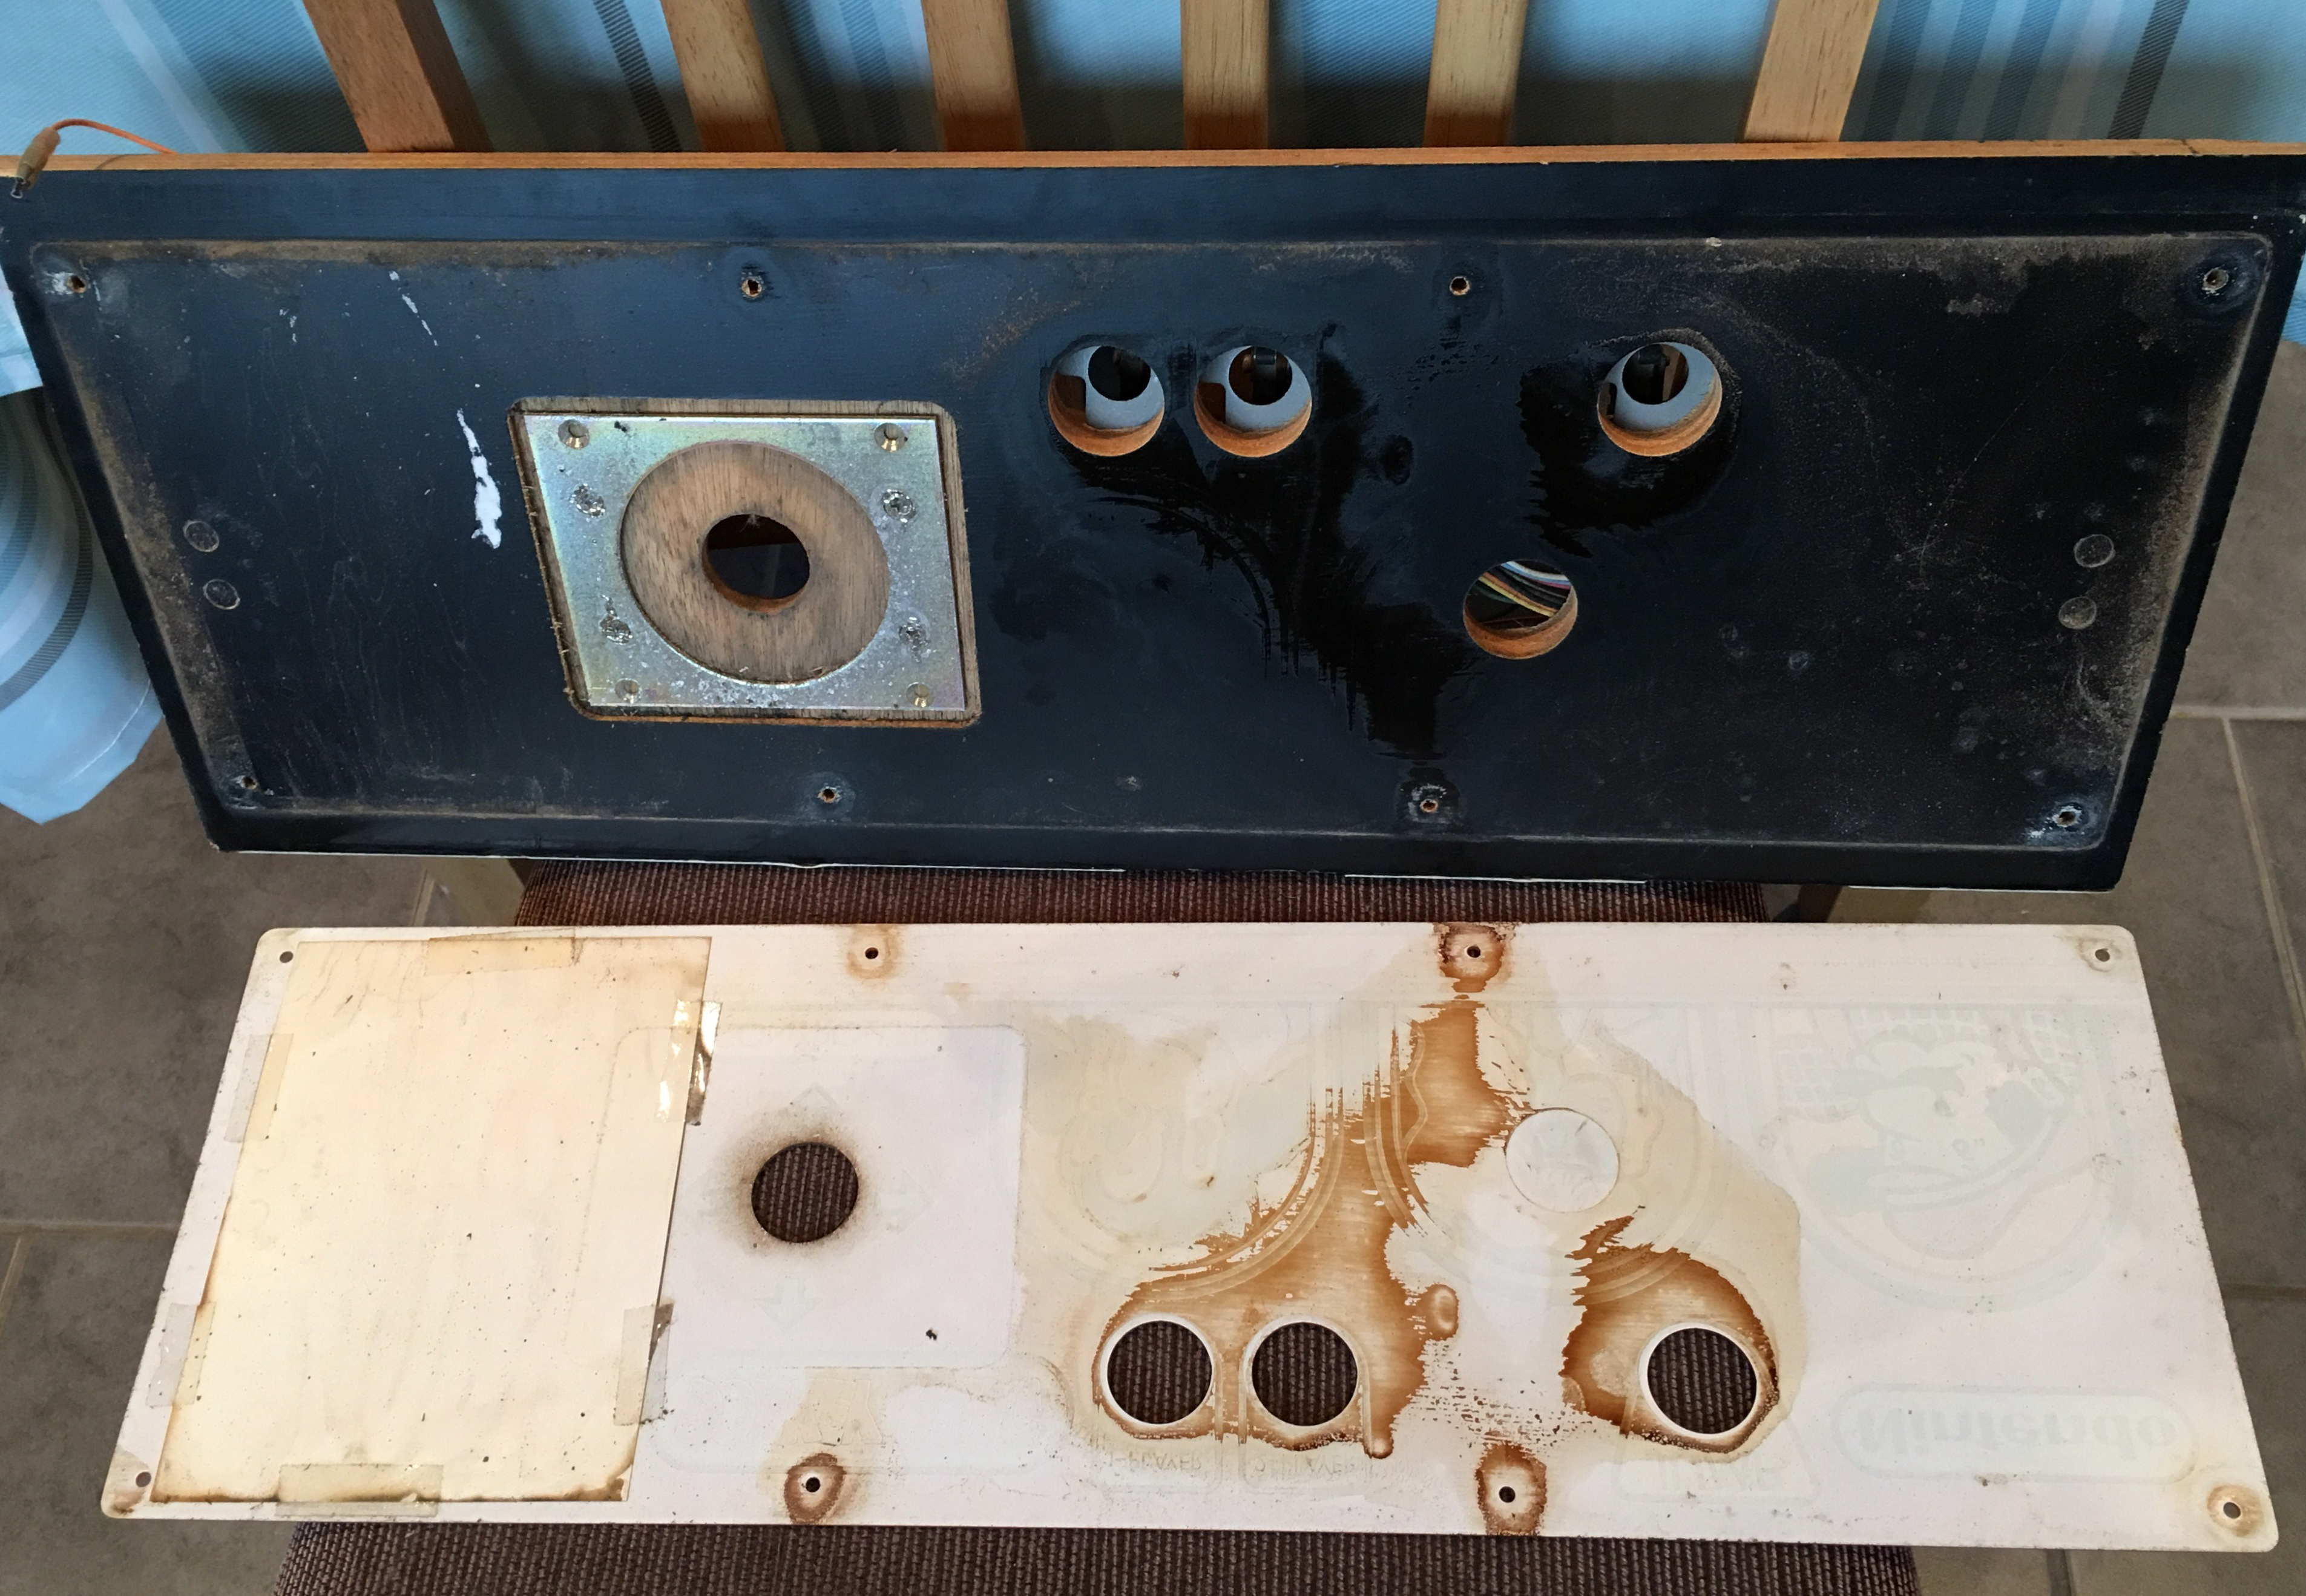
As I cleaned this off, I told myself it was a sticky soft drink of some brand. This wasn’t time for an investigation, just a cleaning session. Some warm soapy water and a bit of work and the plexi was ready to go back on. I cleaned the buttons as well and re-asssmbled the control panel:
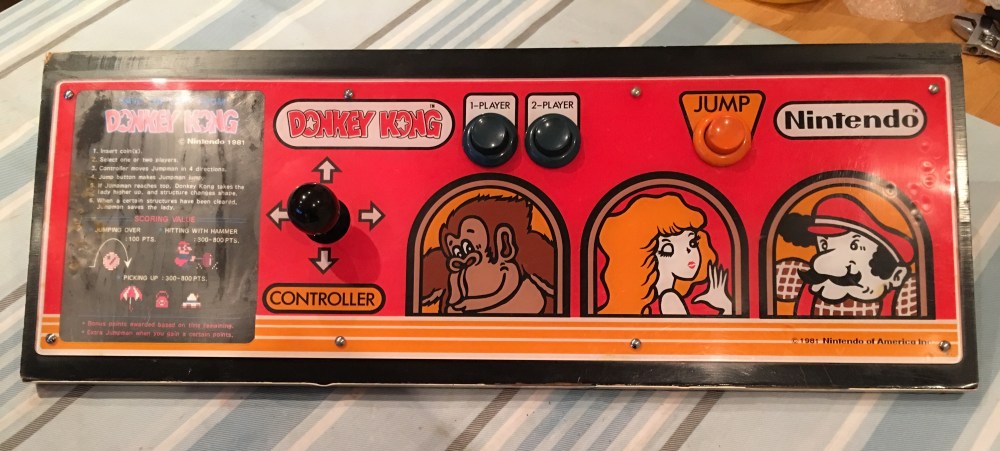
All cleaned up and ready to be connected back up. The panel does need some cosmetic work, but I’ll do that when I tackle the whole cabinet. For now, it can go back on the arcade and help me in my desire to be better at Donkey Kong. Here’s the fully assembled cabinet next to my daughters miniature reproduction:
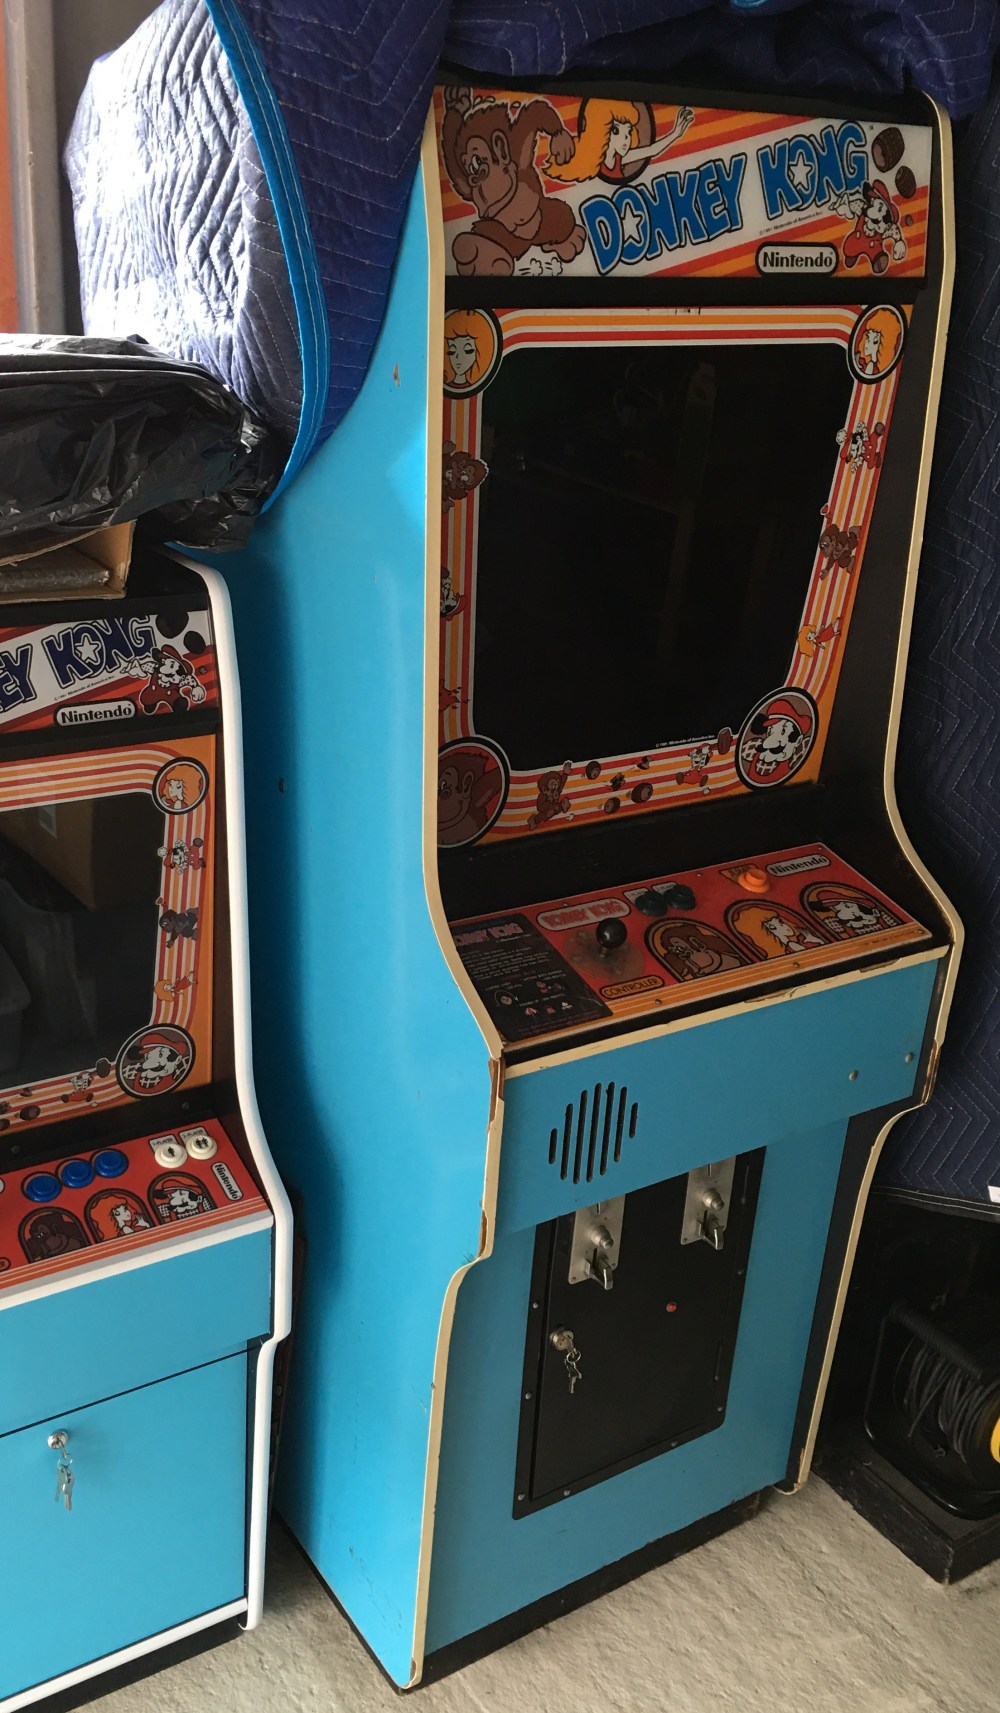
And that’s as far as I go with this cabinet until a full restoration starts. Now that this one was finished, I could concentrate my efforts on the second Nintendo that landed at the same time. This next one was going to get the full works!

A great de-conversion. Nice to see it back to a DK cabinet. Bet it’s hard to start a full conversion though now that it is playable!
LikeLiked by 1 person