I was finally in a position to open the Donkey Kong 3 kit I’d bought nearly a year ago. This was a NOS (New Old Stock) kit that I imported from the US from a guy who had a couple of them in differing completeness. He had a couple of eBay auctions up with these kits and we came to an agreement outside of eBay (saves everyone some money!).
The kit I bought was complete aside from the artwork and control panel. As I had already sourced these, this kit was perfect for me. After transferring the funds and a two and a half week wait, the parcel arrived. Unfortunately, the seller had used the Nintendo Pak box itself for posting, which resulted in labels stuck to the box, and insufficient protection for the contents. This is what I received:
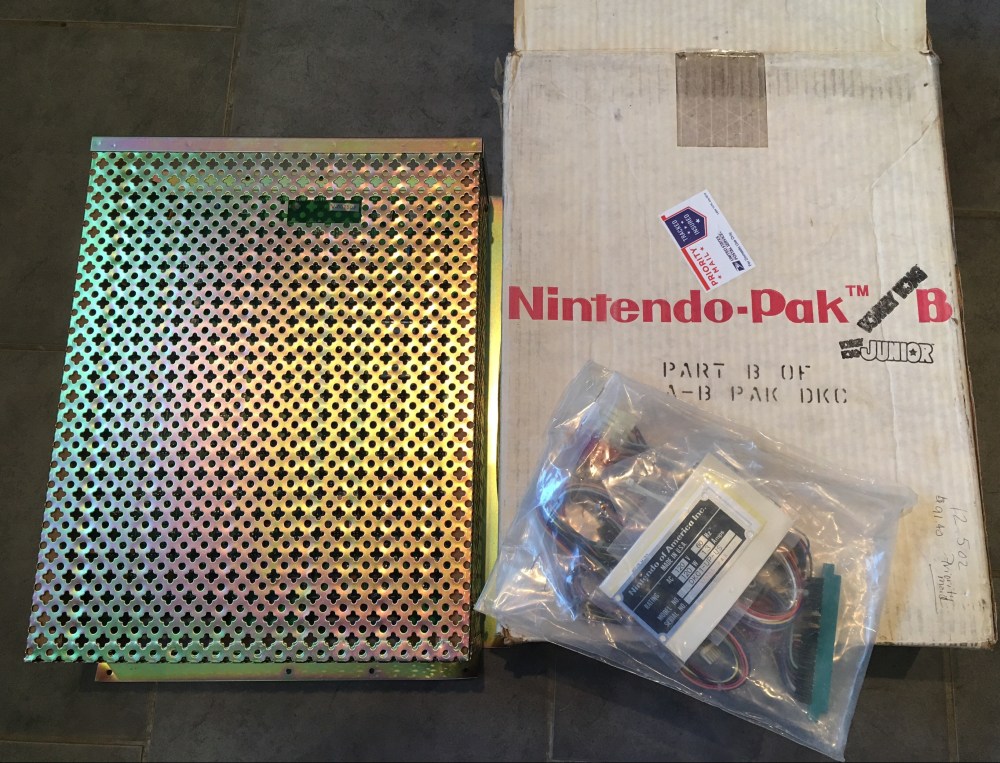
All looks ok from the outset, but unfortunately, the parcel has taken a few knocks during its journey. The metal enclosure had had a couple of the corners bent over quiet badly, and the cage itself was out of shape. This was easy enough to reshape (with a bit of persuasion), but the damage wasn’t restricted to the cage:
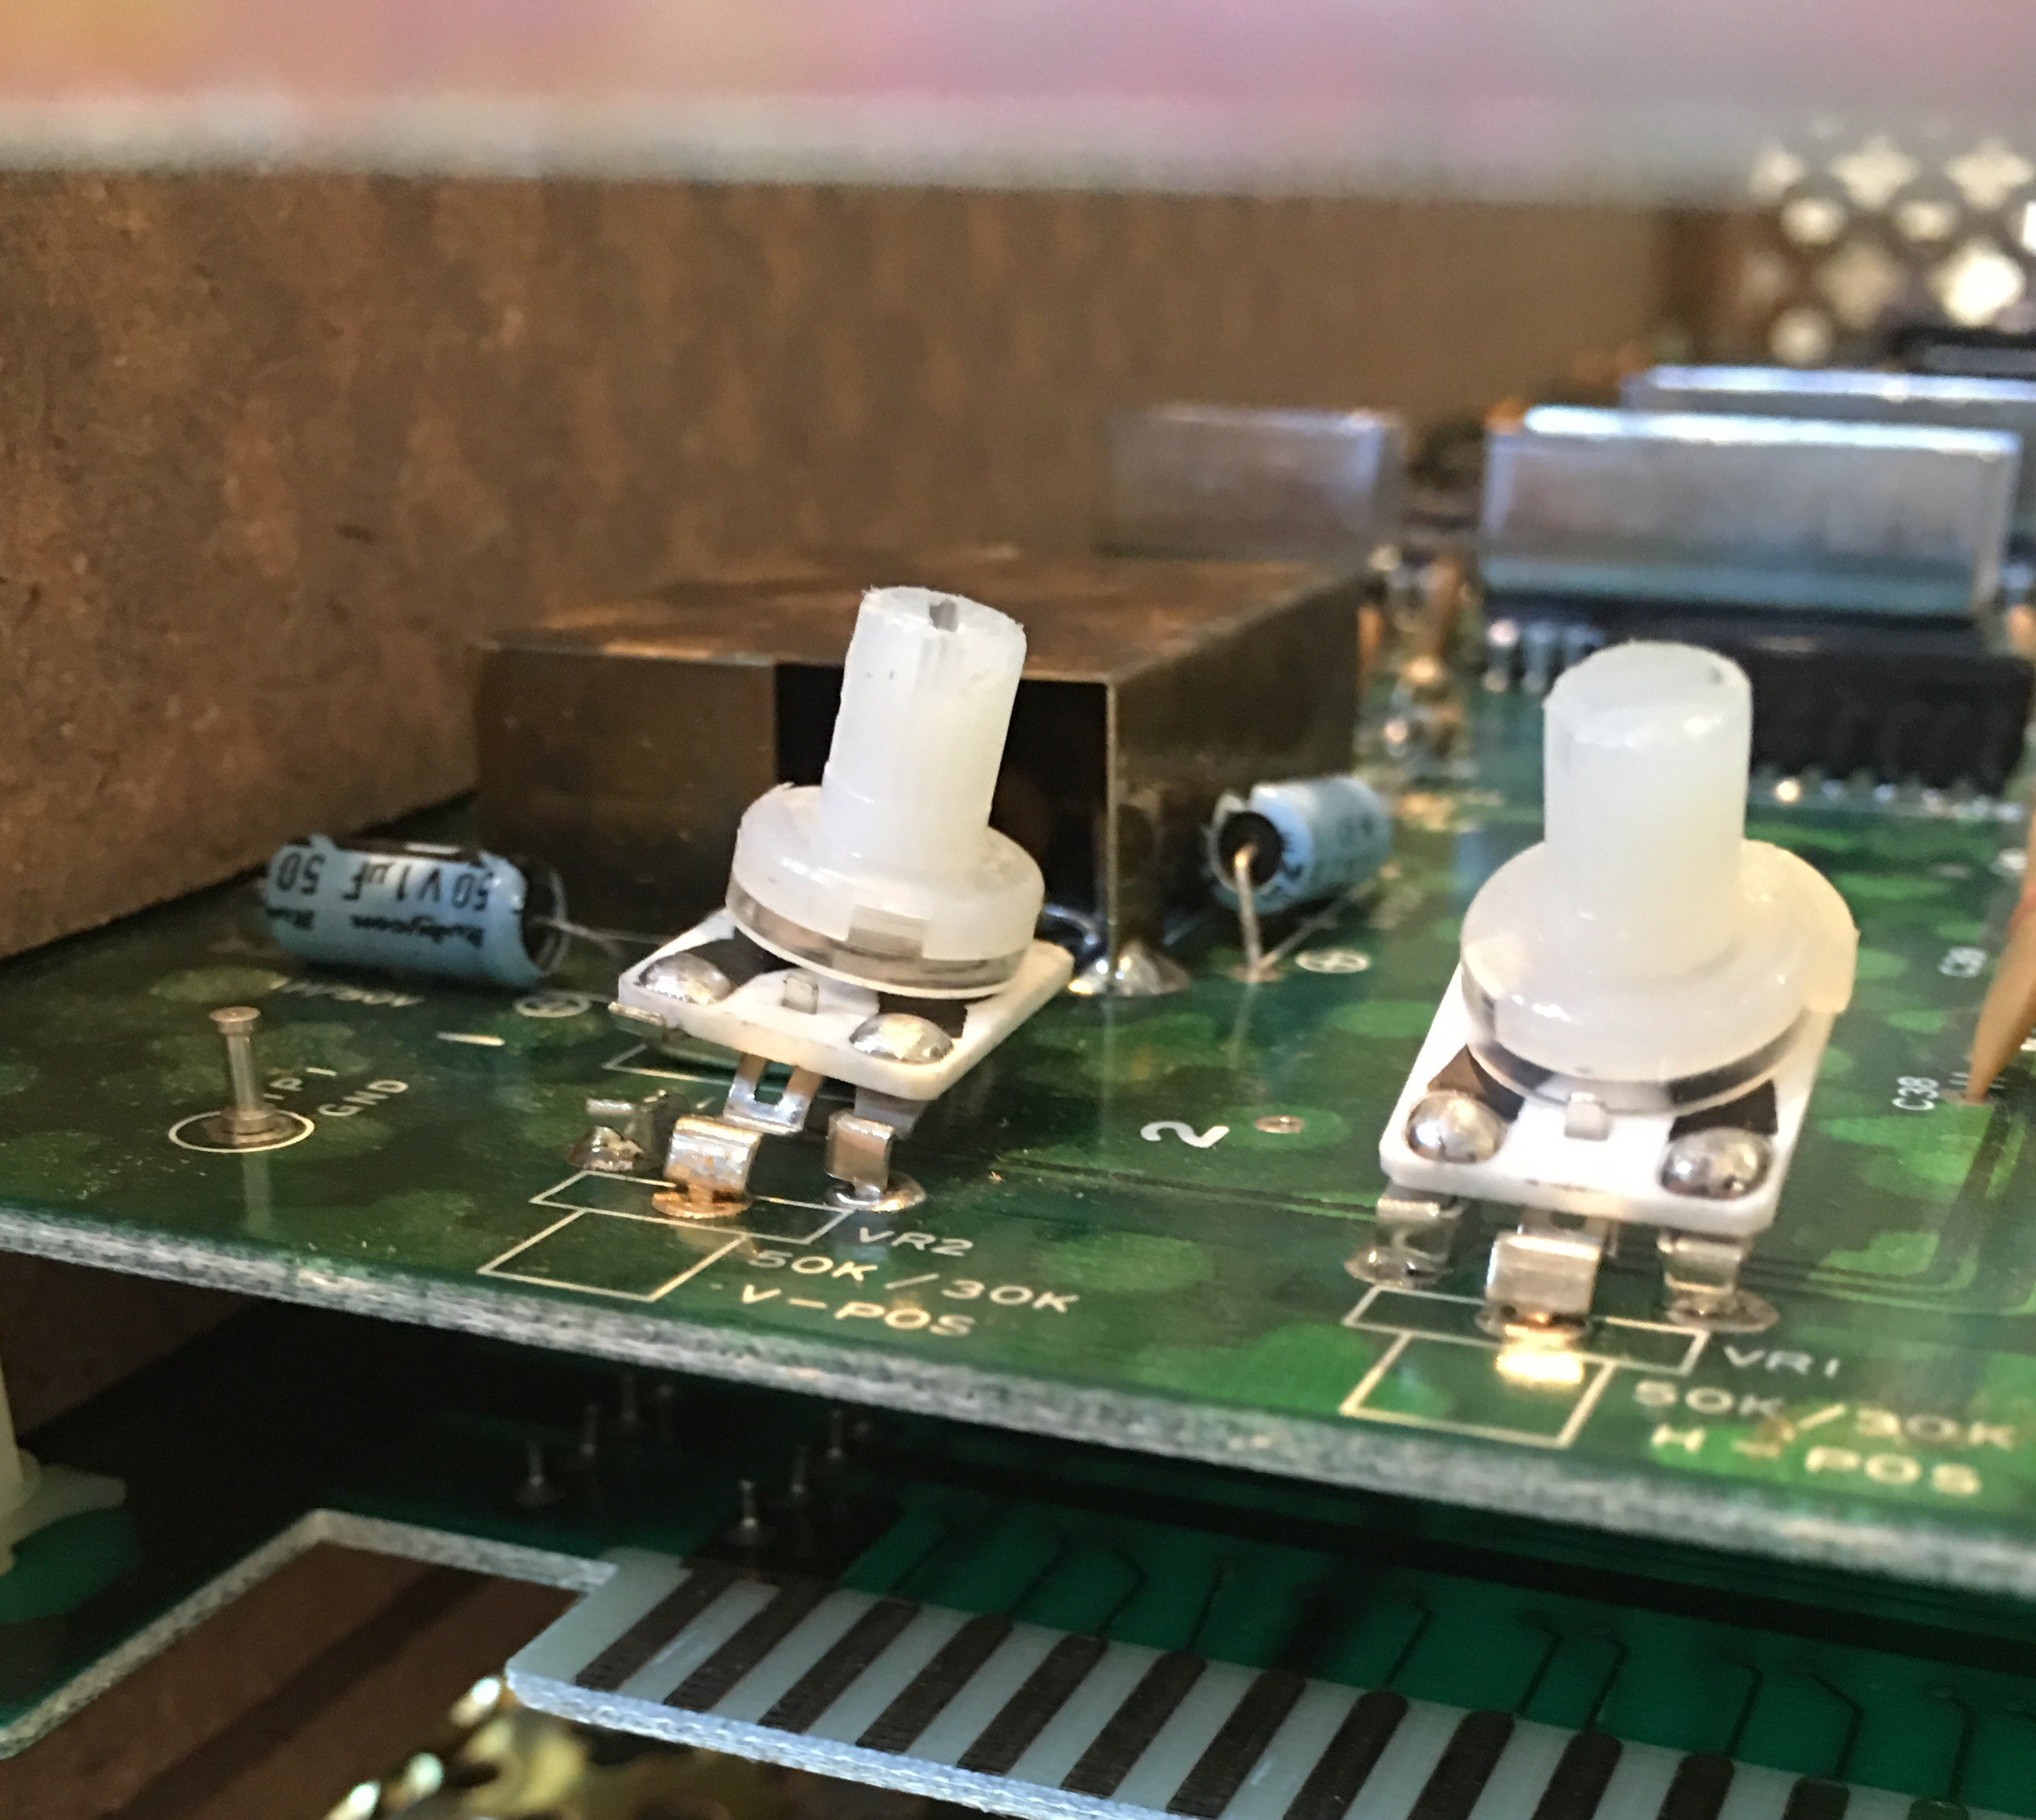
As you’ve probably guessed from the picture above, something was broken! The V-POS (vertical position) pot had clearly taken a knock during transit and had suffered a broken leg, and as we later discovered, the pot itself was broken. This was going to require some attention, but for now, I wanted to get back to opening the rest of my kit.
I had actually purchased all of the Donkey Kong manuals (DK, DKJr, DK3), but decided as always, to go with the simplest approach. Armed with the PDF of the manual on my phone, I began opening each pack and working out where the new pieces would attach. As I’d taken photos all the way through the process, I knew roughly where everything went and where to route cables. I mounted the cage to the inside of the cabinet and fitted the board and loom:
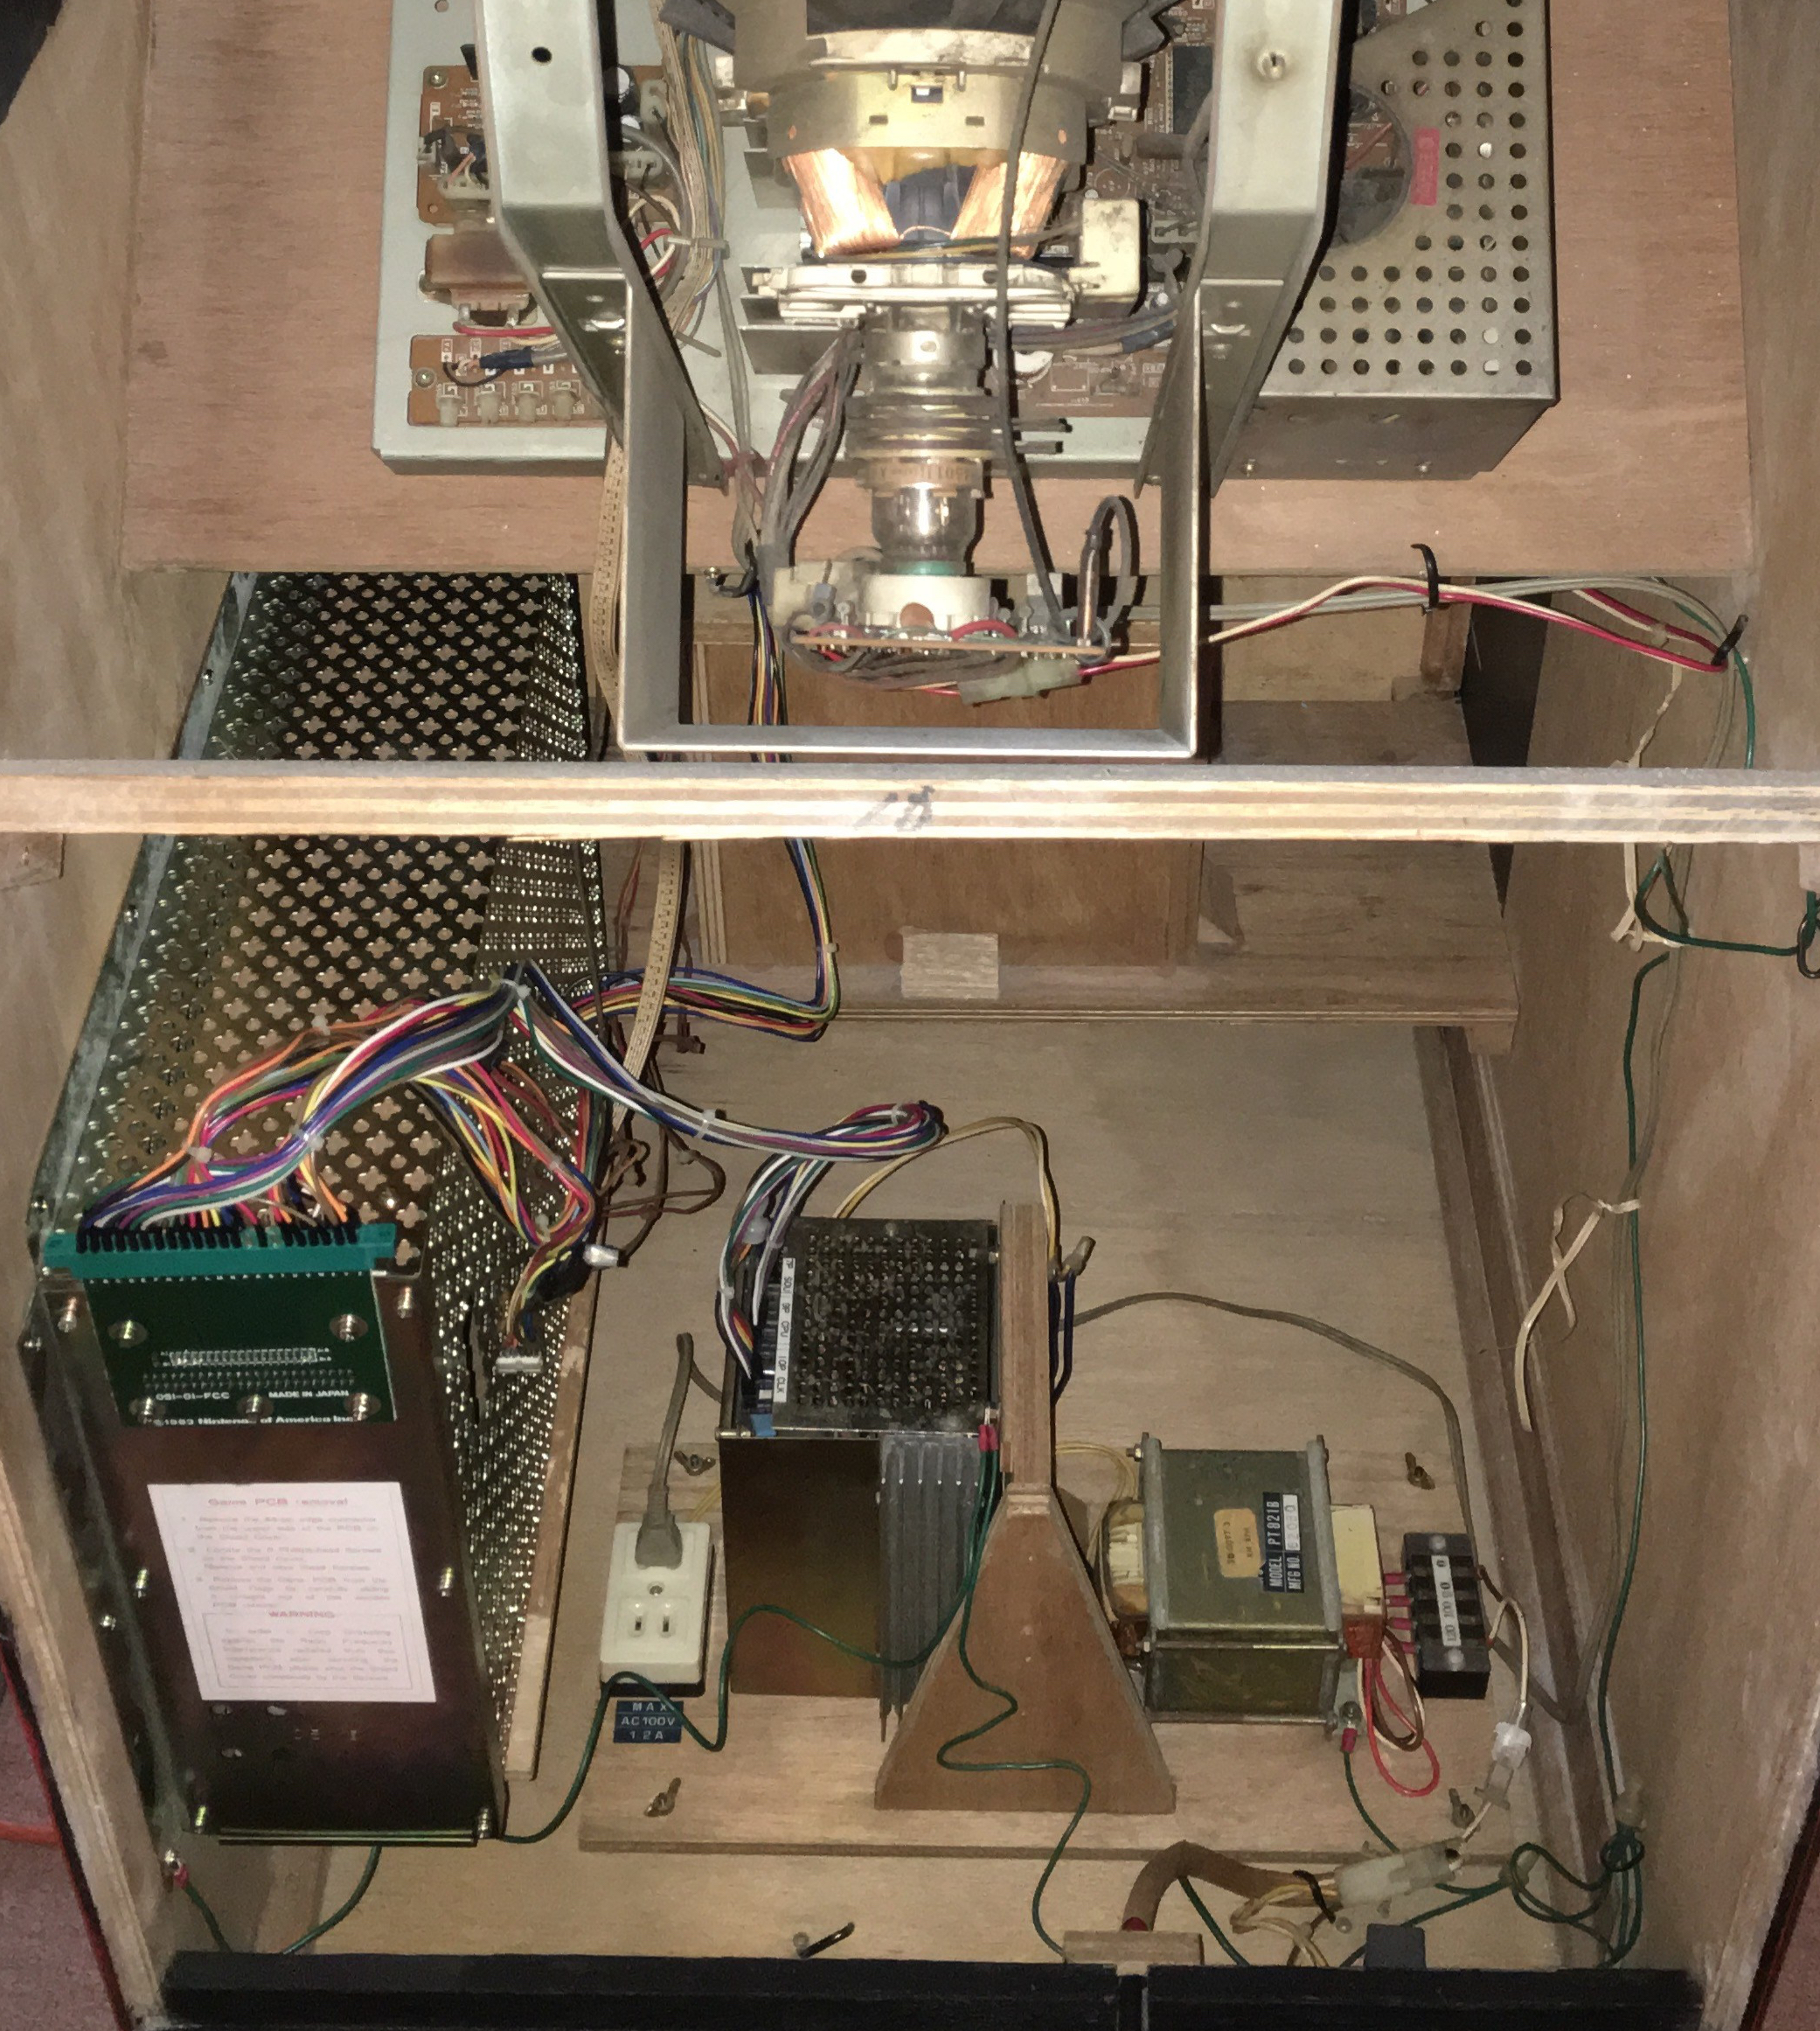
I realised at this point that I’d fitted the cage too far back (towards the back door), but it wasn’t fouling anything. I also didn’t like how it sat on the wooden plinth at the front when pushed further forward.
With everything cabled up and double checked it was time for the switch on. I’m running all my cabinets through external step-downs due to wanting to keep the cabinets as original as possible. So with everything triple checked and the cabinet plugged in, I flicked the switch (well all three: wall, step-down and cabinet):
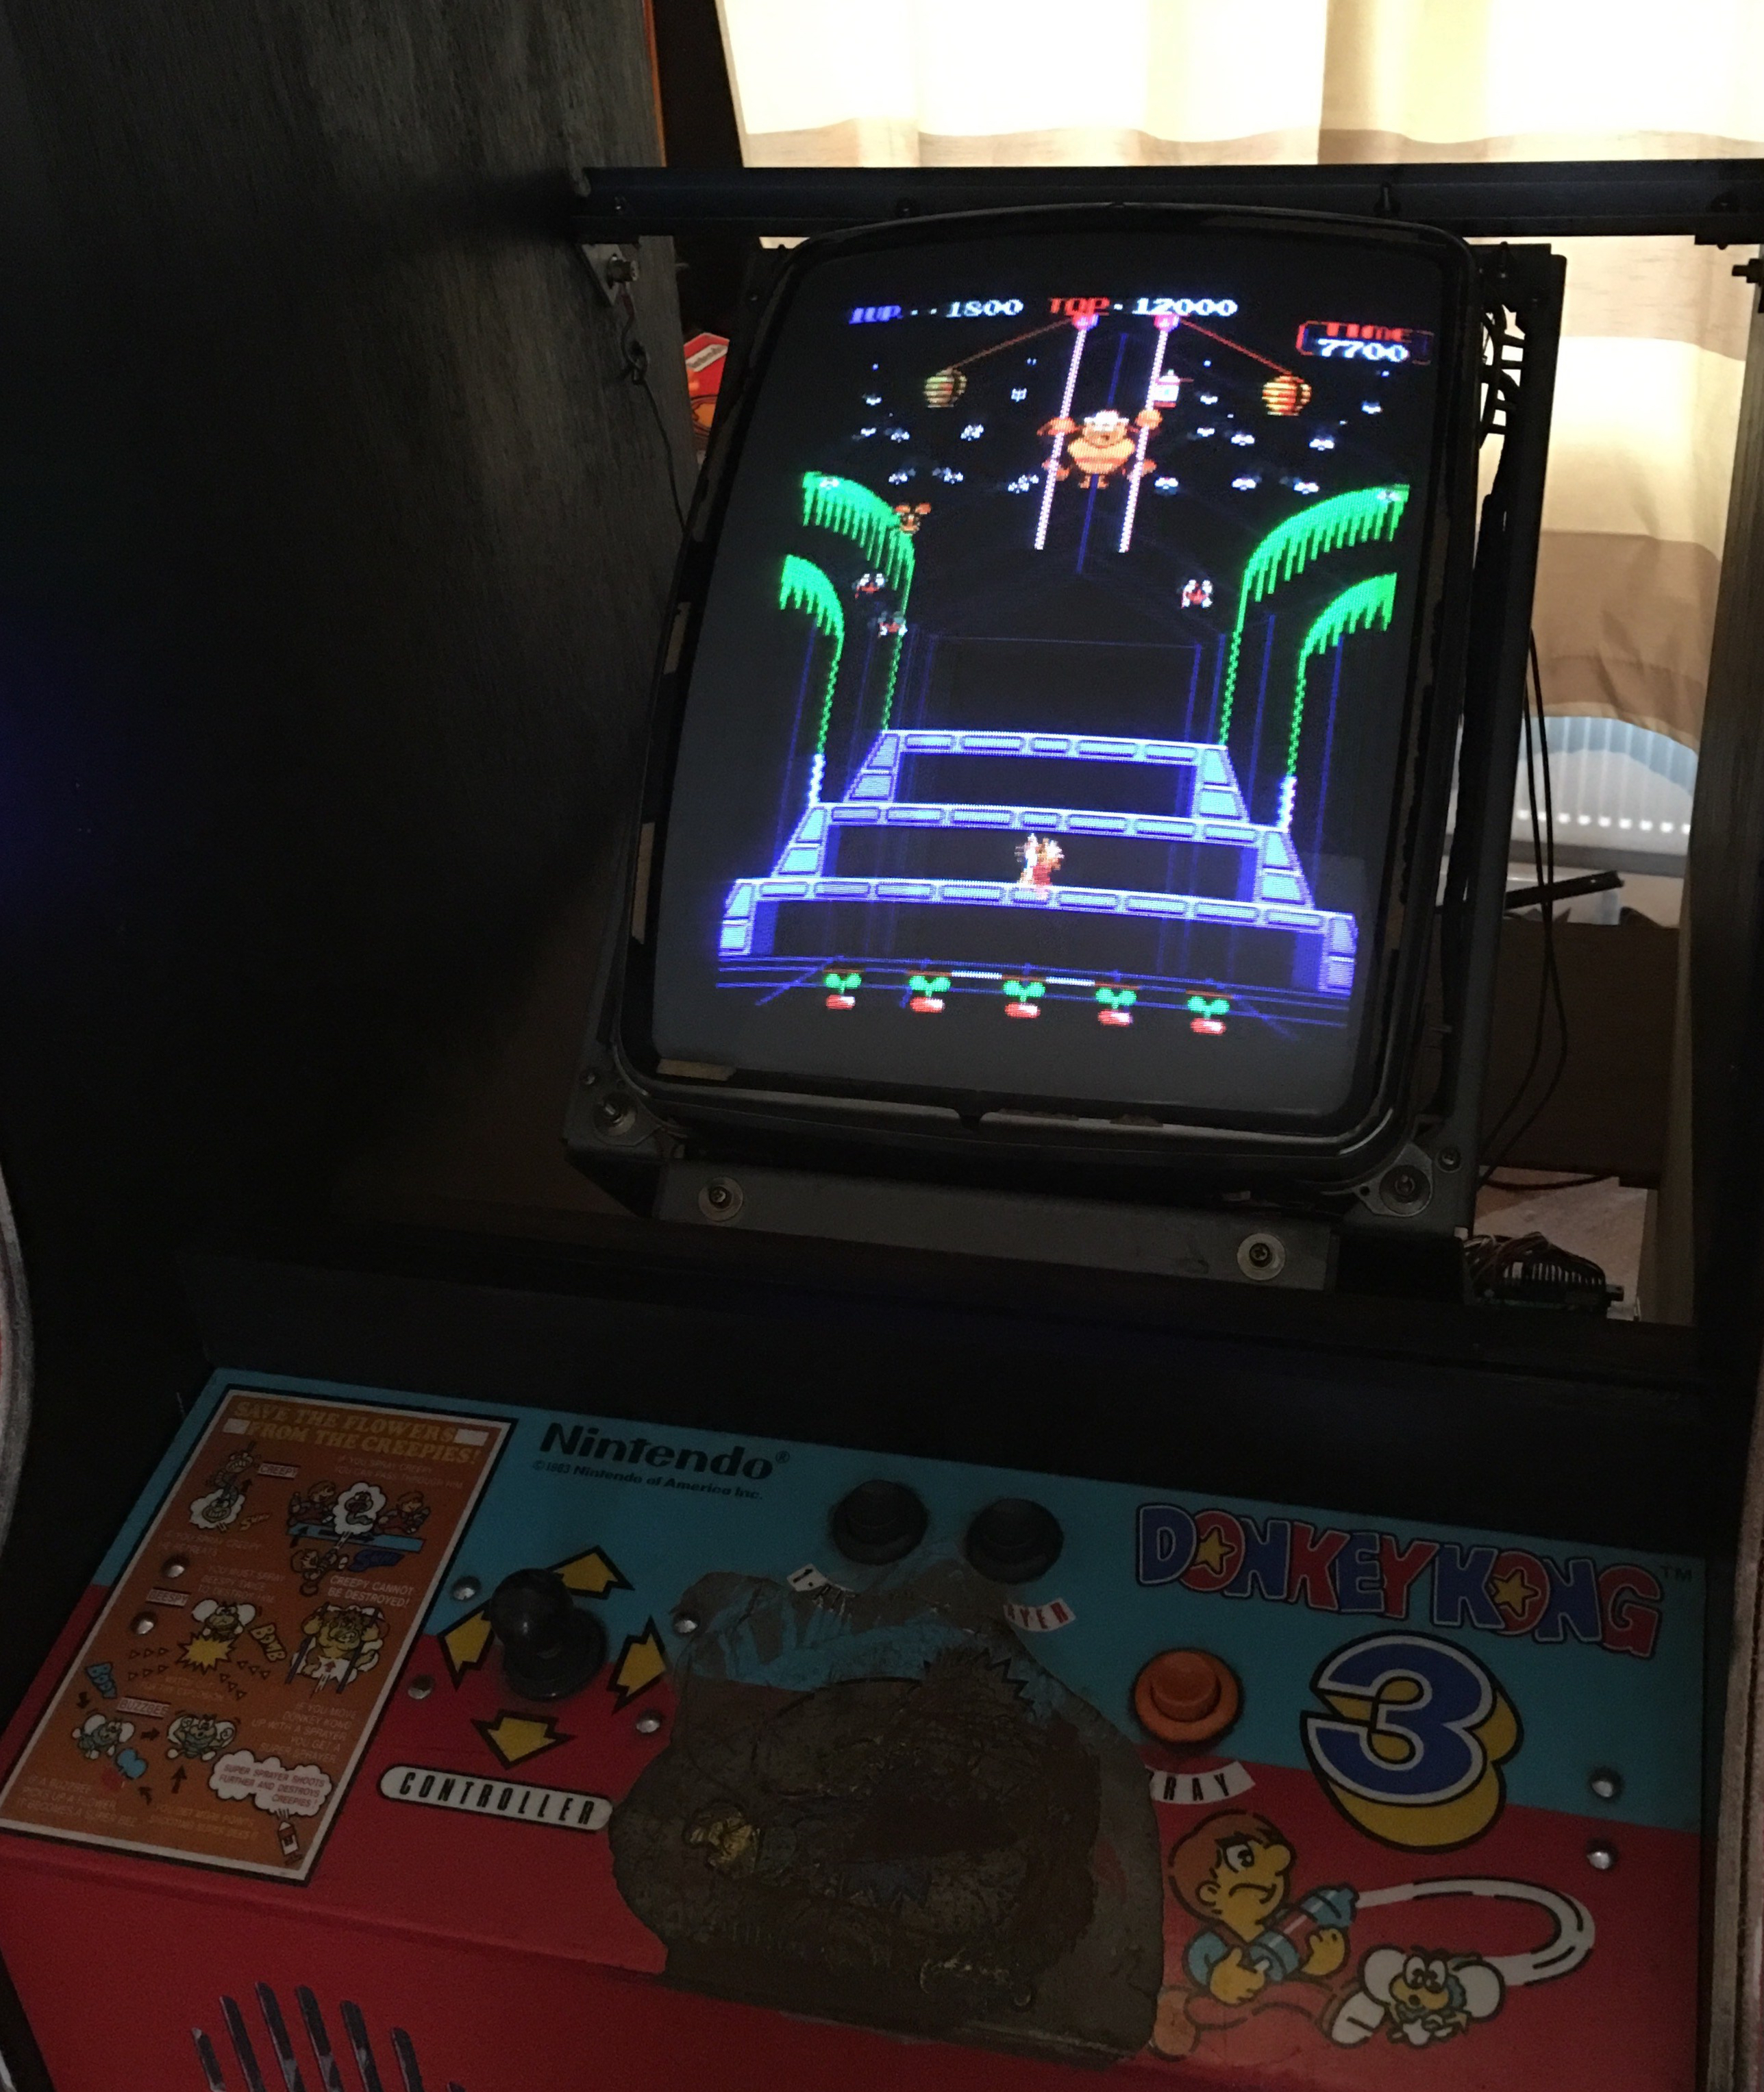
Now all looks good in this picture (aside from the horrible control panel!), but all was not well. Before re-fitting the board (after my initial test), I had re-soldered the broken V-POS pot, but unfortunately, the screen was still scrolling. I could stabilise the picture using the pots on the monitor, but it would eventually slip and lose sync and scroll again. The pot would need replacing, so my next task was to find a suitable replacement (and sort that awful control panel!).

We have life! It’s alive! Alive I say!
LikeLiked by 1 person